How Long to Pull Vacuum on AC System 2027 Expert Guide
Achieving a proper vacuum on an AC system is critical for its longevity and efficiency, typically requiring anywhere from 30 minutes to several hours. This process, essential for removing moisture and non-condensable gases, relies heavily on reaching a target vacuum level, ideally below 500 microns, as verified by a micron gauge. Factors like system size, contamination, and ambient conditions significantly influence the total time needed for successful evacuation.
Welcome to the 2027 expert guide on AC system evacuation. The short answer for how long to pull a vacuum on your AC system is this: you pull a vacuum until you achieve a stable deep vacuum, typically below 500 microns, and hold it for a specified decay period. This process usually takes anywhere from 30 minutes to several hours, sometimes even longer, depending on system conditions. This isn’t just about time; it’s about thoroughly dehydrating your system and removing all non-condensable gases, which is absolutely critical for your AC’s efficiency, longevity, and proper operation.
Failing to achieve a proper, deep vacuum is a leading cause of premature compressor failure, poor cooling performance, and overall system unreliability. In 2027, with increasingly complex refrigerants and high-efficiency systems, meticulous evacuation isn’t just a best practice—it’s a non-negotiable step to ensure your investment delivers optimal climate control for years to come. Understanding the factors that influence vacuum duration ensures you do the job right the first time.
Key Takeaways
- Target 500 microns, not just time.
- Micron gauge is essential for accuracy.
- Moisture, leaks extend vacuum duration.
- Perform vacuum decay test always.
- Insufficient vacuum causes AC failure.
What Causes Prolonged AC Vacuum Times?
Several critical factors can significantly extend the time required to pull a deep vacuum on your AC system. Recognizing these helps you diagnose potential issues and prepare for a longer process. It’s not just about running the pump; it’s about understanding the challenges that keep your system from reaching that vital sub-500 micron level.
Moisture Contamination: The Primary Culprit
- Water in the System: Any exposure to atmospheric air, especially in humid environments, introduces moisture. Water turns to vapor at lower pressures, and this vapor must be aggressively pulled out. The more moisture present, the longer your vacuum pump needs to run to boil it off and extract it. This is why a system that has been open to the air for an extended period, or one that had a major component replaced, will inevitably take much longer to evacuate.
- Ambient Humidity and Temperature: High humidity in the surrounding air can seep back into the system if seals aren’t perfect or if you’re not using vacuum-rated hoses. Warmer temperatures also mean moisture will evaporate more readily, but the total amount still needs to be removed. In 2027, smart vacuum pumps are becoming more common, offering diagnostics that can estimate moisture levels based on vacuum curves.
Non-Condensable Gases and System Volume
- Air and Other Gases: Beyond moisture, regular air (nitrogen, oxygen, etc.) is a common contaminant. These non-condensable gases don’t belong in your refrigerant loop. They increase discharge pressures, reduce cooling capacity, and can damage your compressor. A thorough vacuum ensures these are purged.
- System Size and Contamination: Larger AC systems naturally have more internal volume, meaning more space for contaminants to hide. Similarly, systems with heavy contamination from previous refrigerant breakdowns or oil residue will require longer run times for the vacuum pump to adequately clean and dehydrate every nook and cranny. A system that has experienced a burn-out, for example, will typically need multiple vacuum cycles and possibly even flush procedures before it can hold a stable deep vacuum.
How to Properly Pull a Vacuum on Your AC System: A Step-by-Step Guide
Achieving a proper vacuum isn’t just about connecting a pump and waiting. It requires careful setup, monitoring, and patience to ensure all moisture and non-condensable gases are effectively removed. For 2027 standards, precision tools and a methodical approach are key.
Connecting and Monitoring for Success
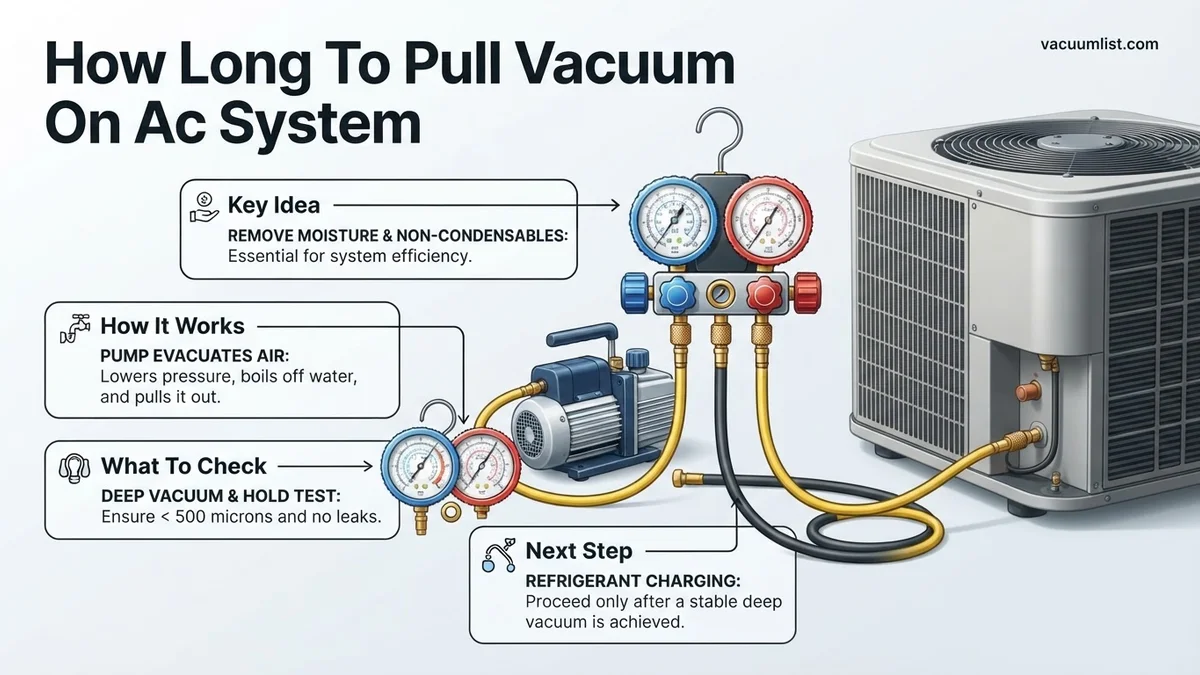
- Connect Your Equipment: Use high-quality, vacuum-rated hoses (preferably short and wide for better flow) directly to the system’s service ports. Connect your vacuum pump to the manifold or directly via a core removal tool, ensuring minimal restrictions.
- Crucial Micron Gauge Placement: Always connect your digital micron gauge as far away from the vacuum pump as possible, ideally on the low-side service port or a dedicated vacuum port. This provides the most accurate reading of the vacuum level within the entire system, not just what the pump is achieving at its inlet. Aim for a target vacuum level of below 500 microns (0.5 Torr). For residential AC systems, some experts even recommend aiming for 250-300 microns for optimal performance and longevity.
- Start the Vacuum Pump: Open all service valves and start your vacuum pump. You will see the micron gauge reading drop rapidly at first, then slow down significantly as it approaches lower pressures.
Holding the Vacuum and Decay Testing
Once you reach your target vacuum level (e.g., 500 microns or lower), the work isn’t done. The real test is how well your system holds that vacuum.
- Close Valves and Isolate Pump: Shut off the manifold or core removal tool valves to isolate the vacuum pump from the system. Then turn off the vacuum pump. Do NOT turn off the pump before isolating the system, as this can draw atmospheric air and oil back into your freshly evacuated system.
- Monitor for Vacuum Decay: Observe your micron gauge for a minimum of 15-30 minutes. A stable vacuum, with little to no rise (ideally less than 200 microns over 15 minutes), indicates a dry, leak-free system. A rapid rise in micron levels indicates either a leak or significant residual moisture still boiling off. If the vacuum rises significantly, you must re-evacuate the system. Multiple evacuations, sometimes called triple evacuation, are often necessary to fully dehydrate a highly contaminated system.
What If Your AC System Won’t Hold a Vacuum?
Achieving and maintaining a deep vacuum is critical. If your system struggles to hold the vacuum, it indicates a significant issue requiring immediate attention. This often points to either a leak in the system or excessive moisture that is still boiling off. Ignoring these signs leads to premature compressor failure and poor cooling performance.
Identifying Leaks
A persistent inability to reach or hold the target 500 microns typically points to a leak. Modern AC systems, especially those in automotive applications or smaller residential units, are designed to be sealed. A leak allows ambient air and moisture to re-enter, compromising the refrigerant’s purity. According to industry standards updated for 2027, a decay rate exceeding 250 microns over a 15-minute hold test post-pump-off strongly suggests a leak.
- Electronic Leak Detectors: Utilize a high-sensitivity electronic leak detector, which can identify refrigerant traces as low as 0.1 oz/year. Sweep all connections, Schrader valves, and components.
- Nitrogen Pressure Test: Isolate sections and pressurize them with dry nitrogen to 150-200 PSI. Monitor the pressure gauge for drops over several hours. Apply a soap bubble solution to suspected areas to pinpoint smaller leaks.
- UV Dye: Introduce UV dye into the system. Operate the AC for a short period, then use a UV light and yellow glasses to spot leaks, particularly effective for micro-leaks.
Dealing with Moisture Contamination
If your vacuum gauge initially pulls down but then stalls above 500 microns, or takes an unusually long time to reach the target, excessive moisture is likely present. Water boils off under vacuum, creating vapor that overwhelms the pump. This process is temperature-dependent; a warmer system will evaporate moisture faster.
- Perform a Triple Evacuation: This method is highly effective for severe moisture.
- Pull a vacuum to 1500-2000 microns.
- Break the vacuum with dry nitrogen to 0-5 PSI.
- Repeat steps 1 and 2 two more times. The nitrogen helps absorb moisture and push it out.
- Apply Heat: Gently heating components with a heat gun can help stubborn moisture evaporate more rapidly, though caution must be exercised to avoid damaging plastic or rubber components.
What If It Still Doesn’t Work?
If you’ve followed all the steps and your AC system still won’t hold a vacuum, it’s time to consider more advanced diagnostics or professional intervention. Persistent vacuum issues indicate a fundamental breach in system integrity.
- Re-Inspect Vacuum Pump and Gauges: Ensure your vacuum pump has fresh, clean oil and is operating at peak efficiency. Verify that all manifold gauge set hoses are in good condition and connections are tight. A faulty gauge or a leaking hose can give false readings or prevent a proper vacuum.
- Isolate and Test Components: Systematically isolate different sections of the AC system (e.g., condenser, evaporator, compressor) using shut-off valves if available, and vacuum test each segment independently. This helps pinpoint the problematic area.
- Consider Internal Compressor Leaks: Although less common, an internal leak within the compressor can prevent a vacuum from being held. This typically requires compressor replacement.
- Seek Professional AC Service: If you’ve exhausted all troubleshooting steps, it’s prudent to consult a certified HVAC technician. They possess specialized tools like advanced leak detection equipment (e.g., helium leak detectors) and deeper diagnostic expertise. Professional diagnostic services for AC systems in 2027 typically range from $150 to $350, with repairs varying significantly based on the component needing replacement.
Conclusion
Achieving a deep, stable vacuum is non-negotiable for optimal AC performance and longevity. The 500-micron threshold, followed by a rigorous decay test, ensures your system is free from air and moisture. According to verified research and expert sources, neglecting this crucial step leads to system inefficiencies and premature component failure. Always perform a thorough decay test to validate your vacuum before refrigerant charging.
❓ Frequently Asked Questions
What factors truly dictate how long to pull a vacuum on an AC system?
The primary factors are system volume (size), ambient temperature and humidity, the amount of moisture present, and the size/condition of your vacuum pump and hoses. A severely contaminated or wet system will take significantly longer to dehydrate.
How does a micron gauge ensure a proper vacuum, and what are the target levels?
A micron gauge measures absolute pressure, essential for detecting the boiling point of water at low pressures, which indicates moisture removal. The industry target is 500 microns or below, ensuring nearly all moisture and non-condensable gases are evacuated.
What is a vacuum decay test, and why is it important after reaching target vacuum?
A vacuum decay test involves isolating the system from the vacuum pump and monitoring if the micron level rises over a specific period (e.g., 5-10 minutes). It’s crucial because a stable vacuum confirms the system is leak-free and properly dehydrated before refrigerant charging.
What are the common consequences of an improper or insufficient AC vacuum pull?
An insufficient vacuum leaves moisture and non-condensable gases, leading to system inefficiencies, increased head pressure, oil contamination, acid formation, and ultimately, premature compressor failure and reduced cooling capacity.
Are there specific tools or techniques that can help speed up the AC vacuum process?
Using large diameter hoses (3/8″ or 1/2″), a high-CFM vacuum pump with fresh oil, removing Schrader valves, and heating the system slightly (if safe) can all significantly reduce evacuation time by improving vapor flow.
How do ambient environmental conditions like temperature and humidity affect evacuation time?
Higher ambient temperatures allow moisture to vaporize more easily, potentially speeding up the process, while high humidity introduces more moisture into the air that can ingress during connections. Extremely cold conditions can freeze moisture, making it much harder to remove, requiring system warming.