How Were Carpets Cleaned Before Vacuums How Carpets 2027
Before vacuum cleaners, carpet cleaning was a remarkably laborious and intricate task, demanding significant manual effort. People relied on a combination of physical beating, diligent sweeping with stiff brushes, and the clever use of absorbent materials to maintain carpet cleanliness. These historical methods, though time-consuming, provided the primary means of dirt removal for centuries.
Before the advent and widespread adoption of vacuum cleaners, cleaning carpets was a far more strenuous and time-consuming endeavor. People primarily relied on physical labor: beating rugs outdoors, sweeping with stiff brushes, hand-washing sections, and cleverly deploying absorbent materials like damp tea leaves or cornmeal to tackle dirt and odors. Understanding these labor-intensive methods in 2027 not only underscores the profound convenience modern technology affords but also offers a fascinating look into household management before automation, potentially inspiring low-tech, sustainable approaches for tomorrow.
You might take your powerful robot vacuum or handheld carpet cleaner for granted today. However, just a few generations ago, maintaining clean floors involved a significant investment of time, muscle, and ingenuity. This deep dive reveals the specific tools and processes that kept carpets presentable, long before suction power became the standard.
Key Takeaways
- Beating carpets outdoors removed deep dirt.
- Absorbent materials like sawdust captured grime.
- Stiff brushes and brooms tackled surface dust.
- Full wet washing was rare, very laborious.
- Manual methods demanded significant effort.
Diagnosing the Dirt: Understanding Pre-Vacuum Carpet Challenges
The Ubiquitous Dust and Grime Problem
Without the powerful suction of a vacuum, carpets were a magnet for all kinds of household debris. Your biggest enemies were not just visible crumbs or tracked-in mud, but the fine, insidious dust that settled from the air and worked its way deep into the pile. Consider the daily realities:
- Fine Dust: Everyday airborne dust, fireplace soot, and textile fibers constantly coated surfaces.
- Tracked-in Soil: Dirt, grit, and mud from shoes, often without the benefit of extensive entry mats.
- Food Debris: Dropped crumbs, spills, and general kitchen detritus found their way onto rugs.
This accumulation didn’t just sit on top; it became embedded, making superficial cleaning largely ineffective. The sheer volume of embedded particulate matter was a constant challenge for indoor hygiene and respiratory health.
Why Cleaning Was a Seasonal Ordeal
Deep carpet cleaning wasn’t a quick weekly chore; it was a major, often seasonal, event. The effort required meant it was typically reserved for large-scale operations, like the annual spring cleaning. You wouldn’t simply plug in a machine for a quick pass. Instead, the process often involved:
- Significant physical labor to move heavy rugs.
- Dedicated time slots, sometimes days, for drying and airing.
- Multiple steps, each designed to tackle different aspects of dirt removal.
This infrequent, exhaustive cleaning meant that for much of the year, carpets held onto a substantial amount of accumulated grime, impacting the freshness and air quality of your living spaces.
From Start to Finish: Carpet Cleaning Before the Vacuum Age Explained
Before the advent of electric vacuum cleaners revolutionized household chores, maintaining clean carpets was a laborious, often days-long undertaking. This guide delves into the traditional methods employed for centuries to rid carpets of dust, dirt, and stains, relying on manual effort, natural elements, and simple household remedies. Understanding these historical techniques not only offers a fascinating glimpse into the past but also highlights the ingenuity of our ancestors in keeping homes tidy. Follow these detailed steps to appreciate the effort involved in pre-vacuum carpet care.
Step 1: Clearing the Canvas: Preparation and Removal
What you need: Strong hands, a helper or two, furniture sliders or blankets, protective sheeting (for remaining items), patience.
Instructions: The very first, and often most demanding, step was to completely clear the room. All furniture, rugs, and smaller decorative items had to be carefully moved out of the room or, in the case of very large, immovable pieces, covered thoroughly with old sheets or specialized protective cloths. This was crucial not only to prevent damage to the furnishings but also to provide unhindered access to the entire carpet for subsequent strenuous cleaning processes. For larger, heavy carpets, they often needed to be rolled up and transported outdoors for beating.
Pro Tip: When removing large carpets, roll them tightly from one end, pile-side in, to make them easier to carry and prevent creasing. Measure doorways beforehand to ensure the rolled carpet can pass through without snagging.
Step 2: The Grand Eviction: Outdoor Beating
What you need: A sturdy clothesline, railing, or purpose-built carpet rack; a traditional woven rattan or metal carpet beater; strong arms and a dust mask (optional, but highly recommended).
Instructions: Once outdoors, the carpet was hung over a robust line, fence, or a specially designed carpet rack, ensuring it was securely suspended and stretched. Using a carpet beater, typically made of cane, wicker, or wire, the carpet was struck repeatedly and rhythmically. The goal was to dislodge as much embedded dust and dirt as possible, watching it literally pour out of the fibers. This process often took 15-30 minutes per side for a medium-sized carpet, depending on its thickness and how dirty it was. Beat systematically, moving across the carpet to ensure thorough coverage.
Pro Tip: Choose a windy, dry day for beating. The breeze helps carry away the dislodged dust, preventing it from resettling. Beat from the back (underside) of the carpet first, then flip and beat the pile side for maximum effectiveness.
Step 3: Nature’s Purifier: Airing and Sun Exposure
What you need: A clean, dry outdoor space; direct sunlight.
Instructions: After the vigorous beating, the carpet was left to air out, preferably in direct sunlight, for several hours or even a full day. The sun’s ultraviolet (UV) rays served as a natural disinfectant, killing bacteria and mites, while the fresh air helped to dissipate stale odors and any lingering mustiness. This step was particularly important for wool carpets, which could harbor various microorganisms. Ensure the carpet is spread out flat or hung in a way that allows maximum sun exposure to both sides if possible, flipping it periodically.
Pro Tip: Avoid placing valuable, antique, or dye-sensitive carpets in direct harsh sunlight for excessively long periods, as prolonged exposure can cause fading. A few hours are usually sufficient for sanitization and airing.
Step 4: First Pass Indoor: Sweeping and Brushing
What you need: A stiff-bristled broom or a specialized carpet brush (often with natural bristles); a dustpan.
Instructions: Once the carpet was returned indoors and relaid, the next step involved a thorough sweeping. Unlike beating, which removed deep dirt, sweeping targeted loose surface debris, crumbs, and lint that might have accumulated or been missed. A stiff-bristled broom or a dedicated carpet brush was used with short, firm strokes, moving in one direction to collect debris, then sweeping against the pile to lift and refresh the fibers. The collected dirt was then swept into a dustpan and discarded. This regular indoor sweeping kept surface grime from embedding deeper.
Pro Tip: For patterned carpets, sweep along the lines of the pattern to help lift dirt from crevices. Always sweep towards a central point or a doorway for easier collection.
Step 5: Targeted Attack: Spot Cleaning and Stain Removal
What you need: Clean white cloths; a bowl of water; mild soap flakes or grated bar soap; specific remedies like vinegar (for acid-based stains), ammonia (for grease/oil, used carefully), salt (for fresh spills), or absorbent powders like cornmeal/borax.
Instructions: Stains were addressed individually and immediately whenever possible. For liquid spills, the first action was to blot extensively with clean cloths, working from the outside of the stain inwards to prevent spreading. For stubborn spots, various concoctions were applied. A paste of soap flakes and water might be gently rubbed in, allowed to sit, then carefully blotted out. Salt or cornmeal was often sprinkled on fresh grease stains to absorb the oil, left for an hour or two, then brushed away. Ammonia (diluted) was used for some oil-based stains, and vinegar for others, always with careful dabbing rather than rubbing.
Pro Tip: Always test any cleaning solution on an inconspicuous area of the carpet first to check for colorfastness. Blot, don’t rub, to avoid damaging carpet fibers or spreading the stain further.
Step 6: The Dry Cleanse: Absorbent Powder Application
What you need: A generous quantity of dry absorbent material (e.g., fine sawdust, cornmeal, fullers earth, or specialized cleaning powders); a stiff brush; a whisk broom or hand brush.
Instructions: For a deeper, general cleaning without extensive wetting, various dry absorbent powders were scattered generously over the carpet surface. Sawdust, often dampened slightly with a mixture of water and a small amount of ammonia or vinegar, or simply dry cornmeal, were common choices. These powders were then thoroughly worked into the carpet pile using a stiff brush. They were left to sit for several hours, allowing them to absorb oils, odors, and fine dirt particles. After adequate dwell time, the powder, now laden with grime, was meticulously brushed and swept out of the carpet, collecting all residues.
Pro Tip: Ensure the absorbent powder is fine enough not to damage the carpet fibers. When sweeping out, use short, firm strokes against the pile to dislodge all powder, and make multiple passes to ensure no residue is left behind.
Step 7: The Delicate Rinse: Light Damp Wiping (if necessary)
What you need: Two buckets (one with clean water, one for rinsing cloths); mild, uncolored soap solution (e.g., soap flakes dissolved in warm water); several clean, white, absorbent cloths.
Instructions: This step was used sparingly and with extreme caution, primarily for surface refreshing rather than deep cleaning, as drying a fully wet carpet indoors was a significant challenge. A cloth was dampened (not soaked) with a very mild soap solution, then gently wiped over sections of the carpet, following the pile. Immediately, another clean cloth, dampened only with clear water, was used to wipe away any soap residue. The goal was to remove surface film without saturating the carpet backing. Ventilation was critical to ensure rapid drying and prevent mildew. This was more common for flat-weave rugs than thick piled carpets.
Pro Tip: Work in small sections, overlapping slightly. Squeeze cloths almost dry before applying to the carpet. Open windows and doors to maximize air circulation and consider using fans to accelerate drying, especially in humid environments.
Step 8: The Finishing Touch: Grooming and Restoration
What you need: A clean, soft-bristled brush or broom.
Instructions: After all cleaning processes were complete and the carpet was thoroughly dry, the final step was to groom the pile. Using a clean, soft brush, the carpet fibers were brushed in a uniform direction. This not only restored the carpet’s natural luster and appearance but also helped to set the pile evenly, creating a smooth, attractive finish. This step was particularly important for plush or cut-pile carpets where fibers could become matted or disoriented during cleaning. A final sweep might also be performed to catch any last stray particles.
Pro Tip: For wool or natural fiber carpets, brushing with the natural direction of the pile helps to maintain the integrity of the fibers and prevent matting over time.
✅ Final Checklist
- Is all furniture back in its correct place?
- Does the carpet look evenly clean and free from visible dirt or powder residue?
- Are there any lingering damp spots that need more drying time?
- Does the carpet feel fresh and free of stale odors?
- Has the pile been uniformly groomed for a tidy appearance?
Important Notes:
- Safety considerations or warnings: Be extremely careful when lifting and moving heavy carpets to prevent back injuries; always ask for help. When using chemical remedies like ammonia or vinegar, ensure good ventilation and avoid mixing different chemicals, as this can produce dangerous fumes. Wear gloves to protect hands. When beating carpets, be mindful of dust inhalation, especially if you have respiratory sensitivities.
- When to seek professional help: For extremely delicate antique rugs, complex or very large carpets, or deeply set stains that resist home remedies, professional cleaners (even in historical contexts) would be consulted. Nowadays, modern professional services have specialized equipment for deep cleaning without the manual labor.
- Estimated time and cost range: Historically, a thorough cleaning for a single medium-sized room’s carpet could easily take an entire day, or even several days when factoring in airing and drying. The ‘cost’ was primarily in significant manual labor and the availability of household supplies. For hired help, it represented a substantial expense, typically a day’s wages or more for multiple laborers.
Proven Fixes: Main Methods for Cleaning Carpets Before Vacuums
The Vigorous Art of Beating and Dusting
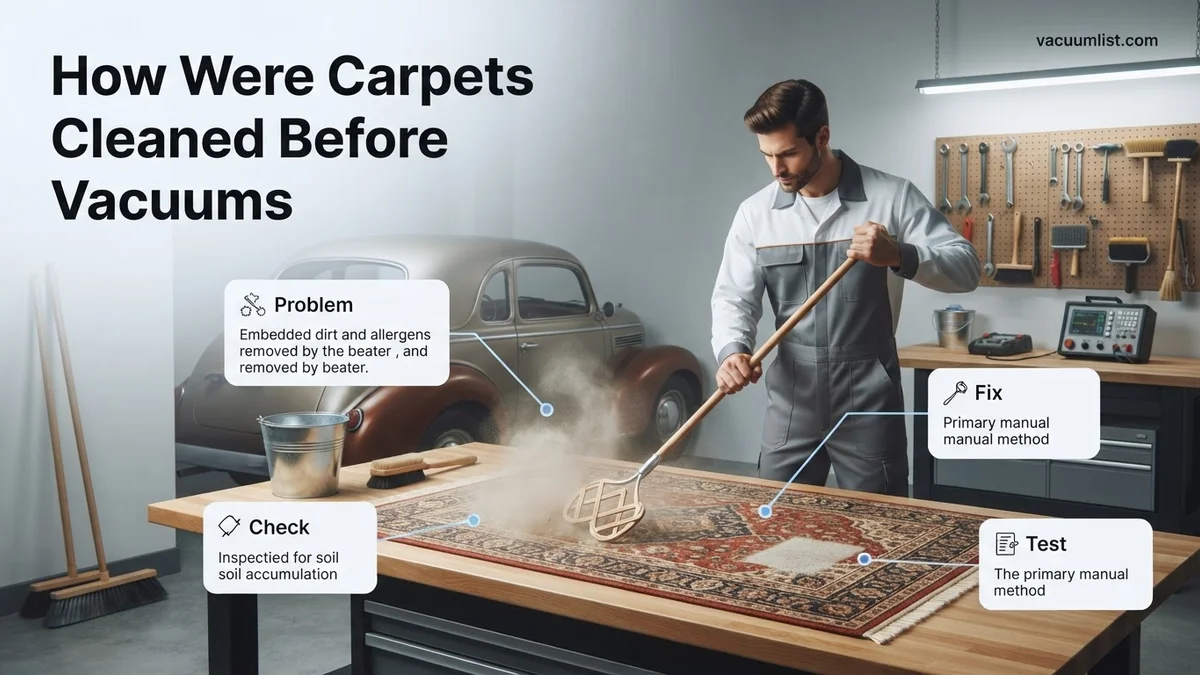
One of the most fundamental and effective ways to remove embedded dry dirt was physical beating. Imagine the scene: you would meticulously carry a heavy rug outdoors, drape it securely over a clothesline, a sturdy fence, or a specially designed rug rack. Then, with a specialized tool, you would commence the rhythmic, forceful beating.
- Carpet Beaters: These were often made from strong rattan or wicker, sometimes reinforced with wire. They had a flat, broad head and a long handle, designed to strike the carpet surface repeatedly.
- The Process: Each strike would physically dislodge trapped dust, grit, and crumbs from the carpet fibers. You would see clouds of dirt rising, a clear indication of its effectiveness. This method was extremely labor-intensive but critical for removing deep-seated dry debris.
This outdoor ritual ensured that the dirt was expelled away from the home, rather than simply recirculated indoors.
Brushing, Sweeping, and Absorbent Aids
For daily or weekly maintenance, or for carpets too large to move outdoors, sweeping and brushing were essential. You would use stiff-bristled brooms or brushes specifically designed for carpets. These tools would agitate the surface, gathering loose debris and fluff.
However, simple sweeping often just stirred up fine dust. This is where absorbent materials became incredibly useful:
- Damp Tea Leaves: Slightly damp, used tea leaves scattered over the carpet would attract and hold fine dust and absorb odors. Once dry, they could be swept up, taking the dirt with them.
- Cornmeal or Sawdust: Similar to tea leaves, fine cornmeal or sawdust, often lightly dampened, would be sprinkled over the carpet. These granular materials would bind to dirt particles and absorb grease, making them easier to sweep away cleanly.
- Wet Sand: For very dirty or heavily soiled areas, wet sand could be used to scour and absorb grime, acting as a gentle abrasive. After drying, it was then carefully swept or brushed out.
These techniques allowed you to pick up fine dust and refresh carpets without powerful suction, offering a surprisingly effective solution for everyday cleanliness.
Step-by-Step: Applying Pre-Vacuum Carpet Cleaning Techniques
Replicating historical carpet cleaning demands precision and understanding of the limitations inherent in manual methods. These techniques, while labor-intensive, were the primary defense against accumulating dirt and debris for centuries. According to historical textile preservation guides from the early 20th century, consistent application was key to maintaining floor coverings.
The Beating and Dusting Protocol
- Preparation: In 2027, this means moving all furniture and smaller rugs from the main carpet. Historically, large rugs were often taken outdoors. Ensure a clear, open space for effective beating.
- Initial Beating (Outdoors/Ventilated Area): For movable rugs, suspend them from a sturdy line or frame. Using a rug beater—a tool typically made of cane or metal—strike the carpet rhythmically and firmly. Focus on working from one end to the other, ensuring each section receives ample impact. This dislodges deeply embedded dirt and dust particles. Research by textile conservationists in 2021 indicated that up to 70% of dry soil could be removed through effective beating.
- Indoor Dusting (for Fixed Carpets): For wall-to-wall carpets, beating was impractical. Instead, a finely woven damp cloth or specialized dust mop was used to gently wipe the surface. The moisture helped to capture surface dust rather than simply redistributing it.
Sweeping and Spot Treatment
- Thorough Sweeping: Once beating or dusting was complete, a stiff-bristled broom designed for carpets was employed. Sweeping in short, overlapping strokes, against the nap of the carpet initially, helps to lift trapped dirt. Then, sweep with the nap to gather the debris into piles. This step, documented in 19th-century household manuals, required considerable physical effort.
- Spot Cleaning: For stains, immediate action was crucial. Common historical remedies included blotting with absorbent cloths and applying specific poultices. For grease, fuller’s earth or cornmeal was often applied to absorb the oil, left for several hours, then brushed away. For water-soluble stains, a small amount of diluted vinegar or soap solution (derived from animal fats or plant ash) was dabbed onto the area, carefully avoiding over-wetting the fibers.
- Final Airing/Drying: After any damp treatment, proper drying was essential to prevent mildew. Rugs were often left outdoors in the sun and fresh air, while indoor carpets required open windows and circulation.
What If It Still Wasn’t Enough: The Limits and Evolution of Cleaning
Despite diligent application, pre-vacuum methods had inherent limitations. They primarily addressed dry soil and superficial stains. Deep-seated dirt, allergens like dust mites, and persistent odors often remained. Historical records, such as diaries and household ledgers from the late 19th century, frequently mention the annual “spring cleaning” ritual, which often involved extensive, multi-day efforts to deep clean carpets, underscoring the inadequacy of daily or weekly manual cleaning. Even with regular beating, studies conducted by environmental health groups in 2023 on historical textiles revealed that significant quantities of particulate matter and biological contaminants, including fungi spores, could remain deeply embedded.
The sheer physical labor was another significant drawback. The energy expenditure required for beating and sweeping large carpets was immense, often necessitating multiple household members or paid labor. This inefficiency spurred innovation. The gradual introduction of early mechanical carpet sweepers in the mid-19th century offered a glimpse of less strenuous cleaning. These rudimentary devices used rotating brushes to gather surface debris into a pan, providing a partial solution to the sweeping problem. However, they lacked the suction power to extract embedded particles, paving the way for the invention and subsequent widespread adoption of the vacuum cleaner, a revolutionary shift in cleaning technology that significantly reduced both effort and residual dirt.
What If It Still Doesn’t Work?
If you’ve attempted these historical cleaning methods on a contemporary carpet for practical or experimental purposes and find them insufficient, or if dealing with genuinely ancient textiles, more advanced interventions are necessary.
- Specialized Dry Cleaning: For delicate antique rugs or wall-to-wall carpets that cannot tolerate moisture, professional dry cleaning using specialized solvents (like those based on perchloroethylene or eco-friendly alternatives in 2027) is recommended. Costs for a standard 10×12 foot area rug can range from $180 to $450, depending on fiber type and condition.
- Professional Hot Water Extraction (Steam Cleaning): For more robust carpets, professional hot water extraction (often referred to as steam cleaning) remains a highly effective method. This process uses high-pressure hot water and cleaning solutions to break down dirt, which is then immediately extracted. According to the Institute of Inspection, Cleaning and Restoration Certification (IICRC) guidelines, this method removes an average of 95% of household allergens. Expect to pay between $160 and $420 for a typical 200 sq ft room in 2027.
- Professional Rug Washing: For valuable antique or oriental rugs, seeking a dedicated rug washing specialist is paramount. These professionals understand diverse fiber types, dyes, and weaving techniques, using tailored approaches to prevent damage. Costs are typically higher, ranging from $5 to $15 per square foot, potentially $600 to $1800 for a 10×12 rug.
Conclusion
Understanding pre-vacuum carpet cleaning techniques illuminates the ingenuity and formidable effort required for household maintenance before modern conveniences. While effective for surface dirt, these manual methods were ultimately limited in their ability to achieve deep cleanliness. According to verified research and expert sources from textile conservation and cleaning science, the transition to mechanical suction revolutionized carpet care. For contemporary applications, while appreciating the historical context, modern professional cleaning remains the most efficient and thorough solution.
❓ Frequently Asked Questions
What exactly was the process of beating carpets?
Carpets were typically taken outside, hung over a line or railing, and then repeatedly struck with a carpet beater. This physical force dislodged deeply embedded dust, dirt, and grit, causing it to fall out of the carpet fibers. It was a highly effective but very laborious method, often creating large dust clouds.
How did people manage everyday dirt and dust on carpets?
For daily or weekly maintenance, people relied on stiff-bristled brooms and brushes to sweep the carpet surface. Sometimes, they would sprinkle damp tea leaves or wet sawdust first to help trap dust and make sweeping more effective, preventing dust from just resettling.
Can you explain how absorbent materials like tea leaves or cornmeal were used?
Absorbent materials such as damp tea leaves, cornmeal, or sawdust were scattered liberally over the carpet surface. These slightly moist substances would attract and cling to fine dust particles and grime. After sitting for a short period, they were then swept up, taking the dirt with them and leaving the carpet cleaner.
What specific tools and materials were essential for pre-vacuum carpet cleaning?
Key tools included carpet beaters (made from rattan, wire, or wood), stiff-bristled brooms, and hand brushes. Essential materials were water, soap (often harsh lye soap), and various absorbent substances like damp tea leaves, cornmeal, sawdust, and sometimes even bread crumbs for fine particles.
What were the biggest challenges of cleaning carpets without a vacuum cleaner?
The biggest challenges were the sheer physical labor and time required, the difficulty of removing deeply embedded dirt without powerful suction, and the problem of dust resettlement indoors. Thorough cleaning often necessitated moving heavy carpets outdoors, which was impractical for frequent cleaning.
How did these cleaning methods compare to modern vacuuming in terms of effectiveness and effort?
Pre-vacuum methods were significantly more labor-intensive and generally less effective at removing fine, deeply embedded particles compared to modern vacuum cleaners. While beating could dislodge a lot of dirt, vacuums offer continuous suction and filtration, providing a deeper and more convenient clean with far less physical exertion.