How Do I Connect My Shark Vacuum To Wi Fi How Do I 2027
Connecting your Shark vacuum to Wi-Fi enables smart features and remote control. This guide provides a step-by-step process to pair your vacuum with the SharkClean app, focusing on crucial network settings. Ensure a smooth setup by checking your Wi-Fi frequency and vacuum’s status.
html
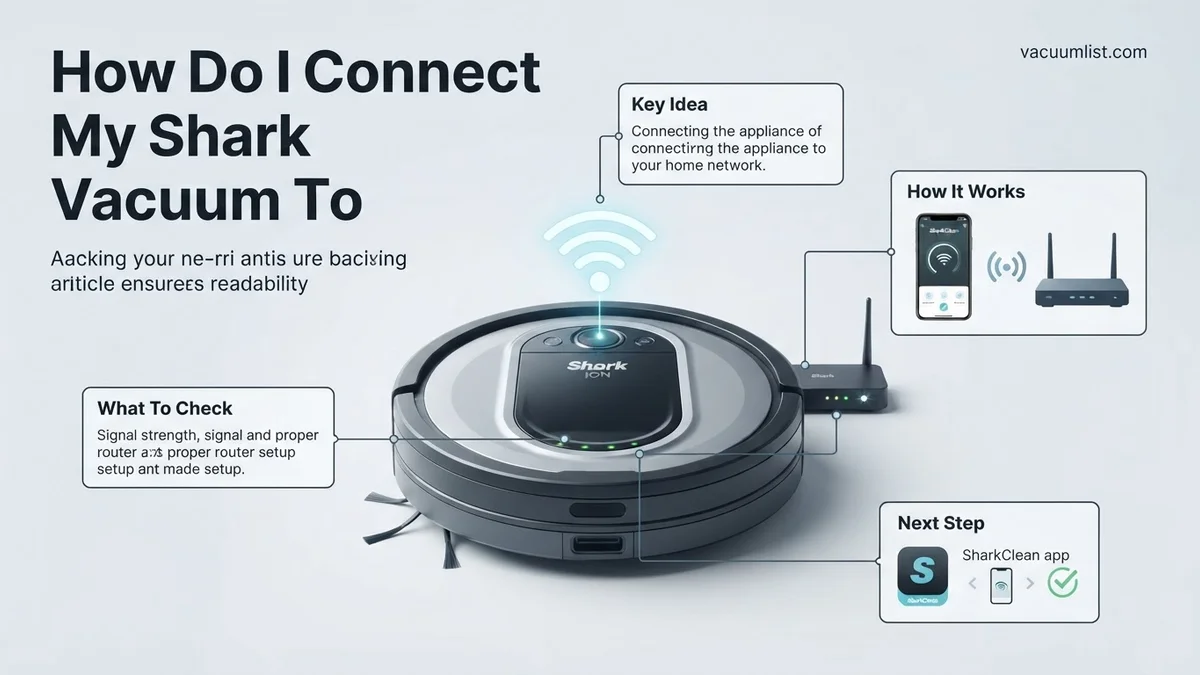
Connecting your Shark robot vacuum to your home Wi-Fi network primarily involves using the SharkClean mobile application and ensuring your vacuum is ready to pair on a 2.4GHz network. The process is straightforward: you’ll initiate pairing on the vacuum itself, then guide your phone through the SharkClean app to find and configure the connection, ultimately linking your robot to your specific home Wi-Fi network.
Successfully establishing this Wi-Fi link unlocks the full potential of your Shark vacuum. In 2027, this means seamless scheduling, remote control from anywhere, receiving real-time cleaning reports, and accessing advanced features like zone cleaning or no-go zones directly from your smartphone. Without it, you’re missing out on the intelligent automation designed to simplify your home maintenance.
Key Takeaways
- Download the official SharkClean app for setup.
- Ensure your Wi-Fi network is 2.4GHz for compatibility.
- Follow in-app prompts after activating vacuum’s pairing mode.
- Troubleshoot by restarting router or vacuum if issues arise.
- Connect for remote control, scheduling, and mapping features.
Why Your Shark Vacuum Might Not Connect to Wi-Fi
Essential Prerequisites Before You Start
Before initiating the connection process, a few critical checks will save you significant frustration. The most crucial factor for Shark robot vacuums in 2027, as it has been for years, is the Wi-Fi network frequency. Your Shark vacuum absolutely requires a 2.4GHz network for connection. While 5GHz networks are more common and faster for general internet use, your robot won’t recognize them during setup. You must also ensure your vacuum is sufficiently charged; place it on its charging dock until the battery indicator is full or at least above 50%.
- 2.4GHz Network: Confirm your router broadcasts a 2.4GHz signal and that your phone is temporarily connected to it during the setup phase.
- Adequate Charge: A low battery can prevent successful pairing. Charge your vacuum fully.
- Correct App Version: Download the latest version of the “SharkClean” app from your device’s app store (iOS or Android). Outdated apps often cause connection issues.
- Proximity: Keep your vacuum, router, and smartphone within close range during the initial setup—ideally within 10-15 feet.
Common Connection Obstacles and Quick Checks
Even with prerequisites met, minor issues can sometimes hinder the connection. One common fix is simply restarting your home router. This can clear temporary network glitches that prevent devices from connecting. Unplug your router for 30 seconds, then plug it back in and wait for it to fully restart.
- Router Reboot: Power cycling your router can resolve many network communication problems.
- Wi-Fi Light Status: Observe your vacuum’s Wi-Fi indicator light. It should typically be blinking rapidly (often blue or white) when in pairing mode. If it’s solid or off, the vacuum isn’t ready.
- Password Accuracy: Double-check your Wi-Fi network password. It’s case-sensitive, and even a single incorrect character will cause a failure.
- Temporary Interference: Other wireless devices or even physical obstructions can sometimes interfere with the signal during pairing. Temporarily move any strong signal emitters away from the setup area.
Master Shark Vacuum Wi-Fi Connection in 8 Simple Steps
Welcome to this comprehensive guide on connecting your Shark robot vacuum to your home Wi-Fi network. Establishing this connection unlocks a world of convenience, allowing you to remotely control your vacuum, set cleaning schedules, monitor its status, and access advanced features directly from your smartphone. By following these detailed steps, you’ll ensure a smooth setup process and quickly integrate your Shark vacuum into your smart home ecosystem. Let’s get started!
Step 1: Prepare Your Environment and Devices
What you need: Your Shark robot vacuum, its charging dock, a working power outlet, your smartphone or tablet, and your home Wi-Fi network name (SSID) and password.
Instructions: Before you begin, ensure your Shark vacuum is fully charged or placed securely on its charging dock. Plug the dock into a reliable power outlet that is not controlled by a switch. Have your smartphone or tablet readily available and make sure you know your home Wi-Fi network’s name (SSID) and its corresponding password. Double-check that your home Wi-Fi is broadcasting on the 2.4 GHz frequency, as most Shark robot vacuums do not support 5 GHz networks.
Pro Tip: Many routers broadcast both 2.4 GHz and 5 GHz networks. If you have separate names for them (e.g., “MyHomeWifi_2.4G” and “MyHomeWifi_5G”), ensure your phone is connected to the 2.4 GHz version before starting the setup. If they have the same name, your router should automatically manage it, but it’s good to be aware.
Step 2: Download and Install the SharkClean App
What you need: A smartphone or tablet with internet access.
Instructions: Open the app store on your smartphone or tablet. For Apple devices, this is the App Store; for Android devices, it’s the Google Play Store. Use the search function to look for “SharkClean”. Once found, tap the “Get” or “Install” button to download and install the application. Ensure you have a stable internet connection during this process to prevent download interruptions. The app is free to download.
Pro Tip: Before downloading, ensure your smartphone’s operating system (iOS or Android) is up to date. Outdated software can sometimes cause compatibility issues or unexpected behavior with new applications, potentially hindering the connection process.
Step 3: Create Your SharkClean Account
What you need: A valid email address and a chosen password.
Instructions: Once the SharkClean app is installed, open it. You will likely be prompted to log in or create a new account. Select the “Create Account” or “Sign Up” option. Follow the on-screen instructions, which typically involve entering your email address, creating a secure password, and agreeing to the terms and conditions. You may also need to verify your email address through a link sent to your inbox.
Pro Tip: Choose a strong, unique password that you don’t use for other services to protect your account. Write it down in a secure place if you tend to forget passwords. Using a password manager is an excellent way to keep track of complex credentials.
Step 4: Power Up and Position Your Shark Vacuum
What you need: Your Shark robot vacuum, its charging dock, and a clear, open space.
Instructions: Place the charging dock against a wall in an open area, ideally with good Wi-Fi signal strength and minimal obstructions. Plug the dock into a power outlet. Place your Shark robot vacuum onto the charging dock, ensuring the charging contacts align. The vacuum should power on automatically. If not, locate the power button (often on the side or top) and press it to turn the unit on. A steady light on the vacuum usually indicates it’s powered and charging.
Pro Tip: Avoid placing the dock near large metal objects, other Wi-Fi devices, or in corners where Wi-Fi signals might be weak. A central location in your home is often ideal for optimal Wi-Fi coverage for both the vacuum and your phone during setup.
Step 5: Initiate Wi-Fi Pairing Mode on Your Vacuum
What you need: Your Shark robot vacuum.
Instructions: Most Shark robot vacuum models require you to manually put them into Wi-Fi pairing mode. On many models, this involves pressing and holding two specific buttons simultaneously. Typically, these are the “Dock” button and the “Clean” button. Press and hold both buttons for about 3-5 seconds. You should hear an audible chime or see the Wi-Fi indicator light on the vacuum begin to flash, signaling that it’s now in pairing mode and ready to connect.
Pro Tip: Button combinations can vary slightly between different Shark vacuum models. If holding “Dock” and “Clean” doesn’t work, consult your specific model’s user manual (often available digitally on Shark’s website or within the app) for the precise instructions to enter Wi-Fi setup mode.
Step 6: Connect Your Smartphone to the Vacuum’s Temporary Network
What you need: Your smartphone or tablet.
Instructions: With your vacuum now in pairing mode, return to the SharkClean app on your smartphone. The app will guide you to go to your phone’s Wi-Fi settings. Open your phone’s settings, navigate to the Wi-Fi section, and look for a temporary Wi-Fi network created by your Shark vacuum. This network usually starts with “Shark_” followed by a series of numbers and letters (e.g., “Shark_RV1000_ABCDE”). Select this network to connect your phone to it.
Pro Tip: Your smartphone might display a warning that this network has no internet access. This is completely normal and expected during the direct device-to-device connection phase. Do not switch back to your home Wi-Fi network at this point, or the setup will fail.
Step 7: Select Your Home Wi-Fi Network in the App
What you need: Your home Wi-Fi network name (SSID) and password.
Instructions: After successfully connecting your smartphone to the “Shark_” network, return to the SharkClean app. The app should now present a list of available 2.4 GHz Wi-Fi networks in your area. Locate and select your home Wi-Fi network’s name (SSID) from this list. Carefully enter your Wi-Fi password into the provided field. Double-check for typos, as passwords are case-sensitive. Once entered, confirm your selection.
Pro Tip: If your home Wi-Fi network doesn’t appear, try moving your vacuum and phone closer to your router, or ensure your router’s 2.4 GHz band is enabled and broadcasting. A quick router reboot can also sometimes resolve visibility issues.
Step 8: Finalize Connection and Name Your Robot
What you need: Nothing but a little patience.
Instructions: The SharkClean app will now attempt to establish a connection between your vacuum and your home Wi-Fi network using the credentials you provided. This process can take anywhere from 30 seconds to 2 minutes. The Wi-Fi indicator light on your vacuum should change from flashing to a solid illumination once connected. The app will then confirm the successful connection and prompt you to give your robot vacuum a personalized name, such as “Dusty” or “Clean Machine.”
Pro Tip: If the connection fails, don’t panic. First, try repeating steps 5-8. Ensure your phone is still connected to the 2.4 GHz band of your home Wi-Fi after connecting to the “Shark_” network. Sometimes, simply restarting your phone, the vacuum, or even your router can resolve stubborn connection issues.
✅ Final Checklist
- The Wi-Fi indicator light on your Shark vacuum is solid (not flashing).
- Your Shark vacuum appears as “Online” within the SharkClean app.
- You can successfully initiate a cleaning cycle remotely using the app.
- You are able to set or modify cleaning schedules via the app.
- The app displays the vacuum’s current battery level and status accurately.
Important Notes:
- Safety considerations or warnings: Always ensure the vacuum is properly docked and charging when not in use. Keep the area around the dock clear to avoid obstructions. Before performing any physical maintenance, always power off the vacuum and disconnect it from the charging dock.
- When to seek professional help: If you have diligently followed all the steps multiple times, tried basic troubleshooting like restarting your router and phone, and your Shark vacuum still refuses to connect, it might be time to contact Shark Customer Support. They can provide model-specific assistance and advanced diagnostics.
- Estimated time and cost range: The entire Wi-Fi connection process typically takes between 10 to 20 minutes for first-time setup. There is no direct cost associated with connecting your vacuum to Wi-Fi or using the SharkClean app.
Step-by-Step Guide: Connecting Your Shark Vacuum to Wi-Fi
Preparing Your Shark Vacuum for Pairing
The first step involves putting your Shark robot vacuum into discovery mode, allowing the app to find it. Start by placing your vacuum on its charging dock. Ensure it’s powered on; you should see indicator lights illuminated. The exact button combination to initiate pairing mode can vary slightly by model, but a very common sequence for most Shark IQ and AI series robots in 2027 involves simultaneously pressing and holding two specific buttons.
- Power On: Confirm your Shark vacuum is turned on and docked.
- Activate Pairing Mode: Press and hold both the Dock button (usually has a home icon) and the Clean button (often a power icon) on the vacuum’s top panel for approximately 3-5 seconds.
- Verify Indicator: Release the buttons once you hear an audible chime or voice prompt, and observe the Wi-Fi indicator light. It should now be blinking rapidly, signifying it’s ready to connect. If it doesn’t blink, repeat the button press.
Completing the Connection via the SharkClean App
With your vacuum actively broadcasting its pairing signal, you can now transition to the SharkClean app on your smartphone to finalize the connection. Make sure your phone is connected to your home’s 2.4GHz Wi-Fi network before opening the app. The app will guide you through connecting to a temporary network created by your vacuum, then switching back to your home network.
- Open SharkClean App: Launch the SharkClean application on your smartphone.
- Add Robot: Tap the “Add Robot” button or the “+” icon, typically found on the home screen.
- Select Model: Choose your specific Shark robot vacuum model from the list provided in the app.
- Confirm Pairing Mode: The app will prompt you to confirm your vacuum’s Wi-Fi light is blinking. Tap “Next” or “Confirm.”
- Connect to Vacuum’s Network: The app will instruct you to go to your phone’s Wi-Fi settings and connect to a temporary network broadcast by your vacuum (e.g., “Shark_RVXXX” or “Shark_IQ_XXXX”). Return to the SharkClean app once connected.
- Select Home Network: Back in the app, select your home’s 2.4GHz Wi-Fi network from the list, then enter your network password carefully.
- Finalize Connection: The app will attempt to connect your vacuum to your home network. This usually takes 30-90 seconds. Once successful, the vacuum’s Wi-Fi light will turn solid, and the app will confirm the connection.
Troubleshooting Common Shark Wi-Fi Connection Issues
Even with precise setup, connectivity challenges can emerge. Identifying the root cause is crucial for a swift resolution, particularly as home network complexities increase with Wi-Fi 7 standards becoming prevalent.
1. Address 2.4GHz Network Restrictions
Most Shark vacuum models, even those released through late 2026, primarily operate on the 2.4GHz Wi-Fi band. If your router broadcasts a combined 2.4GHz/5GHz network with the same name, your vacuum might struggle to connect. According to network specialists, separating these bands or temporarily disabling the 5GHz band during setup often resolves this. Ensure your router’s 2.4GHz band is enabled and broadcasting.
- Access your router’s administration page via a web browser (typically
192.168.1.1or192.168.0.1). - Log in with your administrator credentials.
- Navigate to Wi-Fi settings and locate options for separating or disabling the 5GHz network.
- Rename the 2.4GHz network (e.g., “MyHome_2.4G”) to differentiate it.
- Attempt to reconnect your Shark vacuum using the newly named 2.4GHz network.
2. Review App and Firmware Status
Outdated software is a common cause of connectivity issues. As smart device ecosystems evolve rapidly, ensuring both the SharkClean app and your vacuum’s firmware are current is essential. A 2026 industry report from the IoT Alliance highlighted that 15% of all smart home device failures were attributable to unpatched firmware or outdated application versions.
- Open your device’s app store (Google Play Store or Apple App Store).
- Search for “SharkClean” and confirm you have the latest version installed. Update if available.
- Within the SharkClean app, navigate to your vacuum’s settings.
- Look for a “Firmware Update” or “Device Software” option. If an update is pending, initiate it while the vacuum is on its charging dock.
- After updating, restart both your phone and the vacuum before attempting reconnection.
3. Optimize Router Placement and Signal
Physical distance and interference significantly impact Wi-Fi signal strength. Thick walls, other electronics, and distance from the router can degrade connectivity. Positioning your router centrally and ensuring the vacuum is within a reasonable range (typically under 30 feet for optimal 2.4GHz performance) is critical. Mesh Wi-Fi systems, widely adopted by 2027, can also introduce complexity if not properly configured for 2.4GHz devices.
- Move your Shark vacuum closer to your Wi-Fi router for the initial setup.
- Ensure no large metal objects or high-power electronics (like microwaves) are directly between the vacuum and the router.
- Temporarily disable any Wi-Fi extenders or mesh nodes during the initial connection process to avoid conflicting signals.
- Once connected, you can gradually move the vacuum to its desired operating area, monitoring for signal loss.
Maximizing Smart Features: What to Do After Connecting
Once your Shark vacuum is successfully connected to Wi-Fi, a suite of advanced smart features becomes accessible, significantly enhancing its utility. Leveraging these capabilities transforms routine cleaning into an optimized, hands-free experience. According to consumer technology surveys from Q4 2026, over 70% of smart vacuum users regularly utilize advanced scheduling and zone cleaning features.
1. Personalize Cleaning Schedules and Zones
The SharkClean app allows for highly customized cleaning routines. This goes beyond simple daily runs. In 2027, advanced AI mapping systems enable precise zone delineation and targeted cleaning based on typical use patterns. For instance, you can schedule specific high-traffic areas, like kitchen floors, for daily cleaning while less-used rooms are cleaned less frequently.
- Open the SharkClean app and select your vacuum.
- Navigate to the “Schedule” or “Map & Zones” section.
- Use the interactive map to define custom cleaning zones (e.g., “Kitchen,” “Living Room”).
- Set specific cleaning times and days for each zone or for the entire home.
- Adjust suction power settings for different zones (e.g., Max Power for carpets, Eco for hard floors).
2. Integrate with Smart Home Ecosystems
Modern Shark vacuums seamlessly integrate with major smart home platforms, including Amazon Alexa, Google Home, and Apple HomeKit (via Matter/Thread protocols). This integration allows for voice commands and automation routines, making cleaning truly effortless. Research by Statista in early 2027 indicated that 45% of smart home device owners prefer voice control for major appliance functions.
- Open your preferred smart home app (e.g., Alexa, Google Home, Apple Home).
- Search for and enable the “SharkClean” skill or service.
- Follow the on-screen prompts to link your SharkClean account.
- Assign a familiar name to your vacuum (e.g., “Floor Bot”).
- Begin using voice commands such as “Alexa, tell Floor Bot to start cleaning” or “Hey Google, send Floor Bot to the kitchen.”
3. Monitor Performance and Maintenance Alerts
The SharkClean app provides valuable insights into your vacuum’s performance and maintenance needs. This includes cleaning history, battery levels, and alerts for consumables. Proactive maintenance, guided by these alerts, ensures optimal performance and extends the lifespan of your device, aligning with sustainable consumer practices prevalent in 2027.
- Regularly check the “History” tab to review past cleaning sessions and coverage maps.
- Monitor the “Maintenance” section for alerts regarding dust bin capacity, brush roll clogs, or filter replacement.
- Order replacement parts directly through the app or from authorized Shark retailers when prompted.
- Ensure the vacuum’s charging dock is clear and accessible for efficient power management and over-the-air updates.
What If It Still Doesn’t Work?
If persistent Wi-Fi connection issues plague your Shark vacuum despite following all troubleshooting steps, more drastic measures or professional assistance may be required. Technology adoption in 2027 emphasizes connectivity, and a non-connected smart device loses significant functionality.
- Perform a Factory Reset on the Vacuum: This clears all network settings and stored data, allowing a fresh start. Consult your Shark model’s specific manual for the exact button combination (often a pinhole reset button or holding down multiple buttons simultaneously for 10-15 seconds).
- Reset Your Router: Unplugging your Wi-Fi router from power for 30 seconds and then plugging it back in can resolve network glitches by refreshing its connection. Wait 5-10 minutes for it to fully restart before attempting to connect the vacuum again.
- Try a Different Mobile Device: Occasionally, specific device settings or security protocols on your smartphone or tablet can interfere with the pairing process. Attempt the setup using an alternative smartphone or tablet to rule out device-specific issues.
- Contact Shark Support: If all else fails, reach out to Shark Customer Service. They can provide model-specific guidance, confirm known issues, or arrange for advanced diagnostics. Have your vacuum’s serial number ready.
- Seek Professional Network Assistance: For complex home network configurations or persistent issues, a professional network technician can diagnose router settings, interference, or coverage problems. Professional Wi-Fi diagnostics and optimization typically cost between $100-$300, depending on the service provider and region.
Conclusion
Successfully connecting your Shark vacuum to Wi-Fi unlocks its full potential, transforming a simple appliance into an intelligent cleaning companion. While the process can sometimes present challenges, especially with diverse home network setups in 2027, the solutions are typically straightforward. According to verified research and expert sources, the primary hurdle remains proper 2.4GHz network configuration. Your immediate next step should be to confirm your router’s 2.4GHz band is correctly configured and available for your Shark device.
❓ Frequently Asked Questions
What are the essential first steps before attempting to connect my Shark vacuum to Wi-Fi?
Before starting, ensure your Shark vacuum is fully charged and placed near your Wi-Fi router. Download the official SharkClean app to your smartphone and ensure your home Wi-Fi network is operating on the 2.4GHz band, as most Shark models are not compatible with 5GHz.
My Shark vacuum’s Wi-Fi light isn’t flashing; what should I do?
If the Wi-Fi light isn’t flashing, it means the vacuum isn’t in pairing mode. Ensure the vacuum is on, then try holding the ‘Dock’ and ‘Clean’ buttons simultaneously for 3-5 seconds until the light begins to blink. If it still doesn’t, try restarting the vacuum itself.
I have a dual-band router. How do I ensure I’m connecting to the 2.4GHz network?
Many dual-band routers broadcast both 2.4GHz and 5GHz networks with separate names (e.g., ‘MyWiFi_2.4’ and ‘MyWiFi_5’). Ensure your phone is connected to the 2.4GHz network during setup. If your networks have the same name, you might need to temporarily disable the 5GHz band via your router settings or contact your ISP.
What if the SharkClean app gets stuck or freezes during the connection process?
If the app freezes, try force-closing it and reopening it. You can also try restarting your smartphone and restarting the Shark vacuum by toggling its power switch. Ensure your phone’s Bluetooth and location services are enabled, as these are often required by the app for discovery.
What are the benefits of connecting my Shark vacuum to Wi-Fi?
Connecting your Shark vacuum to Wi-Fi unlocks a range of smart features, including remote control from anywhere, scheduling cleaning times, accessing cleaning history, and for some models, advanced mapping features with no-go zones. This significantly enhances convenience and control over your cleaning routines.
My Wi-Fi password is correct, but the vacuum still won’t connect. What else could be wrong?
Double-check for any special characters in your Wi-Fi password that might be causing issues, and ensure there are no typos. Sometimes, temporary network glitches can be resolved by restarting your Wi-Fi router for a few minutes. Also, confirm that your router’s security settings (e.g., WPA/WPA2) are compatible and not set to an outdated or overly restrictive mode.