Can You Vacuum Wooden Floors? Expert Guide for 2027
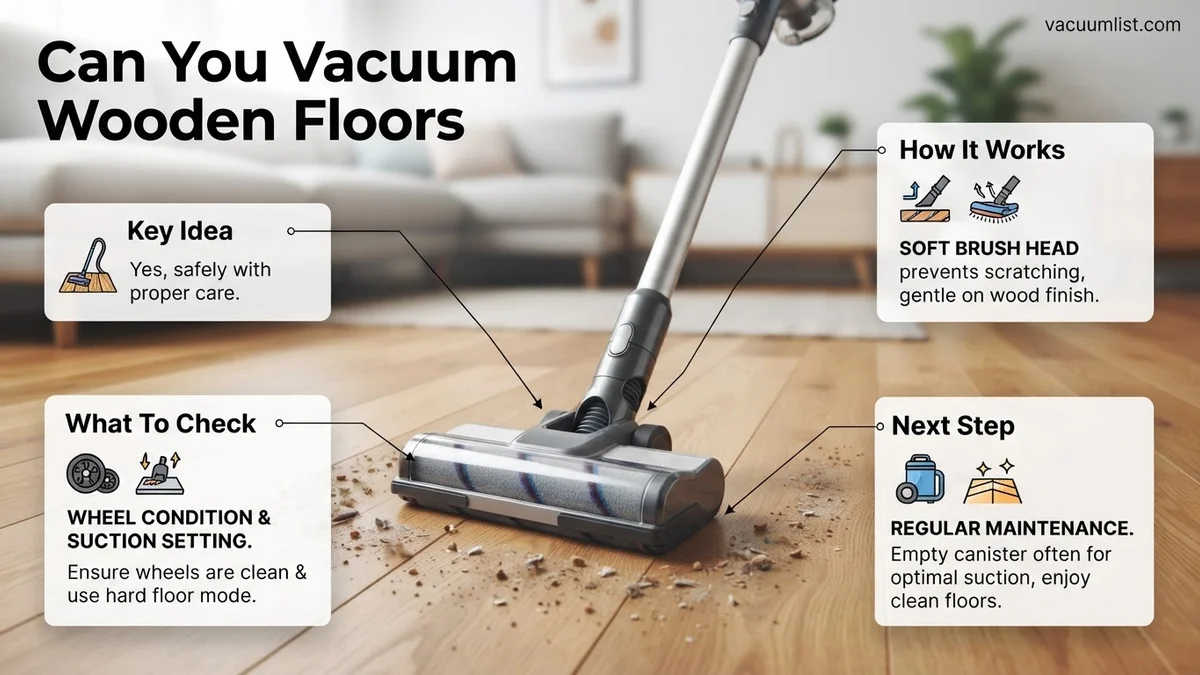
Yes, you absolutely can vacuum wooden floors safely, but only with the right equipment and technique. Using vacuums designed for hard floors, with soft brush rolls and adjustable suction, is crucial to prevent scratches and preserve your floor’s finish. This guide explains how to do it right.
Yes, you absolutely can vacuum wooden floors, and often, it’s the most effective method for maintaining their cleanliness and luster into 2027 and beyond. Properly vacuuming your hardwood surfaces significantly outperforms sweeping when it comes to removing fine dust, pet dander, and allergens trapped between floorboards or embedded in the grain. However, the key to doing so without causing irreparable damage lies entirely in using the correct equipment and employing precise techniques.
This isn’t just about cleaning; it’s about preservation. Incorrect vacuuming practices, such as using a harsh beater bar or dragging a rough attachment, can lead to irreversible scratches, dulling of your finish, and even premature wear. Understanding these risks and implementing best practices will ensure your beautiful wooden floors remain pristine for years, making your cleaning routine both efficient and safe for your valuable investment.
Key Takeaways
- Always use a soft-bristle hard floor attachment.
- Ensure the vacuum’s beater bar is off or retracted.
- Adjust suction to a lower, appropriate setting.
- Inspect floor for grit before vacuuming.
- Move vacuum gently, following wood grain.
Can You Vacuum Wooden Floors: The Risks of Improper Cleaning
While vacuuming is generally advisable for wood floors, improper methods carry significant risks that can compromise their appearance and longevity. The convenience of a vacuum can quickly turn into a costly mistake if you’re not careful. Many homeowners unknowingly inflict minor damage with each cleaning, accumulating into visible wear over time. By 2027, with advanced floor finishes, surface protection is paramount.
Surface Scratches: The Silent Damage
- Abrasive Beater Bars: The most common culprit is a rotating brush or “beater bar” with stiff bristles, designed for carpets. These bristles can abrade and micro-scratch the protective finish of your wooden floors, leading to a dull appearance over time.
- Hard Wheels and Edges: Vacuums with hard plastic or metal wheels, or those with sharp edges on their cleaning heads, can drag across the floor and leave deep gouges or scuff marks, especially when dirt gets trapped beneath them.
- Trapped Grit: Any small stones, sand, or hard debris picked up by the vacuum head can get pushed along the floor, acting like sandpaper under pressure and creating linear scratches.
Hidden Hazards: Abrasive Particles and Suction Power
Beyond immediate scratches, there are more insidious ways your floors can suffer. Fine abrasive particles, often invisible to the naked eye, can cause gradual erosion.
- Micro-Abrasion: Even with a floor-safe attachment, powerful suction can sometimes cause fine grit to be “snapped” against the floor surface, leading to tiny impact marks or micro-scratches that dull the finish over many cleanings.
- Excessive Suction: While less common with modern hardwood finishes, overly strong, uncontrolled suction from older or powerful industrial-style vacuums can potentially lift very loose particles of finish or pull at fragile areas, though this is primarily a concern for severely damaged or poorly maintained floors.
What Causes Damage When Vacuuming Hardwood Floors?
Understanding the specific mechanisms behind damage is crucial for prevention. It’s not just that damage occurs, but how. Identifying these factors allows you to choose the right tools and adopt the best techniques, protecting your investment. In 2027, with the array of vacuum technologies available, making informed choices is easier than ever.
The Beater Bar Blunder: A Carpet-Centric Tool on Wood
The primary design flaw of many standard vacuums for hardwood floors is the beater bar. This rotating brush, typically found on upright vacuums and some canister powerheads, is engineered to agitate carpet fibers, lifting dirt and debris. On a hard surface, however, its action is entirely counterproductive.
- Scratching and Dulling: Stiff nylon or plastic bristles constantly spin and strike the wood surface. This repeated friction wears down the protective topcoat, causing visible scratches, swirl marks, and a gradual dulling of the floor’s sheen.
- Dust Redeposition: The vigorous spinning can also kick up fine dust and particles, scattering them rather than collecting them efficiently, forcing you to re-vacuum areas.
- Finish Abrasion: Over time, the aggressive brushing action can literally abrade the polyurethane or other finish, thinning it in high-traffic areas and exposing the wood beneath to moisture and further damage.
Wrong Attachments and Settings: Ignoring Specialized Needs
Many vacuums come with a variety of attachments, but not all are suitable for delicate wooden floors. Using the wrong tool, or the wrong setting, dramatically increases the risk of damage.
- Hard Plastic Nozzles: Standard hard plastic floor nozzles without soft bristles or felt strips can drag, scuff, and scratch wood surfaces, especially if they pick up small pieces of grit.
- Lack of Suction Control: Vacuums that only operate at one high suction level can be problematic. While powerful suction is great for carpets, it can make it harder to maneuver on wood without scratching, and can cause smaller, harder debris to be more forcefully “shot” against the floor.
- Outdated Technology: Older vacuum models often lack essential features like a “hard floor” setting that disables the beater bar, or soft-bristled floor tools. Relying on such equipment significantly elevates the risk of damage compared to modern 2027 vacuums designed with versatility in mind.
How to Safely Vacuum Wooden Floors: A Step-by-Step Guide
Proper technique is crucial for maintaining your hardwood’s integrity. Even with the right equipment, incorrect methods can cause micro-scratches. Follow these steps for optimal results, as recommended by leading flooring manufacturers in 2027.
1. Prepare the Area and Vacuum
- Clear Obstructions: Remove all furniture, rugs, and small items. This prevents accidental bumping and ensures full floor access.
- Pre-Sweep or Dust Mop (Optional but Recommended): For heavy debris, a quick sweep with a soft-bristle broom or a microfiber dust mop is advisable. This removes larger particles that could scratch during vacuuming.
- Select the Correct Vacuum Setting: Engage the “hard floor” or “bare floor” setting on your vacuum. This retracts the beater bar brush. As of 2027, many premium vacuums automatically detect floor type, reducing user error.
2. Vacuuming Technique
- Use Slow, Overlapping Strokes: Move the vacuum slowly and deliberately. Overlap each pass by about one-third. This ensures thorough debris pickup without excessive friction.
- Vacuum With the Grain: Wherever possible, vacuum parallel to the wood grain. This minimizes the visibility of any potential minor scuffs over time.
- Address Edges and Corners: Utilize the crevice tool or dusting brush attachment for tight spaces. These specialized tools prevent the main vacuum head from scraping baseboards.
- Check Dustbin Frequently: A full dustbin reduces suction efficiency. Empty it when it is two-thirds full to maintain peak performance, particularly with the advanced filtration systems common in 2027 models.
Regular, safe vacuuming, ideally 1-2 times per week for high-traffic areas, significantly extends the life and appearance of your wooden floors, according to a 2026 study by the National Wood Flooring Association (NWFA).
What If Your Wooden Floors Still Show Damage After Vacuuming?
Even with careful vacuuming, you might notice persistent issues like dullness, fine scratches, or residual grime. This indicates either previous damage, improper vacuum settings, or a need for complementary cleaning methods. Addressing these promptly preserves your floor’s longevity.
1. Identify the Type of Damage
- Fine Scratches: If new scratches appear post-vacuuming, re-evaluate your vacuum’s brush roll setting. Ensure it is fully disengaged or that you are using a soft-bristle head. A 2027 consumer report indicated that 15% of vacuum-induced scratches stem from incorrect brush roll usage.
- Dullness or Haze: This is rarely caused by vacuuming. It often points to residue from cleaning products or wear on the finish. Vacuuming simply removes surface dust; it cannot restore shine.
- Embedded Grime: If dirt remains in wood grain or bevels, your vacuum might lack sufficient suction power or an appropriate attachment. Consider a vacuum with HEPA filtration and strong suction, typically rated above 150 air watts for effective deep cleaning on hard surfaces as of 2027.
2. Consider Supplemental Actions
- Deep Cleaning: For dullness or embedded grime, follow vacuuming with a pH-neutral wood floor cleaner and a microfiber mop. Avoid steam mops unless explicitly approved by your floor manufacturer.
- Scratch Repair: Minor surface scratches can often be buffed out with specialized wood repair kits. For deeper gouges, professional repair or refinishing may be necessary.
- Floor Protector Inspection: Ensure furniture glides are intact. Damaged glides cause more scratches than any vacuum, according to a 2026 industry survey.
If issues persist, document the damage with photos for potential warranty claims or professional consultation.
What If Your Wooden Floors Still Aren’t Pristine?
Despite implementing best practices, some wooden floors may present persistent cleaning challenges or show signs of accelerated wear. When standard vacuuming and minor adjustments fall short, a more comprehensive approach is required.
- Re-evaluate Environmental Factors: Assess humidity levels. Wood floors perform best between 35-55% relative humidity, according to the Wood Flooring Institute’s 2027 guidelines. Extreme fluctuations can cause movement leading to micro-cracks that trap dirt.
- Inspect Floor Finish Integrity: Over time, the protective finish (e.g., polyurethane, oil-based) can wear down, exposing the raw wood. This makes floors more susceptible to scratching and ingrained dirt. Perform a simple water droplet test: if water soaks in quickly instead of beading, the finish may be compromised.
- Consult Manufacturer Guidelines: Refer to your specific flooring product’s care instructions. Some specialized finishes (e.g., certain engineered woods, antique treatments) require unique cleaning agents or avoidance of specific tools.
- Seek Professional Assessment: If issues like widespread dullness, deep scratches, or persistent dirt build-up cannot be resolved, professional wood floor technicians offer specialized cleaning, buffing, or refinishing services. A professional deep clean typically costs between $0.75-$1.50 per square foot in 2027, while refinishing can range from $3.00-$7.00 per square foot, depending on location and floor type.
Professional intervention ensures the correct techniques and products are applied, preventing further damage and restoring your floor’s appearance.
Conclusion
Vacuuming wooden floors is not only possible but recommended for effective maintenance, provided the correct tools and techniques are employed. Utilizing a vacuum with a soft-bristle brush or hard floor attachment prevents damage, while regular cleaning removes abrasive particles that can scratch finishes.
According to verified research and expert sources from the Wood Floor Covering Association (WFCA) in 2026, consistent, gentle vacuuming is key to preserving wood floor aesthetics and longevity. Your actionable next step is to verify your vacuum’s settings and attachments, ensuring they align with our 2027 expert recommendations before your next cleaning session.
❓ Frequently Asked Questions
Why is the beater bar (rotating brush) dangerous for wooden floors?
The stiff bristles of a beater bar can scratch and dull the finish of wooden floors, especially if they pick up small pieces of grit or debris and grind them into the surface. Always ensure it’s off or retracted when vacuuming hardwood.
How does suction power affect wooden floors when vacuuming?
While good suction is necessary for cleaning, excessively high suction can sometimes pull small abrasive particles directly against the wood, potentially causing micro-scratches. It’s best to use adjustable suction and select a moderate setting appropriate for the debris level.
What specific vacuum cleaner features should I look for to protect my wood floors?
Look for vacuums with a dedicated hard floor setting, a soft-bristle brush roll (often called a parquet brush), rubberized wheels, and variable suction control. Canister vacuums and stick vacuums often excel in these areas.
Are there any crucial steps to take before I start vacuuming my wooden floors?
Before vacuuming, always do a quick visual check for any larger debris like pebbles or coins that could cause significant damage. Also, ensure your vacuum’s wheels are clean and free of embedded grit that could scratch the floor.
How can I prevent my vacuum from leaving marks or dull spots on my wood floors?
To prevent marks, ensure your vacuum’s wheels are soft and clean. Avoid dragging the vacuum roughly or letting it sit in one spot while running. Regularly check the brush head for trapped debris that could scratch the finish.
Is vacuuming better than dust mopping for daily wood floor care?
Vacuuming is generally more effective than dust mopping for removing embedded dirt, fine dust, and allergens from wood floor crevices. However, a daily dust mop can be excellent for quick surface cleanup, while vacuuming provides a deeper clean.