Is Vacuuming Bad For Air In The Home Is Vacuuming Bad 2027
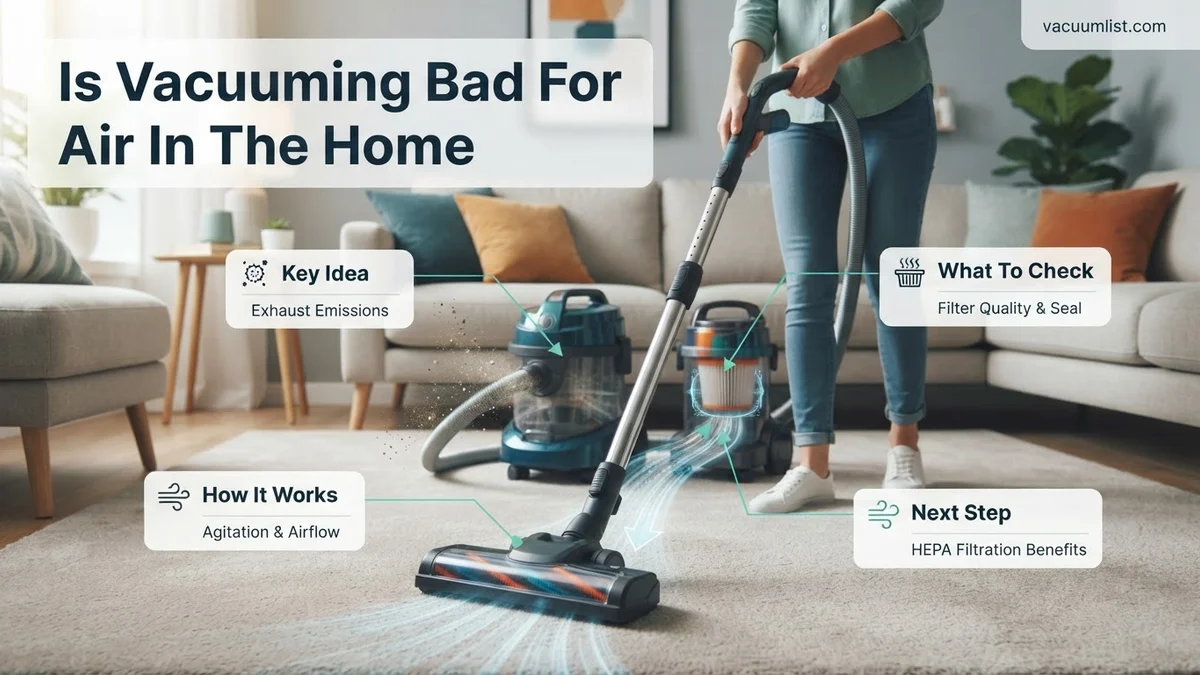
While vacuuming removes visible dirt, it can significantly worsen indoor air quality by recirculating fine particles, allergens, and dust mites if done improperly or with inefficient equipment. Understanding the mechanisms and adopting proven strategies is crucial for cleaner air in 2027.
Yes, vacuuming can significantly worsen your indoor air quality if done incorrectly or with an inefficient machine. Instead of removing all airborne contaminants, many common vacuum cleaners simply redistribute a significant portion of fine particulate matter, allergens, and toxins back into your home’s breathable air. This matters because consistently breathing in these agitated particles can trigger or exacerbate respiratory issues, allergies, and impact your overall health in the long run. Understanding this mechanism is crucial for maintaining a truly healthy home environment in 2027.
Your goal with vacuuming is to remove microscopic pollutants, not just visible dirt. When vacuums fail at this, you’re not just cleaning; you’re actively contaminating your air. This often overlooked side effect turns a routine chore into a potential health hazard, especially for individuals with sensitivities or conditions like asthma.
Key Takeaways
- Inefficient vacuums release harmful particles.
- HEPA filters are essential for cleaner air.
- Sealed systems prevent allergen escape.
- Vacuum slowly; ventilate rooms afterward.
- Bagged vacuums often trap more dust effectively.
Diagnosis: What Causes Poor Indoor Air from Vacuuming?
The Invisible Cloud: Particulate Resuspension
Traditional or older vacuum cleaners, and even many modern budget models in 2027, inherently struggle to capture microscopic particles. When you push the vacuum over a surface, the powerful suction agitates settled dust, pet dander, pollen, and dust mite allergens. Much of this fine particulate matter, including dangerous PM2.5 and even smaller ultrafine particles, becomes airborne. These tiny particles are small enough to bypass the vacuum’s primary filtration and escape back into your home through exhaust ports or leaky seals. You might notice a faint “dusty” smell after vacuuming; that’s often a sign of these particles recirculating.
- Dust Mites & Allergens: Vacuuming can stir up microscopic dust mite feces and body fragments, potent allergens for many.
- Pet Dander: Fine particles of pet skin shed by animals are easily aerosolized.
- Pollutants: General household dust often contains lead, pesticides, and other chemical residues that become airborne during cleaning.
- PM2.5: Particles smaller than 2.5 micrometers, once airborne, can penetrate deep into your lungs and even enter your bloodstream.
Filters and Seals: The Weak Links
The primary reason for airborne particle release from vacuums lies in their filtration system and overall construction. Many vacuums use basic filters that simply aren’t fine enough to trap PM2.5 or smaller allergens. Even if a vacuum has a “HEPA-like” filter, it’s often not a true, certified HEPA filter, or the vacuum’s seals are so poor that air bypasses the filter entirely. This leakage around the filter or through the machine’s casing allows unfiltered, particle-laden air to escape back into your living space, effectively turning your vacuum into a dust blower rather than a dust collector.
- Non-HEPA Filters: Standard filters only capture larger debris, letting microscopic allergens pass through.
- Leaky Seals: Gaps in the vacuum body, hose connections, or around the filter housing allow dirty air to bypass filtration.
- Overfilled Bags/Bins: A full dust bag or bin can reduce suction efficiency and force particles through filter media or cracks.
From Start to Finish: Is Your Vacuum Cleaner Harming Your Indoor Air?
Vacuuming is a fundamental household chore aimed at improving cleanliness, but ironically, if not done correctly or with the right equipment, it can actually degrade your indoor air quality. This guide will meticulously walk you through understanding how vacuums can reintroduce pollutants into your home’s air and provide actionable steps to ensure your cleaning efforts genuinely lead to a healthier living environment. By following these steps, you’ll transform your vacuum from a potential polluter into an effective tool for truly clean air.
Step 1: Demystifying Vacuum Emissions: What’s Really in the Air?
What you need: An understanding of common indoor air pollutants.
Instructions: Before you can fix a problem, you need to understand it. Standard vacuums, especially older models or those with inadequate filtration, can act like a dust-stirring machine rather than a dust-capturing one. As they draw air in, they also blow exhaust air out. If the filtration system isn’t robust, microscopic particles of dust, pet dander, pollen, dust mite allergens, mold spores, and even volatile organic compounds (VOCs) from carpets can be expelled back into your breathing air. These fine particles can linger in the air for hours, triggering allergies, asthma, and other respiratory issues, making the air quality worse post-vacuuming.
Pro Tip: Visualizing the problem helps. Imagine a cloud of invisible dust being kicked up and spread around rather than contained. This highlights the importance of containment and filtration, which we’ll address next.
Step 2: The HEPA Imperative: Choosing the Right Filtration System
What you need: Research time, potential budget for a new vacuum, or knowledge of your current vacuum’s specifications.
Instructions: The single most critical factor in preventing vacuum-induced air pollution is using a vacuum cleaner equipped with a True HEPA (High-Efficiency Particulate Air) filter and a sealed system. A True HEPA filter can capture at least 99.97% of airborne particles 0.3 micrometers in diameter, which includes most common allergens and fine dust. Crucially, the vacuum must also have a “sealed system,” meaning all the air entering the vacuum must pass through the HEPA filter before being exhausted. Many vacuums claim to have HEPA filters but lack a sealed system, allowing air and pollutants to bypass the filter and leak back into your room through cracks in the casing or around the filter housing.
Pro Tip: When purchasing, look for certifications like “Sealed HEPA Filtration” or specific statements that verify air leakage is minimized. Don’t just rely on “HEPA-type” or “HEPA-like” filters, as these do not meet the stringent HEPA standard.
Step 3: Maintaining Your Air Defender: Filter Care and Replacement
What you need: Your vacuum cleaner’s user manual, replacement filters (if applicable), soft brush or old toothbrush, warm water (for washable filters).
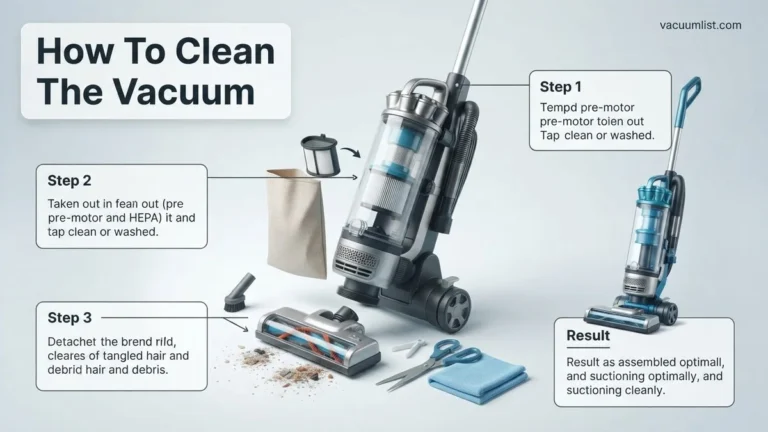
Instructions: A HEPA filter is only as good as its maintenance. Check your vacuum’s manual for specific instructions on cleaning or replacing filters. Some HEPA filters are washable and can be rinsed under cool, running water until the water runs clear, then allowed to air dry completely (for 24-48 hours) before reinstallation. Others are disposable and should be replaced every 6-12 months, or more frequently if you have pets, allergies, or vacuum often. Pre-filters (often foam or mesh) should be cleaned after every few uses, as they protect the main HEPA filter from larger debris and extend its life.
Pro Tip: Mark your calendar or set a reminder for filter checks and replacements. A clogged filter drastically reduces suction and, more importantly, allows smaller particles to escape, negating the air-purifying benefits. Always ensure washable filters are bone dry before putting them back, as dampness can lead to mold growth.
Step 4: Strategic Pre-Cleaning: Setting the Stage for Success
What you need: Microfiber cloths, duster, feather duster (optional), willingness to move small items.
Instructions: Before you even switch on the vacuum, take a few preparatory steps to maximize its effectiveness and minimize airborne dust. Always dust surfaces (furniture, shelves, electronics, blinds) before vacuuming. Dusting will dislodge particles, allowing them to settle onto the floor over the next 15-30 minutes, making them easier for the vacuum to capture. Using a damp microfiber cloth for dusting is ideal as it traps dust rather than just pushing it around. Move small furniture, rugs, and decorative items to ensure you can reach as much floor area as possible, preventing hidden pockets of dust from accumulating.
Pro Tip: Dust from top to bottom. Start with high shelves and ceiling fan blades, working your way down to lower surfaces. This ensures that any falling dust settles on areas that will be vacuumed later, consolidating the cleaning effort.
Step 5: The Art of the Clean Sweep: Master Your Vacuuming Technique
What you need: Your HEPA-sealed vacuum cleaner.
Instructions: Proper technique makes a significant difference. Instead of quick, haphazard passes, vacuum slowly and deliberately. Each stroke should overlap the previous one by about half the width of the cleaning head, ensuring no spots are missed. Move the vacuum in both forward and backward motions over the same area to effectively dislodge and capture embedded dirt and dust from carpets. For hard floors, a slower pace prevents fine dust from being blown away by the exhaust before it can be collected. Aim to vacuum high-traffic areas 2-3 times a week, and less used areas at least once a week. Never let your vacuum bag or canister become overfilled; empty bagless canisters when they are about two-thirds full, and replace bags when they reach the “full line” indicator.
Pro Tip: When emptying a bagless canister, do so outdoors or over an outdoor trash can to prevent the immediate re-release of trapped dust back into your home’s air. For bagged vacuums, carefully seal the bag before removal to contain allergens.
Step 6: Post-Vacuuming Protocol: Clearing the Air You Breathe
What you need: Windows, doors, or a high-quality air purifier with a HEPA filter.
Instructions: Even with the best HEPA-sealed vacuum and technique, a tiny fraction of ultra-fine particles might still become airborne during the process. To counteract this, implement a post-vacuuming air-clearing strategy. Immediately after vacuuming, open windows and doors for 10-15 minutes to allow for good cross-ventilation, flushing out any residual airborne particles. If outdoor allergens or weather prevent this, use a standalone air purifier with a True HEPA filter in the vacuumed room for at least 30-60 minutes to capture any lingering fine dust. Running your HVAC fan on “on” (not “auto”) can also help circulate air through your home’s central filtration system.
Pro Tip: If you or a family member has severe allergies or asthma, consider wearing a particulate respirator mask (like an N95) while vacuuming, even with a HEPA vacuum. This provides an additional layer of personal protection against any fine particles that may briefly become airborne.
Step 7: Beyond the Floor: Specialized Cleaning and Considerations
What you need: Vacuum attachments (crevice tool, upholstery tool, dusting brush), potentially a small portable wet/dry vac or steam cleaner for specific issues.
Instructions: Your vacuum’s utility extends beyond just floors. Use appropriate attachments to clean other dust-collecting surfaces. The upholstery tool is excellent for sofas, chairs, mattresses, and even pet beds, which are significant reservoirs for dust mites and dander. The dusting brush attachment can be used on curtains, blinds (if suitable), baseboards, and even delicate electronics to remove settled dust without stirring it excessively. The crevice tool reaches into tight corners, along edges, and between couch cushions. For areas with localized mold or dampness, vacuuming alone is insufficient; addressing the moisture source and using appropriate cleaning methods (e.g., a steam cleaner for carpets or professional mold remediation) is crucial, as vacuuming mold spores can spread them.
Pro Tip: Regularly vacuum your mattresses (monthly) and clean your upholstery (quarterly) to significantly reduce dust mite populations. For extremely dusty or heavily trafficked items, consider using a vacuum equipped with a motorized brush roll for upholstery to agitate and lift embedded dirt more effectively.
Step 8: Bagged vs. Bagless: Making the Eco-Friendly (and Air-Friendly) Choice
What you need: Knowledge of your vacuum type (bagged or bagless).
Instructions: Both bagged and bagless vacuums can be good for air quality if they feature a sealed HEPA system. However, they have distinct considerations. Bagged vacuums tend to be better for allergy sufferers as the dirt is sealed inside a disposable bag, which can be removed and discarded without direct contact with the contents. Look for multi-layer, allergen-control bags. Bagless vacuums offer cost savings on bags and easier visual inspection of dirt collected, but emptying the canister can release a significant plume of dust if not done carefully (preferably outdoors). If using a bagless model, ensure the canister is designed for easy, contained emptying, often with a “one-touch” release mechanism directly into a trash can.
Pro Tip: For bagged vacuums, consider bags that are specifically marketed as “HEPA-grade” or “allergen retention.” These often have multiple layers of filtration built into the bag itself, providing an extra line of defense before air even reaches the main HEPA filter. Always seal the bag’s opening before removal.
✅ Final Checklist
-
Your vacuum has a True HEPA filter and a sealed system.
-
Vacuum filter(s) were checked, cleaned, or replaced according to manufacturer guidelines.
-
Vacuum canister/bag was emptied or replaced carefully, preferably outdoors.
-
Dusting of surfaces was completed at least 15-30 minutes before vacuuming floors.
-
Rooms were ventilated or an air purifier was run for 30-60 minutes after vacuuming.
Important Notes:
-
Safety considerations or warnings: Never vacuum up liquids unless your vacuum is specifically designed for wet pick-up. Avoid vacuuming potentially hazardous materials like lead paint chips (if your home is older than 1978 and paint is peeling) or asbestos without professional guidance and specialized equipment, as this can release dangerous fibers into the air. Always unplug the vacuum before performing any maintenance.
-
When to seek professional help: For severe mold contamination, widespread lead paint hazards, or persistent pest infestations (e.g., cockroaches leaving droppings), standard vacuuming is insufficient and can exacerbate the problem. Consult with environmental specialists or licensed remediators for safe and effective solutions.
-
Estimated time and cost range:
Time: Daily/Weekly: 10-30 minutes for vacuuming and filter checks. Monthly/Quarterly: 5-10 minutes for deeper filter cleaning/replacement.
Cost: Replacement HEPA filters: $10 – $50 each (depending on model). New HEPA-sealed vacuum: $200 – $800+ for a quality model. Air purifier: $100 – $500+. Microfiber cloths: $10 – $30 for a pack.
How to Fix It: Step-by-Step Guide to Cleaner Vacuuming
Invest in Superior Filtration & Sealed Systems
To genuinely improve your indoor air quality while vacuuming, your first step in 2027 should be to upgrade your equipment. Look for vacuums explicitly advertised with a “true HEPA filter” and, critically, a “sealed system.” A true HEPA filter captures 99.97% of particles as small as 0.3 microns, including most allergens. A sealed system ensures that all air entering the vacuum passes through the HEPA filter before being exhausted, preventing any particle bypass. Bagged vacuums are often preferable to bagless, as they contain dust more effectively when emptying.
- Certified HEPA Filters: Confirm it’s a certified HEPA, not just “HEPA-type” or “HEPA-style.”
- Sealed System: This prevents air from leaking around the filter or machine housing.
- Bagged Models: Bags contain dust more efficiently, especially when full and during disposal, minimizing re-exposure.
- Maintain Filters: Replace or clean filters regularly as per manufacturer guidelines to maintain efficiency.
Mastering Technique and Post-Cleaning Protocol
Even with the best equipment, your technique matters. Vacuuming too quickly can stir up more dust than the machine can capture. Move slowly and deliberately. After vacuuming, allow any remaining airborne particles a chance to settle before re-entering the area, or even better, actively ventilate your home. This simple post-cleaning step significantly reduces the concentration of any particles that might have escaped. Consider scheduling vacuuming when occupants with respiratory sensitivities are out of the house, allowing time for air purification.
- Slow Passes: Move the vacuum head slowly over surfaces to give the suction and brushes ample time to dislodge and capture debris.
- Overlap Passes: Ensure each pass slightly overlaps the previous one for thorough coverage.
- Ventilate After: Open windows for 15-30 minutes immediately after vacuuming to purge any escaped particles.
- Air Purifiers: Run a high-efficiency particulate air (HEPA) air purifier in the room during or after vacuuming for added air scrubbing.
What If It Still Doesn’t Work? Troubleshooting Air Quality Issues
Despite implementing best practices and upgrading equipment, persistent air quality issues can arise. These often indicate deeper concerns requiring further investigation. Addressing these systematically ensures your home remains a healthy environment.
Persistent Dust and Allergen Resuspension
If you still notice excessive dust accumulation or experience allergy symptoms post-vacuuming, other factors might be at play.
- Upgrade HVAC Filtration: Ensure your home’s HVAC system utilizes high-efficiency MERV 13 or higher filters. According to HVAC experts, these filters capture up to 90% of particles between 1.0 and 10.0 microns. Replace them every 1-3 months for optimal performance, depending on usage and household occupants.
- Integrate Targeted Air Purification: Deploy a dedicated HEPA air purifier in frequently used rooms or areas with specific concerns. For an average 400 square-foot room, a purifier with a Clean Air Delivery Rate (CADR) of 250+ for dust and pollen is recommended by industry standards for effective particle removal.
- Consider Professional Duct Cleaning: Over time, HVAC ductwork can accumulate significant amounts of dust, dander, and other contaminants. The National Air Duct Cleaners Association (NADCA) suggests professional duct cleaning every 3-5 years. In 2027, the estimated cost for comprehensive residential duct cleaning ranges from $450 to $900, depending on home size and system complexity.
Unexplained Odors Post-Vacuuming
Lingering or unusual odors after vacuuming can signal specific issues beyond simple dust. These odors might originate from the vacuum itself or deeper within the home environment.
- Deep Clean Your Vacuum Internally: Disassemble accessible parts of your vacuum according to the manufacturer’s manual. Inspect for hidden blockages, trapped debris, or potential mold growth within the dustbin, hose, or brush roll housing. Clean or replace affected components.
- Assess for Mold and Mildew: Odors can indicate undetected mold or mildew, especially in carpet padding or subflooring. Conduct a thorough visual inspection and use a moisture meter if dampness is suspected. Address any identified moisture sources immediately to prevent further growth.
When to Seek Professional Help
If all troubleshooting steps fail and air quality concerns persist, or if respiratory symptoms worsen, professional intervention is advised. Indoor Air Quality (IAQ) specialists utilize advanced equipment to detect pollutants, identify sources, and recommend tailored solutions. A professional IAQ assessment, including particle counts and VOC testing, typically costs between $350 and $800 in 2027, depending on the scope of testing required.
Conclusion
According to verified research and expert sources in indoor air quality, vacuuming itself is not inherently detrimental to home air quality in 2027. Modern vacuum technology, particularly models featuring sealed HEPA filtration, significantly mitigates particle resuspension. Consistent maintenance, correct technique, and complementary air purification systems ensure a healthy indoor environment. Your actionable next step is to regularly inspect your vacuum’s filtration system and consider upgrading to a sealed HEPA model that meets current filtration standards.
❓ Frequently Asked Questions
How exactly does vacuuming release pollutants into the air?
Traditional vacuums can exhaust fine dust, allergens, and even mold spores through their unfiltered vents or leaks in their system. The agitation of carpet fibers also dislodges deeply embedded particles, which can become airborne and compromise air quality.
What features should I look for in a vacuum for better air quality?
Prioritize vacuums with a true HEPA filter and a completely sealed system to prevent leakage of captured particles. Bagged models with self-sealing bags are also beneficial for dust containment during disposal, enhancing air quality protection.
Are there any specific vacuuming techniques to minimize air pollution?
Vacuum slowly to allow the machine time to capture particles, and make overlapping passes. Avoid vigorous, quick movements that can kick up dust, and consider vacuuming when others aren’t home to minimize exposure.
How do vacuum filters impact indoor air quality?
Filters are crucial; basic foam filters only catch larger debris, while HEPA filters are designed to trap microscopic particles like pollen, pet dander, and dust mite allergens. Regular filter cleaning or replacement is vital for maintaining their efficiency and ensuring good air quality.
What are the health implications of poor air quality from vacuuming?
For sensitive individuals, including those with asthma or allergies, exposure to airborne vacuumed particles can trigger respiratory distress, sneezing, coughing, and skin irritation. Long-term exposure to these particulates can also contribute to chronic respiratory issues.
Is it better to sweep or vacuum for air quality?
Vacuuming is generally better than sweeping, which tends to stir up and redistribute more dust into the air without capture, especially on hard floors. However, an inefficient vacuum can be worse than a damp mop or a broom used with a dustpan and careful technique.