
How to Clean Vacuum Filter Step-by-Step Guide for 2026
A dirty vacuum filter restricts airflow, reduces suction power, and can damage the motor over time. Properly cleaning and drying your vacuum filter restores peak performance and extends the lifespan of your machine. This guide outlines how to safely wash, dry, and maintain both washable and non-washable filters.
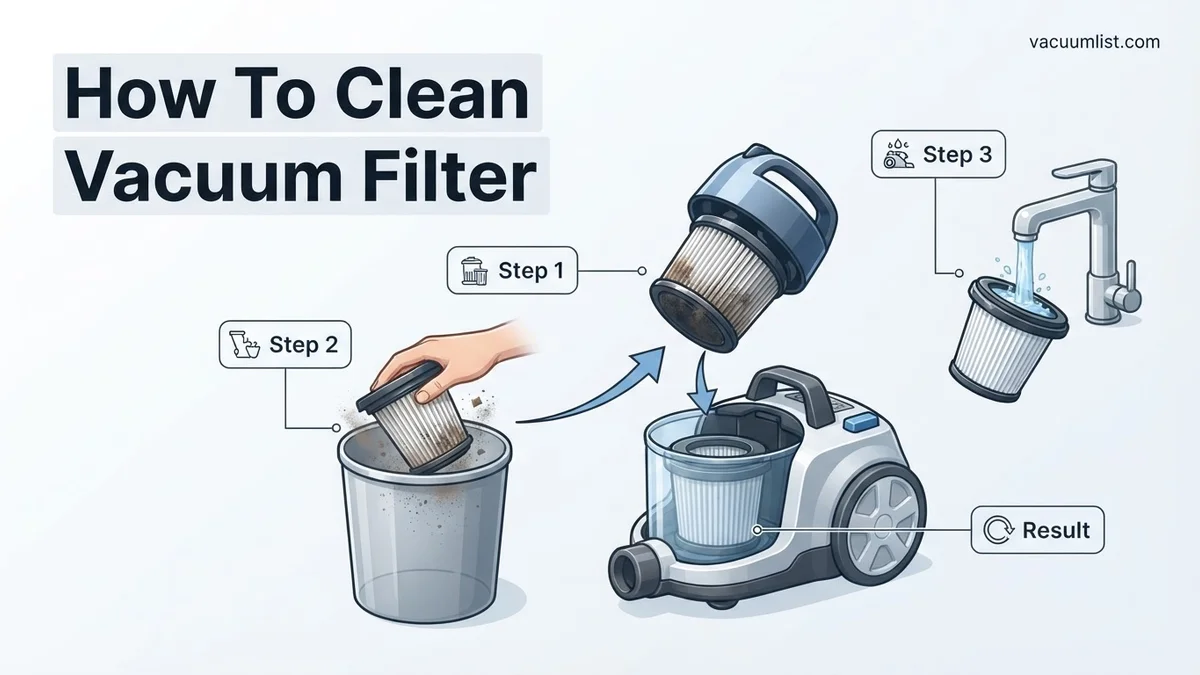
Cleaning your vacuum filter properly requires removing the filter assembly, tapping off loose debris, washing washable foam or pleated components under cold running water, and letting them air dry completely for at least 24 to 48 hours before reinstalling. If your filter is a non-washable HEPA variant, you must gently tap it clean or use a soft brush instead of water to avoid ruining the internal fibers.
Maintaining clean filtration restores full suction power, prevents motor burnout, and stops trapped dust and allergens from blowing back into your living space during 2026 household cleaning routines. Whether you are troubleshooting a sudden drop in performance or sticking to a routine maintenance schedule, knowing the exact steps for your specific filter type ensures your vacuum operates at peak efficiency.
Key Takeaways
- Always unplug your vacuum cleaner before accessing or removing any internal filters.
- Check manufacturer labels to confirm whether your specific filter model is washable with water.
- Tap foam and pleated filters gently over a trash can to dislodge loose, trapped dust.
- Air dry washable filters for a full 24 hours before reinstalling them into the vacuum.
- Never run a vacuum with a damp filter, as this invites mold growth and motor burnout.
Why Your Vacuum Loses Suction: The Problem with Clogged Filters
When you notice your vacuum leaving dirt behind or struggling to pick up debris, a clogged filter is usually the culprit. As you clean your floors, fine dust, pet dander, and microscopic particles pass through the dust bin and immediately embed themselves into the vacuum filter.
How Airflow Restrictions Overheat Your Motor
Modern vacuums rely on unobstructed airflow to cool the internal electric motor. When layers of packed dust block the filter:
- Airflow drops by up to 50 percent within just a few weeks of heavy use.
- The motor works twice as hard to pull air through the restriction.
- Internal temperatures rise rapidly, risking thermal overload and permanent motor failure.
The Hidden Cost of Ignoring Filter Maintenance
Skipping regular filter cleanings does more than just hurt your cleaning performance. Trapped microscopic debris eventually breaks through saturated filters, recirculating allergens back into your home air. By taking ten minutes to clean your filter every month, you preserve suction power and extend the overall lifespan of your machine.
Master Vacuum Filter Maintenance in 7 Simple Steps
Welcome to your go-to manual for revitalizing your home cleaning appliance. Over time, dust, pet dander, and fine microscopic debris clog your vacuum’s filtration system, drastically reducing suction power and releasing unpleasant odors back into your living space. This comprehensive walkthrough is designed to show you exactly how to properly maintain, wash, and dry your specific vacuum filter type without damaging sensitive materials. By following these precise instructions, you will not only extend the lifespan of your motor and improve indoor air quality, but you will also restore peak cleaning performance to your trusty machine.
Step 1: Unplug and Locate the Filtration System
What you need: Your vacuum cleaner, a well-lit workspace, and an empty flat surface like a kitchen counter or table.
Instructions: Before touching any internal components, ensure your vacuum is completely unplugged from the electrical outlet to prevent accidental startups. Consult your owner’s manual to locate the filter housing compartments, as most modern upright and canister vacuums feature both a pre-motor foam or felt filter and a secondary post-motor HEPA filter. Gently release the latches, press the release buttons, or twist the filter cover counterclockwise to open the compartment. Carefully slide the filter assembly outward, taking note of its exact orientation so you can reinstall it smoothly later.
Pro Tip: Never force plastic latches or covers; if a compartment resists opening, double-check your manual to ensure you are releasing the correct locking mechanism.
Step 2: Perform Initial Dry Debris Removal
What you need: A large kitchen trash can, old newspapers or paper towels, and a pair of rubber cleaning gloves.
Instructions: Take the extracted filter assembly directly over your household trash can and gently tap the rigid plastic frame against the inner rim to dislodge loose, caked-on dust and heavy dirt clumps. If your filter has pleated paper or a thick mesh shroud, use very light tapping motions to avoid puncturing or tearing the delicate material. For stubborn surface dust wedged deep inside pleats, use a soft-bristled toothbrush to gently brush downward along the folds, always moving in the direction of the pleats rather than across them.
Pro Tip: Perform this initial outdoor or over a deep bin while wearing a dust mask, as tapping dry filters releases a significant cloud of fine particulate matter into the air.
Step 3: Determine Your Filter Type (Washable vs. Non-Washable)
What you need: The vacuum filter unit and your vacuum’s manufacturer instruction manual or online reference guide.
Instructions: Carefully examine your filter for specific manufacturer markings such as “Washable” or “Non-Washable” printed directly on the rim or plastic housing. Foam and standard mesh filters are almost always designed for water rinsing, while traditional pleated paper HEPA filters or carbon-impregnated filters will warp, degrade, or lose their electrostatic charge if exposed to moisture. If your filter features a paper element, skip the washing steps and rely solely on dry brushing and gentle tapping. If it is marked washable, you are ready to proceed to the water-rinse phase.
Pro Tip: Never guess whether a filter is washable; washing a non-washable paper HEPA filter ruins the microscopic fibers and instantly destroys its filtration capabilities.
Step 4: Wash with Lukewarm Water Only
What you need: A clean sink, lukewarm running tap water, and mild dish soap (strictly optional for heavily soiled foam).
Instructions: Turn on your faucet and adjust the temperature until the water feels comfortably lukewarm—never use hot water, as high temperatures can melt glues or warp the plastic frame. Hold the washable filter under the running stream, allowing water to flow from the clean side out through the dirty side to push trapped debris away from the pores. If the filter is excessively greasy or coated in stubborn pet oils, apply a single drop of mild dish soap and gently massage it into the material before rinsing thoroughly until the water runs completely clear.
Pro Tip: Avoid using harsh chemical detergents, bleach, or abrasive scouring pads, as these substances chemically break down foam elasticity and degrade filter membranes.
Step 5: Remove Excess Moisture
What you need: Several clean, lint-free microfiber towels or thick paper towel sheets.
Instructions: Once the rinsing process is complete, gently shake the filter over the sink to fling off heavy droplets of water. Place the damp filter flat onto a dry microfiber towel, wrap or press the towel gently around the filter, and apply firm, even pressure with your hands to absorb trapped moisture from the core and outer layers. Do not aggressively wring, twist, or squeeze foam or pleated filters, as this mechanical stress permanently stretches the material and ruins its tight structural fit inside the vacuum.
Step 6: Air Dry Completely (The 24-Hour Rule)
What you need: A well-ventilated room, a drying rack or flat surface away from direct sunlight and heat sources.
Instructions: Position the damp filter upright on a drying rack or a clean towel in an area with good air circulation. Allow the filter to air dry naturally for a minimum of 24 to 48 hours depending on ambient humidity levels. Do not attempt to speed up this process by using hair dryers, clothes dryers, microwaves, or placing the filter directly on heating vents, as excessive direct heat will shrink and permanently distort the plastic frame and filter media.
Pro Tip: Smell the filter before reinstallation; if it still smells musty or damp, it is not completely dry inside and requires additional drying time to prevent mold growth.
Step 7: Reassemble and Test the Vacuum
What you need: Your completely dry vacuum filter, vacuum body, and access to a power outlet.
Instructions: Once you are 100 percent certain the filter is dry to the touch, align it carefully within its designated housing slot. Press firmly until you feel or hear a secure click, ensuring no gaps or pinched edges allow unfiltered air to bypass the system. Close the filter compartment door and lock all latches securely. Plug the vacuum back into the wall outlet, turn the power switch on, and listen to the motor pitch while checking for proper suction at the base nozzle.
Pro Tip: If your vacuum emits a high-pitched whistling noise after reassembly, the filter is likely not seated properly or the cover door is unlatched.
✅ Final Checklist
- Vacuum was safely unplugged from power source before opening housing compartments.
- Filter type was correctly identified as washable or non-washable prior to cleaning.
- All loose surface dust and trapped debris were removed via dry brushing or tapping.
- Washable filter was rinsed exclusively with lukewarm water and left to air dry for a full 24 hours.
- Filter is completely seated, locked securely into place, and vacuum suction is fully restored.
Important Notes:
- Never operate your vacuum cleaner without a filter installed, as fine dust particles will immediately damage the motor bearings and void your appliance warranty.
- If your vacuum emits a burning smell, loses suction immediately after cleaning, or if the filter fabric remains torn or discolored, stop use and replace the filter with a certified OEM replacement part.
- Estimated time: 20 minutes of active work time plus 24 hours of passive drying time. Cost: Free (unless replacement filter parts are needed, averaging $10 to $30).
How to Identify Filter Types and Assess Cleaning Needs
Before you take any cleaning action in 2026, you need to know exactly what kind of filter your vacuum uses. Treating the wrong filter with water can destroy it instantly, leading to costly replacement parts.
Washable Foam and Pleated Paper Filters
Most modern bagless upright and stick vacuums feature a multi-stage filtration system that includes a foam sleeve, a felt pad, or a pleated cartridge. To check if yours is washable, look for the manufacturer label printed directly on the plastic rim or consult your manual. Washable filters typically feature a water droplet icon or explicitly state “Rinse under water.”
Non-Washable HEPA and Specialized Cartridges
High-efficiency particulate air (HEPA) filters trap 99.97 percent of microscopic particles down to 0.3 microns. Many of these dense paper or fiberglass matrices are strictly non-washable. Exposing them to moisture ruins the delicate paper structure and destroys their filtration capability. Always inspect your filter for a “Do Not Wash” warning before bringing it anywhere near a sink.
Step-by-Step Instructions on How to Clean Your Vacuum Filter
Executing the cleaning process correctly prevents permanent motor damage and maintains optimal suction power. According to appliance manufacturers and maintenance experts, following a precise sequence ensures thorough debris removal without damaging sensitive materials.
Sub-Step 1: The Initial Knock-Out
- Take the filter outdoors or hold it deep inside a large waste bin to contain airborne micro-dust.
- Gently tap the rigid plastic frame against a hard, flat surface to dislodge trapped dirt, pet hair, and large particulate clumps.
- Avoid striking the pleated paper or delicate mesh material directly, as this causes structural tears and compromises filtration integrity.
- Rotate the filter while tapping to ensure even debris release from all internal folds and crevices.
Sub-Step 2: Rinsing and Drying Protocols
- Hold washable foam or pleated filters under a gentle stream of lukewarm tap water until the runoff turns completely clear.
- Never use dish soap, laundry detergents, or harsh chemical solvents unless explicitly recommended in your specific user manual.
- Gently squeeze excess moisture from foam components, avoiding aggressive twisting or wringing that stretches the material.
- Place the filter in a well-ventilated area out of direct sunlight for a minimum of 24 to 48 hours to dry completely.
- Verify absolute dryness by touching the deepest folds before reinstallation, as trapped moisture creates mold and burns out the motor.
What If It Still Doesn’t Work?
If thorough cleaning fails to restore your vacuum cleaner’s suction, deeper mechanical issues likely exist. Industry repair data shows that persistent airflow loss often stems from clogs or component degradation beyond simple filter maintenance. Try these fallback steps before abandoning your machine:
- Inspect the entire length of the vacuum hose and extension wand for hidden blockages, using a broom handle or flashlight to clear jammed debris.
- Check the brush roll and motorized floor head for tangled hair, thread, and carpet fibers that restrict spinning and airflow channels.
- Examine rubber seals, gaskets, and collection bin latches for cracks or loose fits that cause destructive air leaks.
- Consult a certified service technician if the motor sounds strained or emits a burning odor despite a clean airflow path.
- Evaluate replacement costs: professional motor repairs typically range from $75 to $150, making a brand-new unit more economical if your machine is over five years old.
Conclusion
Maintaining peak cleaning performance in 2026 relies heavily on routine filter upkeep and timely component replacements. Neglecting this simple maintenance task strains the motor and drastically reduces indoor air quality. According to verified research and appliance expert sources, establishing a consistent bi-weekly cleaning schedule doubles the operational lifespan of modern vacuum systems. Your immediate next step is to remove your vacuum filter today, inspect its condition, and follow the proper washing or tapping guidelines outlined above.
❓ Frequently Asked Questions
Is it safe to wash all vacuum filters with water?
No. While foam and some pleated filters are fully washable, standard paper HEPA filters will be ruined by water. Always check the user manual or look for washing symbols printed on the filter housing.
Can I use a hair dryer to speed up the filter drying process?
Using a hair dryer or any heat source to dry a vacuum filter is strongly discouraged. Direct heat can warp the plastic frame, melt synthetic fibers, or shrink the material, ruining the airtight seal.
Why does my vacuum still smell bad after cleaning the filter?
Trapped bacteria, pet dander, and fine dust embedded deep within the fibers can cause lingering odors. If washing and thorough drying do not eliminate the smell, it is time to replace the filter entirely.
Should I tap a HEPA filter to clean it?
Non-washable HEPA filters should only be tapped very gently against a hard surface to release loose surface debris. Striking them too hard can puncture the delicate pleated paper material, rendering the HEPA filtration ineffective.
Does cleaning the vacuum filter actually improve suction?
Yes. A clogged filter blocks vital airflow, forcing the motor to work harder while pulling less dirt from your floors. Cleaning or replacing the filter immediately restores proper airflow and maximum suction strength.
How many times can a washable vacuum filter be reused?
A quality washable foam or cloth filter can typically last for the lifetime of the vacuum if rinsed regularly and allowed to dry completely. However, you should still inspect them annually for structural wear and tear.