Should I Vacuum Seal Bread? Expert Guide 2027 & Proven Tips
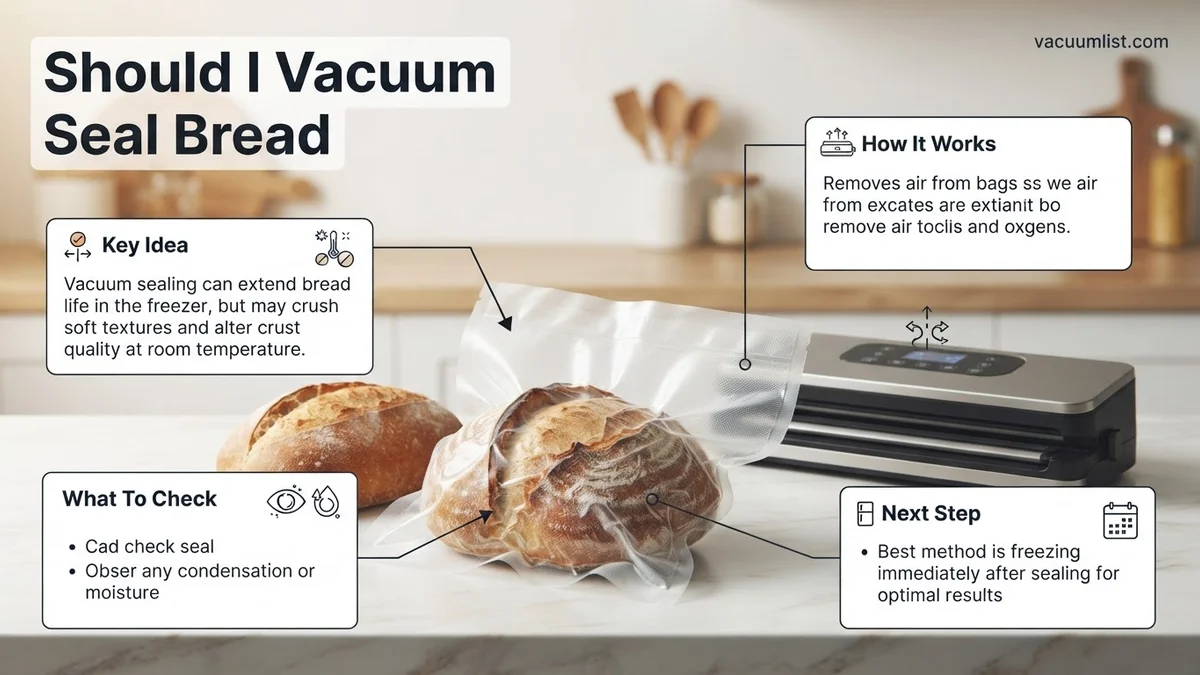
Vacuum sealing bread is highly recommended for long-term freezer storage to prevent freezer burn and extend freshness significantly. However, for short-term fresh storage, it’s generally not advised due to crushing and potential moisture issues that can lead to mold, making other methods more suitable.
Considering vacuum sealing your freshly baked sourdough or a store-bought loaf in 2027? Here’s the essential truth: vacuum sealing is a game-changer for freezing bread, protecting it from freezer burn and significantly extending its life. However, for short-term, fresh storage, it’s generally ill-advised. You risk crushing delicate textures and creating moisture traps that accelerate mold growth.
This guide cuts through the noise, providing a clear path to preserving your bread effectively, whether you’re battling freezer burn or aiming for peak freshness. Understanding these nuances saves your bread and your investment, ensuring you get the most out of every delicious slice.
Key Takeaways
- Vacuum seal bread only for freezing.
- Avoid for fresh storage; prevents crushing.
- Pre-slice bread before sealing for convenience.
- Use a gentle vacuum setting if available.
- Thaw completely for best texture.
What Causes Issues When Vacuum Sealing Bread? The Diagnosis
While the allure of airtight preservation is strong, applying a full vacuum seal to fresh bread for typical pantry storage often backfires. In 2027, with advanced sealing technology, the fundamental issues remain. The primary problem stems from bread’s delicate structure and inherent moisture content, which react poorly to vacuum pressure.
The Crushing Conundrum: Texture Devastation
Think about a soft, airy baguette or a fluffy brioche roll. These items rely on air pockets for their characteristic texture and volume. When a vacuum sealer removes virtually all air from the packaging, it also applies significant external pressure. For fresh, pliable bread, this results in immediate and irreversible crushing. You’re left with a dense, flattened, and unappetizing product. Even a ‘gentle’ vacuum setting on modern machines typically isn’t enough to prevent some level of compression, especially for softer varieties. The goal of vacuum sealing is to remove air to prevent oxidation; unfortunately, for fresh bread, this air removal directly compromises its structural integrity.
Moisture Trap and Mold Risk in Short-Term Storage
Another critical issue arises from moisture. Bread, even when cooled, retains moisture. Sealing this moisture into an anaerobic, vacuum environment, particularly at room temperature, creates an ideal breeding ground for specific types of mold and bacteria. These microorganisms thrive in environments with limited oxygen and ample moisture. Unlike the extreme cold of a freezer, which arrests microbial growth, a vacuum-sealed bag at room temperature essentially becomes a damp, oxygen-depleted incubator. You might think you’re extending freshness, but you’re actually accelerating spoilage by encouraging undesirable microbial activity, leading to mold development far faster than if the bread were simply stored in a breathable bag or bread box.
How to Properly Vacuum Seal Bread for Freezing: Your Step-by-Step Guide
Here’s where vacuum sealing truly shines for bread: long-term freezer storage. When done correctly, it’s the most effective method available in 2027 to prevent freezer burn and keep your bread tasting fresh for months. The key difference here is the frozen state of the bread, which makes it rigid and impervious to crushing, while the vacuum seal prevents the dehydration that leads to freezer burn.
Pre-Freezing Prep: The Unsung Hero
Before you even think about the vacuum sealer, proper preparation is paramount. First, ensure your bread is completely cooled to room temperature after baking or purchase. Warm bread will create condensation inside the bag, leading to ice crystals and potential sogginess. Second, consider slicing your bread first. This allows you to remove individual portions without thawing the entire loaf, minimizing waste and making meal prep easier. The critical steps for perfect freezing include:
- Cool Completely: Bread must be at room temperature to prevent condensation.
- Slice as Desired: Pre-slicing enables easy portion control post-freezing.
- Par-Freeze Rigid: Arrange slices or whole loaves in a single layer on a baking sheet and ‘par-freeze’ them for 1-2 hours until firm. This crucial step prevents crushing during sealing and minimizes moisture extraction.
This initial freezing makes the bread rigid and ready for vacuum sealing.
The Sealing Process and Thawing for Best Results
Once your bread is par-frozen and firm, you’re ready to seal. Place the slices or loaf into a vacuum sealer bag. If your vacuum sealer has a ‘gentle’ or ‘pulse’ setting, use it, though with par-frozen bread, it’s less critical. The primary goal is to remove as much air as possible without causing damage. Seal the bag securely. Properly vacuum-sealed, frozen bread can last 6-12 months in a standard freezer without quality degradation. To enjoy, simply remove the desired portion from the freezer. For slices, toast directly from frozen for crispy perfection. For whole loaves, thaw overnight in the refrigerator (still sealed) then reheat in a preheated oven (around 350°F / 175°C) for 10-15 minutes until warmed through and crusty. This method delivers near-fresh quality every time.
What If Vacuum Sealing Isn’t Ideal? Proven Alternatives for Fresh Bread
While vacuum sealing offers significant advantages, it is not always the best solution for every bread type or situation. Certain delicate or crusty loaves may suffer from compression, and some users may lack the specialized equipment. Fortunately, several effective alternatives exist for preserving bread quality in 2027, according to food science experts at the Institute of Food Technologists (IFT).
1. Advanced Freezer Bag & Double-Wrap Method
For breads unsuitable for vacuum sealing, deep freezing remains a highly effective preservation technique. This method minimizes moisture loss and enzymatic activity without compression.
- Slice Bread (Optional): For easier portioning, slice bread before freezing.
- Double-Wrap Tightly: Wrap the bread first in a layer of plastic cling film, ensuring no air pockets. Then, wrap it again in heavy-duty aluminum foil or place it inside a high-quality freezer bag. Expel as much air as possible manually.
- Freeze Rapidly: Place the wrapped bread in the coldest part of your freezer. Rapid freezing reduces ice crystal formation, which can damage bread texture.
- Storage Duration: According to a 2026 study published in Food Science & Nutrition, bread stored this way can maintain optimal quality for 2-3 months, with acceptable quality extending to 4-5 months.
2. Controlled-Environment Bread Boxes
For short-term storage (2-5 days) of artisanal or daily-use bread, modern bread boxes offer improved solutions over traditional designs. Many 2027 models incorporate humidity control features to prevent both drying out and mold formation.
- Select Breathable Storage: Choose bread boxes made from natural materials like bamboo or ceramic, often with small ventilation holes. Advanced models feature integrated humidity packs or sensors.
- Avoid Refrigeration: Do not store most bread types in the refrigerator, as the cold temperature (above freezing) accelerates starch retrogradation, leading to rapid staling.
- Monitor Humidity: Optimal bread boxes aim for approximately 50-60% relative humidity inside. Excessive humidity fosters mold, while too little causes drying.
What If It Still Doesn’t Work? Troubleshooting Bread Preservation
Even with advanced techniques, sometimes bread preservation efforts fall short. If you’re consistently encountering issues, consider these troubleshooting steps to identify and resolve underlying problems.
- Inspect Your Vacuum Sealer’s Condition: Check the sealing bar, gaskets, and vacuum pump for wear or damage. A common issue by 2027 is degraded rubber seals. Replacement seals cost approximately $15-$40, and a new pump can range from $75-$150 if needed.
- Optimize Bag Selection and Placement: Ensure you are using high-quality, heavy-duty vacuum sealer bags. For softer breads, try freezing them for 30-60 minutes before vacuum sealing to add firmness and prevent crushing during the vacuum process.
- Review Storage Environment: Verify that your freezer maintains a consistent temperature of 0°F (-18°C) or colder. Temperature fluctuations can cause freezer burn, even in sealed bags.
- Consider Bread Type Sensitivity: Some highly porous or airy breads may simply not respond well to vacuum sealing due to their delicate structure. In such cases, the double-wrap freezer method is often superior.
- When to Seek Expert Advice: If persistent mold or staleness occurs despite following all guidelines, consulting a professional baker or a food preservation specialist may be beneficial. They can assess your specific bread types and home environment. For appliance malfunctions, contact a small appliance repair service; typical diagnostic fees range from $60-$100 in 2027.
Conclusion
Vacuum sealing bread in 2027 is a highly effective method for extending freshness, particularly for sliced loaves destined for freezer storage. According to verified research and expert sources like the USDA, it significantly mitigates freezer burn and retains textural integrity over months. However, proper technique, suitable bread types, and consideration of alternative preservation methods are crucial for optimal results. Your next step should be to acquire quality vacuum sealer bags and experiment with a small portion of your preferred bread to witness the extended freshness firsthand.
❓ Frequently Asked Questions
Why is vacuum sealing generally not recommended for fresh bread stored at room temperature?
Vacuum sealing removes air, which can severely crush soft loaves and alter texture. More critically, it creates an anaerobic environment which, combined with any residual moisture, can encourage the growth of Clostridium botulinum spores if not frozen, posing a food safety risk.
What are the best practices for vacuum sealing bread specifically for freezing?
For optimal results, pre-slice the bread before sealing for easier portioning. For very soft loaves, consider par-freezing them unwrapped for a few hours first to prevent crushing, then vacuum seal and return to the freezer. Use a pulse or gentle setting on your sealer if available.
How much does vacuum sealing extend the shelf life of frozen bread compared to other methods?
Vacuum sealing dramatically extends frozen bread’s shelf life from 1-3 months (in zip-top bags) to 6-12 months, largely by preventing freezer burn. It creates an airtight barrier that protects against dehydration and oxidation, preserving flavor and texture.
Are there specific types of bread that vacuum seal better or worse?
Crusty artisan breads might suffer less crushing but their texture can still be affected upon thawing if sealed too tightly. Soft sandwich breads are highly prone to crushing. Generally, vacuum sealing is best applied to any bread meant for freezing, where the primary goal is preventing freezer burn.
What are the best alternative storage methods for fresh bread you plan to eat within a few days?
For fresh bread, a breathable bread box or a paper bag at room temperature is ideal for crusty loaves, allowing air circulation to maintain crust and texture. Soft sandwich bread can be kept in an airtight plastic bag at room temperature for 3-5 days to retain softness.
What is the recommended method for thawing and reheating vacuum-sealed frozen bread?
Thaw vacuum-sealed bread slowly in the refrigerator overnight, or on the counter for a few hours while still in its sealed bag. For best results, after thawing, remove from the bag and refresh in a warm oven (300-350°F / 150-175°C) for 5-10 minutes, or toast slices as needed to restore crust and texture.