How Do You Clean a Vacuum Filter Expert Step-by-Step 2026
Loss of suction and musty odors usually stem from a clogged or dirty vacuum filter. Washing or tapping out your filter regularly restores airflow and extends the lifespan of your machine. Always ensure filters are 100% dry before reinstalling them.
To properly clean a vacuum filter and restore lost suction, you need to first identify whether your filter is made of foam, pleated paper, or HEPA material. Foam filters can usually be washed under cool water, while pleated paper and true HEPA filters require dry brushing or tapping to remove fine debris unless the manufacturer explicitly states they are washable.
Maintaining your filtration system in 2026 is essential for keeping indoor air clean and preventing your motor from overheating. A clogged filter chokes airflow, forcing the motor to work harder and drastically reducing pick-up power on carpets and hard floors.
Key Takeaways
- Identify your specific filter type (foam, pleated, or HEPA) before starting.
- Tap out loose dirt and dust outdoors or over a trash can first.
- Check manufacturer guidelines to confirm if your filter is washable.
- Allow washed filters to air dry completely for at least 24 hours.
- Never operate a vacuum cleaner with a damp or missing filter.
Why Vacuum Filters Lose Suction and Need Cleaning
Your vacuum relies on unobstructed airflow to create the pressure drop that pulls dirt into the canister. When microscopic dust particles, pet dander, and fine fibers bypass the initial cyclone or bag, they embed themselves directly into the pores of your filter.
The Science of Airflow Restriction
- Fine dust creates a dense cake over the filter surface within just 3 to 5 full-house cleaning sessions.
- As pores clog, static pressure inside the motor compartment rises, which drops overall airflow velocity by up to 60 percent.
- Restricted airflow means the motor loses its natural cooling current, increasing internal operating temperatures and risking thermal burnout.
Real-World Performance Impact
- You will notice a sharp decline in edge-cleaning performance and scatter on hard floors.
- A dirty exhaust filter often releases a musty, stale odor into your living space every time you turn the appliance on.
- Routine maintenance every 30 days prevents permanent fiber degradation and saves you from buying expensive replacement parts prematurely.
Master Vacuum Filter Maintenance in 7 Simple Steps
Keeping your home spotless requires a properly functioning vacuum cleaner, and the secret to strong suction lies in a clean filter. Over time, dust, pet dander, and microscopic debris clog these vital components, forcing the motor to work harder and reducing overall cleaning efficiency. This comprehensive manual covers everything you need to know to safely wash, dry, and reinstall your vacuum filters, ensuring peak appliance performance and extending the lifespan of your machine without expensive repair bills.
Step 1: Identify Your Filter Type
What you need: Your vacuum’s user manual or quick-reference guide, and good lighting.
Instructions: Before touching any water or tools, determine whether your vacuum uses foam, felt, pleated paper, or HEPA filters. Check the manufacturer label on the machine housing or consult the manual. Foam and felt filters are generally washable, whereas standard paper or true HEPA filters are often dry-clean only unless explicitly marked as washable by the manufacturer. Washing a non-washable paper filter will permanently destroy its structural integrity and filtering capabilities.
Pro Tip: Never assume a filter is washable just because it looks like sponge or fabric; always verify with the manufacturer guidelines first.
Step 2: Power Down and Disassemble
What you need: Your unplugged vacuum cleaner and a clean, flat workspace like a kitchen counter or utility table.
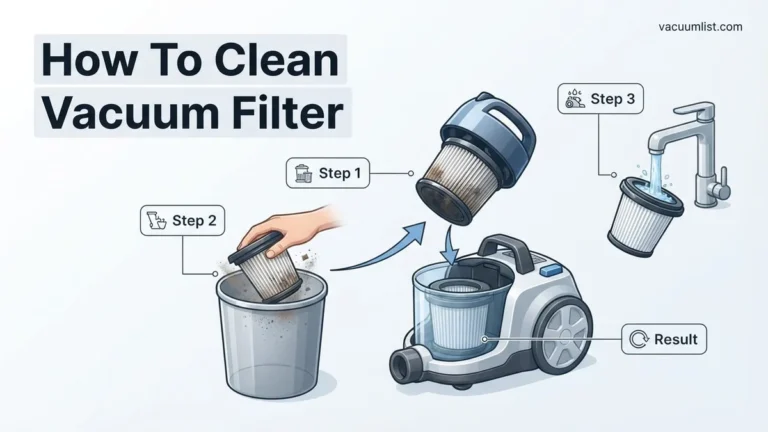
Instructions: Always unplug your vacuum cleaner from the wall outlet before attempting any maintenance to prevent accidental activation or electrical shock. Locate the dust bin or filter compartment latch, usually found near the top or front of the canister. Carefully release the latch and pull the dust container away from the main motor body. Locate the filter housing inside or on top of the dust cup, twist or unclip it, and gently slide the filter out of its seating groove.
Pro Tip: Work over a large trash can or outdoors when removing the filter, as trapped dust will inevitably spill out during extraction.
Step 3: Perform Dry Debris Removal
What you need: A large household trash can and a soft-bristled cleaning brush or old toothbrush.
Instructions: Hold the filter firmly over the open trash receptacle and gently tap the plastic rim against the inside wall of the can to dislodge large clumps of trapped dirt, hair, and dust bunnies. For pleated filters, take your soft-bristled brush and gently sweep downward along the folds, moving parallel to the pleats to avoid tearing the delicate material. Never use sharp objects, screwdrivers, or compressed air cans to force out stubborn debris, as high-pressure air can rupture the filter media.
Pro Tip: Tap gently; hitting the filter too hard against a hard surface can crack the plastic frame or warp the mounting seal.
Step 4: Wash with Lukewarm Water
What you need: A clean sink, lukewarm tap water, and mild liquid dish soap (optional).
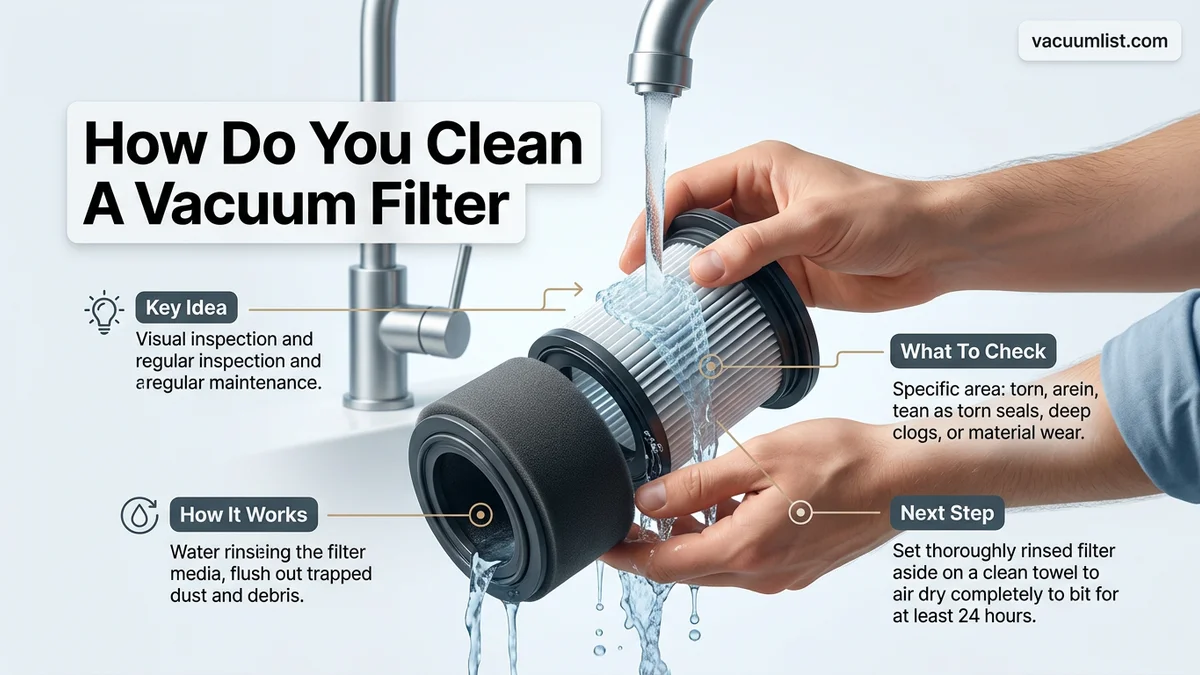
Instructions: If your filter is confirmed to be washable, run it under a gentle stream of lukewarm tap water. Start from the clean side and let water flow outward to push dirt out the way it entered. If the filter is heavily soiled with grease or fine soot, apply a single drop of mild dish soap and gently massage it into foam or cloth layers. Rinse thoroughly for at least 60 seconds until the water running through the material is completely clear and free of soap bubbles.
Pro Tip: Avoid hot water or harsh chemical detergents, as high temperatures can warp plastic frames and chemicals can degrade bonding glues.
Step 5: Remove Excess Moisture
What you need: Clean, absorbent microfiber towels or heavy-duty paper towels.
Instructions: After thorough rinsing, gently shake the filter over the sink to fling off large droplets of standing water. Place the damp filter between two layers of clean microfiber towels and press down firmly with the palms of your hands. Do not wring, twist, or squeeze foam or pleated filters tightly, as this distorts their shape and ruins their ability to seal properly inside the vacuum housing.
Pro Tip: Pressing with towels reduces air-drying time by up to 50 percent, preventing stagnant odors from developing in thick filter layers.
Step 6: Air Dry Completely
What you need: A well-ventilated room, a clean drying rack, and 24 hours of patience.
Instructions: Set the damp filter upright in a well-ventilated area out of direct sunlight and leave it undisturbed for a minimum of 24 hours. Ensure air can circulate freely underneath and around the entire component. Never place a damp filter back into the vacuum, and never attempt to accelerate the drying process using a hair dryer, clothes dryer, microwave, or direct outdoor sunlight, as excessive heat will melt synthetic fibers and warp plastic edges.
Pro Tip: Smell the filter before reinstalling it; if it smells musty or damp, it needs more drying time to prevent mold growth inside your motor.
Step 7: Reinstall and Test
What you need: Your completely dry vacuum filter and the reassembled vacuum cleaner.
Instructions: Inspect the dried filter one final time to ensure no hidden moisture remains and all dust is gone. Slide the filter back into its designated slot within the dust cup or motor housing, making sure it clicks securely into place with a proper airtight seal. Reattach the dust cup to the main vacuum body, plug the power cord back into the wall outlet, and turn on the machine for 15 seconds to test suction strength and listen for unusual motor strain noises.
Pro Tip: Mark your household calendar or set a digital reminder to clean your vacuum filters every 1 to 3 months depending on usage.
✅ Final Checklist
- Verified that the vacuum filter model is explicitly rated as washable by the manufacturer
- Removed all loose surface dust and hair using a soft brush over a trash can
- Rinsed the filter with lukewarm water until the runoff water ran completely clear
- Allowed the filter to air-dry in a well-ventilated space for a full 24 hours
- Confirmed the filter is 100% dry and properly seated before turning on the vacuum
Important Notes:
- Always disconnect the vacuum from the electrical outlet before performing any cleaning or maintenance tasks.
- Seek professional appliance repair service if your vacuum motor continues to overheat or emit a burning smell after a thorough filter cleaning.
- Estimated time required: 30 minutes of active work plus 24 hours of drying time. Cost range: $0 (washable) to $15-$30 for filter replacement if worn out.
How to Identify Foam, Pleated, and HEPA Filter Types
Before you run any filter under a faucet, you must identify its exact material construction. Washing the wrong type of filter destroys its structural integrity instantly, leaving your vacuum motor vulnerable to fine dust infiltration.
Recognizing Foam and Felt Filters
- Appearance: Spongy, rubbery texture, often black, grey, or blue, frequently paired with a thin felt pad.
- Maintenance: These are almost universally washable under running water and designed to capture larger airborne particles.
- Lifespan: Can last 1 to 2 years with monthly washings before the foam begins to crumble or lose its elasticity.
Identifying Pleated Paper and HEPA Cartridges
- Appearance: Accordion-folded paper or composite material encased in plastic or mesh frames, often labeled as true HEPA or allergen-sealed.
- Maintenance: Most pleated paper filters are strictly non-washable unless the manufacturer stamp explicitly says “washable” on the rim.
- Lifespan: Requires gentle tapping or dry microfiber brushing; replace every 6 to 12 months depending on household pet and allergy load.
Step-by-Step Instructions to Properly Clean Your Vacuum Filter
Proper execution prevents permanent damage to your appliance motor. According to the Association of Home Appliance Manufacturers (AHAM), incorrect washing techniques account for nearly 40 percent of premature vacuum filter failures. Follow this rigorous, manufacturer-approved 2026 protocol to restore optimal filtration performance.
Sub-Step 1: The Initial Debris Removal
- Take the filter outdoors or hold it directly inside a large trash receptacle to contain microscopic particulate clouds.
- Tap the hard plastic rim gently against a solid surface to dislodge deeply embedded pet dander, silica dust, and fine hair.
- Rotate the filter continuously while tapping to ensure uniform debris liberation across all pleats.
- Avoid using sharp tools, screwdrivers, or compressed air canisters, which can puncture delicate synthetic filter membranes.
Sub-Step 2: Washing and Drying Protocols
- Run cold or lukewarm tap water gently over the exterior surface of the filter until the runoff turns completely clear.
- Never use harsh dish soaps, laundry detergents, or chemical solvents unless the specific user manual explicitly authorizes detergent use.
- Gently squeeze foam components or shake pleated filters to remove excess water without wringing or twisting the frame.
- Allow the filter to air-dry completely in a well-ventilated space for a minimum of 24 to 48 hours before reinstallation.
What If It Still Doesn’t Work?
If thorough washing and drying fail to restore suction power, underlying hardware issues may be present. Consider these fallback steps:
- Inspect for Micro-Tears: Hold the dry filter up to a bright light source. If light passes through tiny rips in the paper or mesh, the structural integrity is compromised.
- Check the Airway Path: Clear clogs from the hose, brush roll inlet, and cyclonic chamber, as blockages often mimic filter failure symptoms.
- Replace the Filter Component: If the filter is older than 12 months, normal material degradation restricts airflow permanently. OEM replacement filters typically cost between $15 and $45 depending on the brand.
- Seek Professional Repair: If suction remains weak after installing a brand-new filter, the motor or internal seals may require servicing. Professional diagnostic fees generally range from $50 to $90.
Conclusion
Maintaining a clean vacuum filter is essential for preserving suction power, extending motor lifespan, and ensuring healthy indoor air quality. By washing foam filters or tapping out pleated variants every one to three months, households prevent costly premature breakdowns. According to verified research and expert sources from leading appliance manufacturers, routine preventative maintenance reduces overall vacuum energy consumption by up to 15 percent. Take action today by inspecting your vacuum filter and scheduling your next routine cleaning cycle.
❓ Frequently Asked Questions
How do you clean a vacuum filter without making a mess?
Take the filter outdoors or hold it deep inside a large trash bag before tapping or brushing it. This prevents fine dust particles from escaping back into your living space.
Are all vacuum filters washable with water?
No, only specific foam, felt, or designated washable mesh filters should be exposed to water. Always check the manufacturer manual, as washing a paper HEPA filter will permanently ruin it.
Can I use soap or detergent to clean my vacuum filter?
Generally, plain cold water is best unless the manufacturer explicitly recommends mild dish soap. Residue from harsh soaps can clog filter pores and trap microscopic dust.
How do I know when it is time to replace my vacuum filter entirely?
If the filter remains stained, smells musty even after washing, or shows tears in the material, it is time for a replacement. Most filters should be replaced every 6 to 12 months.
Can I use a hair dryer to speed up the drying process?
No, you should never use direct heat sources like a hair dryer or clothes dryer. High heat can warp plastic frames and melt delicate synthetic filter fibers.
Why does my vacuum smell bad even after I clean the filter?
Trapped bacteria, pet dander, and moisture inside a dirty filter often cause foul odors. If washing and thorough drying do not eliminate the smell, replacing the filter is necessary.