How Much Is It to Fix a Vacuum Leak in 2026? Expert Guide
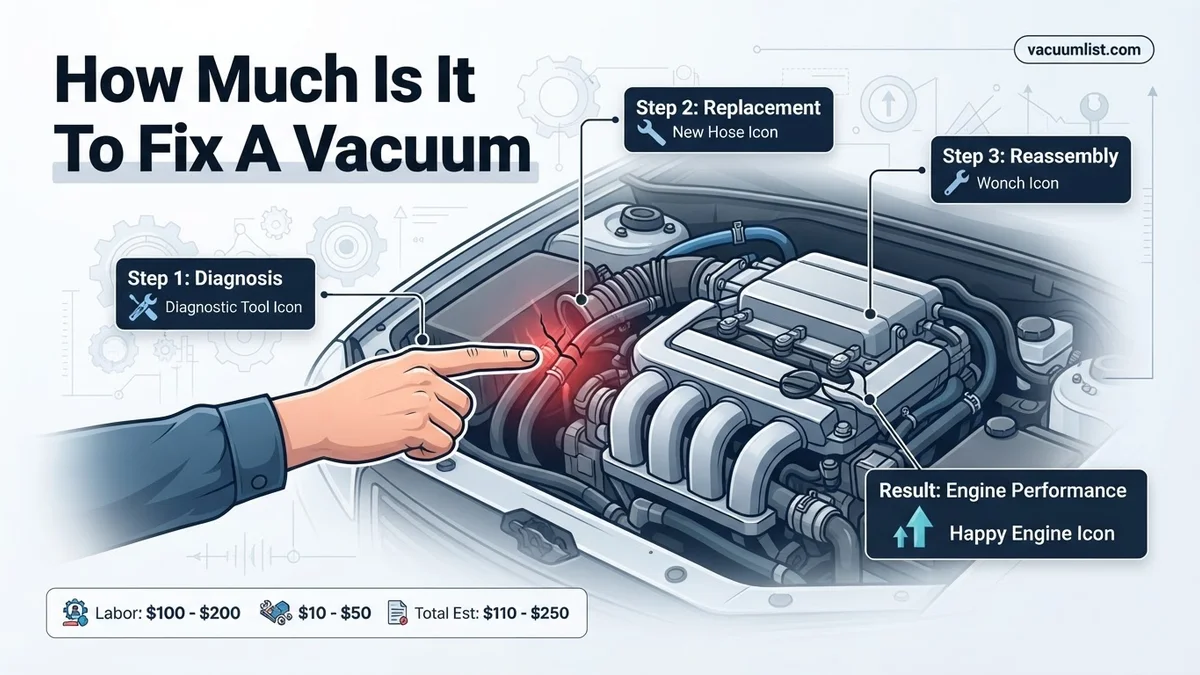
Fixing a car vacuum leak typically costs between $150 and $1,000 depending on the damaged component and your vehicle’s make. Simple hose replacements cost under $100, while complex intake manifold gasket repairs can exceed $800 in labor. Professional diagnosis fees generally range from $100 to $200 before any actual repairs begin.
Fixing a vacuum leak in your car typically costs between $150 and $600 total, depending on labor rates and the exact part that failed. If your engine is idling rough, your fuel economy has plummeted, or the dreaded check engine light has popped on, unmetered air entering your intake system is the likely culprit.
Addressing a vacuum leak quickly protects your engine from running too lean, which can cause severe internal damage over time. Knowing the financial scope helps you budget properly for the repair shop visit and prevents you from overpaying for standard diagnostic procedures.
Key Takeaways
- Expect to pay $100 to $200 for a professional mechanic diagnostic test.
- Replacing a rubber vacuum hose is a quick DIY fix costing less than $20.
- Intake manifold gaskets are labor-intensive and often cost $500 to $1,000.
- Rough idling and a Check Engine light are the primary symptoms of leaks.
- Ignoring a vacuum leak can lead to engine overheating and catalytic converter failure.
Average Cost to Fix a Vacuum Leak and Diagnosis Fees
Diagnostic Fees to Expect
Most auto repair shops charge a standard diagnostic fee before they even touch a wrench to your engine. In 2026, expect to pay between $100 and $200 just for the diagnosis.
- Shops often apply this fee toward the final cost of the repair if you approve the work.
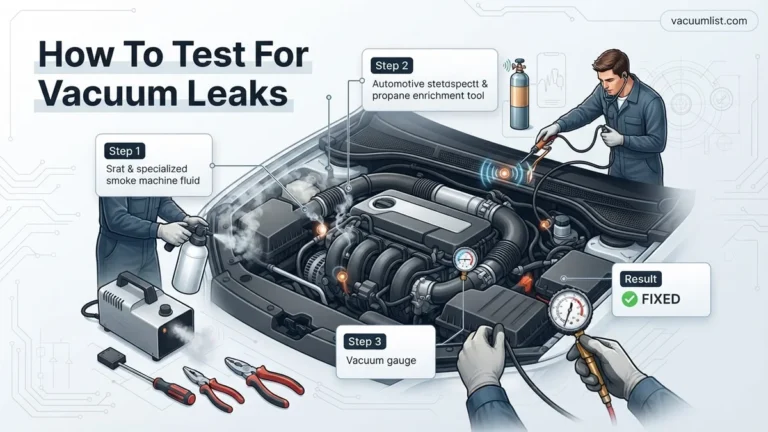
- Mechanics use specialized tools like smoke machines to pump harmless smoke into your intake and spot escaping wisps.
- Electronic scan tools also read live data to check fuel trim anomalies indicating unmetered air.
Total Average Repair Costs
Once the leak is found, the total bill combines labor time and the price of the failed component. Most everyday drivers walk out paying under $400.
- Simple fixes like a slipped rubber hose usually cost $150 to $250 total.
- Complex leaks hidden beneath the intake manifold can push total bills to $500 or $800 due to heavy labor.
- Independent mechanics generally charge lower hourly labor rates than dealership service centers.
Vacuum Leak Repair Costs: What Causes It and How to Fix It
Dealing with a vacuum leak under the hood of your car can be frustrating, leading to rough idling, engine stalling, and decreased fuel economy. This comprehensive walkthrough is designed to help you understand the true costs associated with diagnosing and repairing an automotive vacuum leak, whether you choose the DIY route or head to a professional mechanic. By following this roadmap, you will learn how to accurately budget for parts, labor, and diagnostic procedures so you can restore your engine’s performance without breaking the bank.
Step 1: Recognize the Symptoms and Initial Costs
What you need: OBD-II scanner, notebook, and a keen eye for engine behavior.
Instructions: Before spending any money, you must identify if you actually have a vacuum leak. Common symptoms include an erratic or high idle, engine misfires, a hissing sound from the engine bay, and a Check Engine Light. Plug your OBD-II scanner into the port under your dashboard to check for codes like P0171 or P0174, which indicate a lean air-fuel mixture. If you do not own a scanner, most auto parts stores will read these codes for free. Documenting these symptoms early helps you avoid unnecessary part replacements and gives you a clear baseline for the repair process.
Pro Tip: Do not immediately replace oxygen sensors if you see a lean code; a vacuum leak is almost always the root cause of the fuel trim imbalance.
Step 2: Invest in a Basic DIY Diagnostic Setup
What you need: Spray bottle with soapy water, long-handled screwdriver or mechanic stethoscope, and a bright flashlight.
Instructions: Pinpointing the exact location of the leak requires a systematic inspection of all rubber vacuum hoses, plastic PCV lines, and intake manifold gaskets. Start by visually inspecting every rubber hose for dry rot, cracks, or disconnections. Next, use the propane or soapy water trick: spray a light mist of soapy water around gasket mating surfaces and hoses while the engine idles. If the idle changes or bubbles form, you have found your leak. Alternatively, use a mechanic’s stethoscope (with the probe removed) to listen for a distinct hissing sound around the intake manifold area. This diagnostic phase typically costs under $15 if you use household items, or around $30 for a proper mechanic stethoscope and spray bottles.
Pro Tip: Exercise extreme caution when spraying liquids near the serpentine belt or electrical components to avoid short circuits or slipping belts.
Step 3: Utilize Advanced Smoke Testing (Professional Option)
What you need: Automotive smoke machine (or professional mechanic service).
Instructions: If visual and spray inspections fail to reveal the leak, a smoke machine test is the gold standard. A professional technician will feed low-pressure, dense smoke into the intake system and watch where it escapes into the open air. This instantly exposes micro-cracks in hoses, warped intake manifolds, or failing gaskets that are invisible to the naked eye. If you take your vehicle to a repair shop, expect to pay a diagnostic fee ranging from $100 to $150 just for this smoke test alone. However, it completely eliminates guesswork and ensures you only pay for the exact repair needed.
Pro Tip: Always ask the shop if the diagnostic fee will be rolled into the final cost of labor if you choose to have them perform the actual repair.
Step 4: Price Out Replacement Vacuum Hoses and PCV Lines
What you need: Replacement rubber vacuum tubing (various diameters), zip ties, and utility scissors.
Instructions: The most common and least expensive vacuum leaks stem from degraded rubber hoses and aging PCV (Positive Crankcase Ventilation) valves. Measure the inner diameter and length of the damaged hose, then purchase bulk vacuum line from any local auto parts store. Replacing a simple rubber hose usually costs between $5 and $20 in materials. Carefully cut the new hose to the exact length of the old one, remove the old cracked line using pliers to twist and pull, and firmly push the new hose onto the respective nipples. Secure connection points with spring clamps or small zip ties if necessary to maintain a tight seal under engine pressure.
Pro Tip: Replace hoses one at a time so you never lose track of where each vacuum line routes across the engine bay.
Step 5: Budget for Intake Manifold Gasket Replacement
What you need: Intake manifold gasket set, torque wrench, socket set, and gasket scraper.
Instructions: If your smoke test revealed that the vacuum leak originates from the intake manifold gasket, the repair becomes significantly more involved. You will need to disconnect the battery, remove plastic engine covers, unbolt the throttle body, and carefully unbolt the entire intake plenum to access the rubber or paper gaskets underneath. Replacement gasket sets typically cost between $25 and $85 depending on your vehicle make and model. However, professional labor for this job usually takes 2 to 4 hours, pushing total mechanic repair bills into the $300 to $600 range due to the complexity of components that must be moved.
Pro Tip: Always clean the mating surfaces thoroughly with a scraper and brake cleaner before installing new gaskets to ensure a flawless, airtight seal.
Step 6: Assess Throttle Body and EGR Valve Gaskets
What you need: Throttle body cleaner, new throttle body gasket, and hand tools.
Instructions: Vacuum leaks frequently hide right where auxiliary engine components mount to the intake manifold, such as the throttle body and the EGR (Exhaust Gas Recirculation) valve. Remove the air intake ducting, unbolt the throttle body, and inspect the paper or rubber o-ring gasket sandwiched behind it. If the gasket is flattened, brittle, or torn, replace it immediately. A new throttle body gasket generally costs less than $10. While you have the component unbolted, take the opportunity to spray down the butterfly valve with specialized throttle body cleaner to remove carbon buildup that could also be contributing to rough idle issues.
Pro Tip: Be very careful not to force the throttle plate open manually on drive-by-wire electronic throttles, as this can permanently damage the internal actuator motor.
Step 7: Clear Trouble Codes and Verify the Repair
What you need: OBD-II scanner and a test drive route.
Instructions: Once you have replaced the faulty hoses, gaskets, or components, it is time to finalize the fix. Plug your OBD-II scanner back into the vehicle port and clear any stored diagnostic trouble codes (DTCs). Next, start the engine and listen closely to the idle; it should settle smoothly between 650 and 800 RPM without surging. Take your car out for a 15-minute test drive, making sure to experience both stop-and-go city traffic and highway cruising speeds. Check that the Check Engine Light remains off and that your fuel economy readings begin to return to normal manufacturer specifications.
Pro Tip: Some vehicle computers require a specific “drive cycle” to recalibrate fuel trims, so do not panic if the readiness monitors take a few days to fully reset after clearing codes.
✅ Final Checklist
- All diagnostic trouble codes have been successfully cleared using an OBD-II scanner.
- Engine idles smoothly without surging, stalling, or unusual hissing noises.
- All newly installed vacuum hoses are securely routed away from hot exhaust manifolds and moving belts.
- Intake manifold and throttle body bolts are properly torqued to factory specifications.
- Check Engine Light remains off after completing a comprehensive test drive.
Important Notes:
- Always allow the engine to cool completely before touching intake components or working near hot exhaust parts to prevent severe burns.
- Seek professional mechanic assistance if you are uncomfortable removing complex fuel injection wiring harnesses or intake plenums.
- Total DIY repair costs range from $10 to $100 for basic hoses and gaskets, while professional shop repairs range from $150 to $600+ depending on labor time and part accessibility.
Component Cost Breakdown for Vacuum Leak Repairs
Hoses, Connectors, and PCV Valves
Rubber hoses and plastic connectors are the most common sources of vacuum leaks because they degrade from extreme under-hood heat. Fortunately, these items are very inexpensive.
- Individual rubber vacuum hoses cost between $5 and $20 per foot.
- Replacing a faulty PCV (Positive Crankcase Ventilation) valve usually runs $20 to $50 for the part.
- Labor for replacing hoses is minimal, often taking a technician less than 30 minutes.
Gaskets and Intake Manifold Components
If your leak stems from a hard seal, the parts cost remains low, but the labor skyrockets. Intake manifold gaskets and throttle body seals require significant engine disassembly.
- An intake manifold gasket set typically costs between $30 and $100.
- Labor for this specific job takes 2 to 4 hours, bringing total costs to $300 to $700.
- Brake booster diaphragms or purge valves can add another $100 to $250 depending on vehicle placement.
How to Fix a Vacuum Leak and Save on Labor Costs
Fixing a vacuum leak independently can significantly reduce the overall repair bill, as labor typically accounts for over 60 percent of a professional shop invoice. According to automotive service data from 2026, standard diagnostic fees alone average $100 to $150 before any mechanical work begins. Vehicle owners with basic mechanical aptitude can tackle many common leaks using straightforward tools.
Step-by-Step DIY Repair Process
- Locate the faulty component: Use a smoke machine test or spray a small amount of soapy water around suspected gasket areas and hoses while the engine idles. Bubbles will form or engine idle will change where the leak draws air.
- Disconnect the negative battery terminal: Ensure electrical safety before removing components near the intake manifold or electronic sensors.
- Remove damaged rubber hoses: Use pliers to slide spring clamps away from the connection points. Pull the degraded hose straight off the fitting without twisting aggressively.
- Cut and fit replacement tubing: Measure high-temperature automotive-grade silicone or rubber vacuum tubing against the old piece. Cut the new line cleanly with sharp shears to prevent fraying.
- Secure all connections: Push the new hose fully onto the vacuum nipple and reposition the clamps securely. Reconnect the battery and test drive the vehicle to verify the check engine light remains off.
What If It Still Doesn’t Work After Replacing Hoses?
Replacing visible rubber vacuum lines does not always resolve the issue, especially if underlying mechanical failures persist. If the engine idle remains rough or diagnostic trouble codes return, motorists should execute systematic fallback steps to isolate stubborn leaks.
- Inspect intake manifold and throttle body gaskets: Degraded plastic intake manifolds or warped mounting gaskets frequently bypass hoses entirely. Spraying brake cleaner near the manifold flange will cause a sudden RPM change if a gasket has failed.
- Test PCV valves and emission components: Positive crankcase ventilation valves stick open over time. Remove the valve and shake it; a rattling sound indicates normal operation, while silence means replacement is necessary.
- Examine brake booster diaphragms: A compromised internal brake booster diaphragm draws unmeasured air directly through the master cylinder port, severely impacting braking performance and idle quality simultaneously.
- Consult a certified professional: When advanced electronic smoke diagnostics fail to pinpoint elusive internal engine leaks, booking a professional inspection is essential. Professional diagnostics typically range from $150 to $300 depending on regional labor rates in 2026.
Conclusion
Addressing a vacuum leak promptly prevents poor fuel economy, engine overheating, and potential catalytic converter damage. While minor hose replacements cost less than $20 in materials, complex gasket repairs can scale up to $500 at a professional repair facility. According to verified research and automotive service data from expert sources, catching these air intake issues early minimizes long-term repair expenses. The best next step is to perform a visual inspection under your vehicle hood today or schedule a professional diagnostic test if warning lights persist.
❓ Frequently Asked Questions
How do mechanics find a vacuum leak during an inspection?
Mechanics often use an automotive smoke machine to inject smoke into the intake tract. Escaping smoke visibly highlights the exact location of the leak, making hard-to-reach cracks easy to spot.
Why are intake manifold gasket repairs so expensive?
Intake manifold gaskets are buried deep inside the engine bay beneath numerous components. Mechanics must spend several hours removing parts just to access the gasket, which drives up labor costs significantly.
Will a vacuum leak cause my car to fail an emissions test?
Yes, a vacuum leak alters the air-fuel ratio, causing your vehicle to run lean and produce higher emissions. This will frequently trigger a Check Engine light and result in a failed smog check.
Can I use tape to temporarily fix a leaking vacuum hose?
Electrical tape or duct tape will not hold up to engine heat and vacuum pressure. If you need a temporary roadside fix, specialized silicone tape or a small hose connector is much safer.
How long does it take a professional to replace a vacuum line?
Replacing a standard vacuum line typically takes a mechanic less than an hour. However, tracking down the leak using diagnostic equipment may add an extra hour to the total service time.
What happens if I ignore a small vacuum leak?
A small leak forces your engine’s computer to constantly adjust fuel trim, leading to poor fuel economy. Over time, the unbalanced air-fuel mixture can cause engine misfires and overheat components.