How Much to Fix a Vacuum Leak in 2026 Real Cost Guide
Fixing an automotive vacuum leak typically costs anywhere from $20 for a simple DIY hose replacement to $500+ for professional intake manifold gasket repairs. Total expenses depend heavily on whether the issue stems from a minor rubber line or a complex internal seal. Professional diagnostic fees and smoke tests generally add another $100 to $150 to the final bill.
Fixing an automotive vacuum leak typically costs between $100 and $600 total, depending heavily on what is causing the leak and your local mechanic’s labor rates. While a simple rubber hose replacement might cost less than a tank of gas, dealing with a warped intake manifold or a failing throttle body gasket can push repair bills much higher.
Ignoring this issue hurts your fuel economy and forces your engine to run dangerously lean. Knowing the average diagnostic fees, labor rates, and part expenses helps you budget properly for the mechanic shop in 2026 without getting overcharged.
Key Takeaways
- Simple vacuum hose replacements usually cost under $50 in parts.
- Shop diagnostic fees and smoke tests generally range from $100 to $150.
- Intake manifold gasket replacements commonly cost between $150 and $500+.
- DIY repairs save significantly on high mechanic labor rates.
- Ignoring a vacuum leak leads to poor fuel economy and engine damage.
Average Vacuum Leak Repair Costs and Diagnostic Fees
Professional Diagnostic Fees
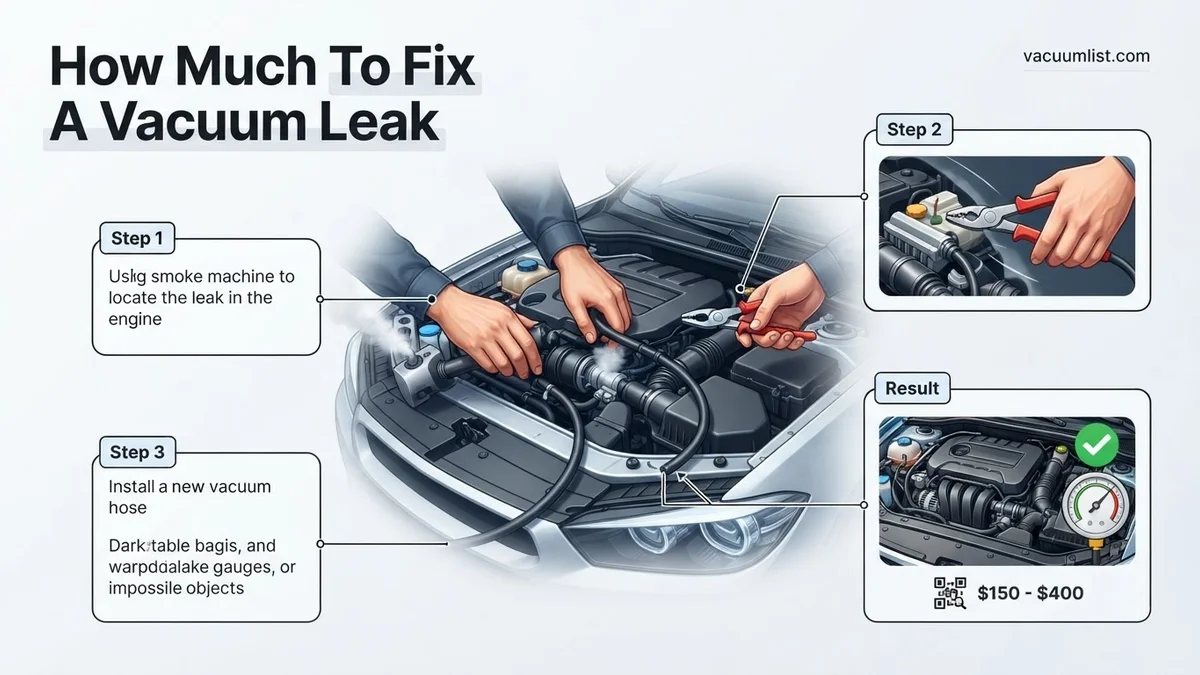
Before a technician can fix your vacuum leak, they have to find it. Most repair shops charge a standard diagnostic fee ranging from $100 to $150 just to inspect the system. If the leak is hidden, the technician will likely perform an advanced smoke test. A smoke machine forces visible vapor through your intake tract to pinpoint tiny cracks, adding another $50 to $100 to the initial diagnostic bill.
Total Repair Estimates
Once the mechanic finds the source, the total cost depends on how long the repair takes:
- Minor fixes: $50 to $150 for simple rubber hoses, PCV valves, or loose clamps.
- Moderate fixes: $150 to $350 for throttle body gaskets or EGR components.
- Major fixes: $400 to $900+ for deep intake manifold gaskets or integrated plastic plenum replacements.
Vacuum Leaks: What Causes It and How to Fix It
A vacuum leak in your vehicle can lead to a frustrating array of symptoms, from rough idling and engine stalling to decreased fuel efficiency and illuminated check engine lights. Understanding how much it costs to fix a vacuum leak and how to accurately diagnose the problem can save you hundreds of dollars in unnecessary mechanic fees. This comprehensive guide walks you through the entire process of identifying vacuum leaks, calculating repair costs, and determining whether you should DIY or hire a professional.
Step 1: Identify the Symptoms and Warning Signs
What you need: OBD-II scanner (optional), notepad, and a keen eye for engine behavior.
Instructions: Before calculating repair costs, you must recognize the indicators of a vacuum leak. Start by observing your engine while it idles in park or neutral. Does the RPM fluctuate wildly between 500 and 1,500 RPM, a phenomenon known as a “hunting idle”? You might also experience engine hesitation when pressing the accelerator, a hissing sound emanating from the engine bay, or a persistent Check Engine Light displaying diagnostic trouble codes like P0507 or P0171. Documenting these specific symptoms helps you and your mechanic pinpoint the general area of the leak, laying the groundwork for an accurate cost estimation before you spend a dime on parts.
Pro Tip: Do not ignore a Check Engine Light combined with a rough idle; prolonged driving with a severe vacuum leak can cause your engine to run lean, potentially damaging internal components and catalytic converters.
Step 2: Perform a Visual Inspection of Hoses and Lines
What you need: Flashlight, microfiber towel, and a mechanic’s mirror for hard-to-see areas.
Instructions: Open your hood and thoroughly examine every rubber vacuum hose, plastic line, and connection point. Over time, engine heat causes rubber to dry out, crack, split, or disconnect entirely. Run your fingers gently along the lengths of smaller vacuum lines connected to the intake manifold, PCV valve, and brake booster. Look closely for dry rot, deep surface cracks, soft spongy spots, or oil contamination that degrades rubber. Replacing a cracked rubber hose is often the cheapest fix, usually costing less than $20 in materials if you choose to tackle the replacement in your home garage rather than paying a shop labor rate.
Pro Tip: Take clear photographs of complex routing layouts with your smartphone before disconnecting any old hoses to ensure you route the replacement lines correctly.
Step 3: Conduct a Controlled Propane or Smoke Test
What you need: Unlit propane torch (or specialized automotive smoke machine) and a spray bottle filled with soapy water.
Instructions: To find hidden leaks that are invisible to the naked eye, use a diagnostic method. With the engine idling, gently wave an unlit propane torch around vacuum lines and gasket seams—if the engine idle suddenly smooths out, you have found the leak where the propane was sucked in. Alternatively, spray soapy water on suspect areas; bubbling indicates escaping pressure or drawn-in air. Professional shops typically charge between $100 and $200 just to perform a professional smoke machine test if DIY methods fail, but this test isolates the exact failure point quickly.
Pro Tip: Exercise extreme caution when using flammable gases like propane near a hot engine block, and always keep a fire extinguisher nearby for safety.
Step 4: Assess Gasket and Intake Manifold Leaks
What you need: Torque wrench, replacement intake manifold gaskets (if needed), and gasket scraper.
Instructions: If your hoses are intact, the vacuum leak is likely stemming from a failing intake manifold gasket, throttle body gasket, or EGR valve gasket. These large gaskets create an airtight seal between the engine block and the intake components. When they degrade, unmeasured air enters the combustion chamber. Replacing an intake manifold gasket is significantly more labor-intensive than swapping a hose. While the gasket itself costs between $15 and $50, professional labor can range from $300 to $800 because mechanics must remove multiple engine accessories to reach the manifold.
Pro Tip: Always torque intake manifold bolts in the manufacturer-specified cross-pattern to prevent warping and ensure an even, airtight seal.
Step 5: Calculate Total DIY vs. Professional Repair Costs
What you need: Calculator, notepad, and local mechanic price quotes.
Instructions: Now that you have located the source of the vacuum leak, it is time to calculate the total cost to fix it. If the issue is a simple rubber vacuum line, buying a spool of universal hose costs roughly $10 to $25, making this a near-free DIY project. However, if your vehicle requires a new intake manifold or a complex plenum gasket replacement, professional labor will drive total costs up to $400–$900. Weigh your mechanical skill level against the time required; complex manifold jobs can take a novice up to six hours, whereas an experienced technician can complete it in half that time.
Pro Tip: Always ask repair shops for an itemized quote separating parts from labor costs so you can verify you are not being overcharged for standard components.
Step 6: Execute the Repair or Schedule the Service
What you need: Basic socket set, pliers, replacement parts, and safety glasses.
Instructions: If you chose the DIY route, disconnect the vehicle’s negative battery terminal before starting work. Carefully remove the damaged components, clean any mating surfaces thoroughly to remove old gasket residue, and install the new parts securely. Ensure all hose clamps are tightly fastened and electrical connectors are snapped back into place. If you opted for a professional repair, drop your vehicle off at the scheduled time with your diagnostic notes ready. A professional repair usually carries a 12-month or 12,000-mile warranty, offering peace of mind for complex jobs.
Pro Tip: Double-check your work area before reconnecting the battery to ensure no tools, rags, or loose bolts were left inside the engine compartment.
Step 7: Clear Codes and Test Drive Your Vehicle
What you need: OBD-II scanner and a safe stretch of road.
Instructions: After completing the repair, use your OBD-II scanner to clear any stored diagnostic trouble codes from the engine control unit. Start the engine and let it reach normal operating temperature. Pay close attention to the idle speed; it should now remain steady and smooth without surging. Take your vehicle out for a 15-minute test drive, incorporating both stop-and-go city driving and highway cruising. Monitor acceleration response and ensure the Check Engine Light does not illuminate again. If the idle remains stable and no new codes return, your vacuum leak fix is officially a success.
Pro Tip: Some vehicle computers require a “drive cycle” relearn period after clearing codes, so give the car a few days of normal driving to fully recalibrate fuel trims.
✅ Final Checklist
- All vacuum lines and hoses inspected for cracks, dry rot, and secure connections
- Propane or smoke test confirmed no remaining unmeasured air entering the intake
- Gaskets and seals properly torqued to manufacturer specifications
- OBD-II trouble codes successfully cleared and dashboard check engine light extinguished
- Engine idle remains smooth, stable, and within normal RPM range during test drive
Important Notes:
- Always allow the engine to cool completely before touching intake components or exhaust areas to prevent severe burns.
- Seek professional help immediately if the vacuum leak involves internal engine components, warped intake manifolds, or if you lack specialized tools.
- Estimated total costs range from $15 for a basic DIY hose replacement to upwards of $900 for a complex professional intake manifold gasket overhaul; estimated time ranges from 30 minutes to 6 hours depending on severity.
Cost Breakdown by Specific Component and Failure Point
Rubber Hoses, Connectors, and PCV Valves
Under-hood rubber degrades rapidly from extreme heat cycles. Fortunately, individual vacuum lines are the cheapest components to replace. A few feet of high-grade silicone or rubber vacuum tubing costs under $20 at an auto parts store. If you pay a shop to swap out a brittle hose or replace a clogged Positive Crankcase Ventilation (PCV) valve, expect a total bill of $75 to $150, mostly covering a half-hour of minimum shop labor.
Intake Gaskets and Plastic Plenums
As engines age, rubber intake manifold gaskets flatten and crack, creating massive unmetered air leaks. While the gasket set itself usually costs between $30 and $90, the labor is extensive. Mechanics often have to remove fuel rails, wiring harnesses, and the upper intake plenum to reach them. This turns a cheap part into a $350 to $700 professional repair job because of the 2 to 4 hours of labor involved.
How to Fix a Vacuum Leak: DIY vs Mechanic Pricing
Deciding between a DIY repair and a professional mechanic depends heavily on your mechanical aptitude and where the leak is located. According to data from automotive service associations, basic diagnostics at a repair shop start at $100 to $150. If the fix requires simply swapping a split rubber hose, a mechanic will typically charge one hour of labor plus parts, totaling $150 to $250. However, fixing harder-to-reach components drastically alters the pricing structure.
Intake Manifold Gasket Replacement
Replacing an intake manifold gasket involves removing several engine components to access the seal. Mechanics usually quote between $350 and $800 for this labor-intensive job. Doing this yourself saves you roughly $250 to $600 in labor costs, but it requires intermediate mechanical skills and specialized tools.
EVAP System and Vacuum Line Replacement Steps
If you choose the DIY route for basic vacuum lines, follow these procedural steps to ensure a proper repair:
- Locate the damaged hose or connection using a visual inspection or a smoke machine test.
- Measure the inner diameter and length of the faulty hose before purchasing a replacement at a local auto parts store.
- Disconnect the old hose from both fittings, taking care not to break plastic nipples on sensitive components.
- Cut the new vacuum hose to match the exact length of the old one for a clean routing path.
- Push the new hose securely onto both connection points, ensuring a tight and airtight fit.
What If It Still Doesn’t Work After Replacing Hoses?
Replacing visible vacuum lines does not always solve rough idling or check engine lights. If your engine symptoms persist, use these advanced troubleshooting steps to locate the remaining issues:
- Perform a professional smoke test to pressurize the intake system and reveal microscopic cracks in plastic manifolds or degraded EGR valve gaskets.
- Inspect the PCV valve and its associated grommets, as a stuck valve mimics a severe vacuum leak and costs under $20 to replace.
- Check the brake booster diaphragm by pinching its supply hose; a failure here bleeds vacuum and causes a stiff brake pedal.
- Consult an ASE-certified professional if your OBD-II scanner still registers lean codes (P0171 or P0174) after all external lines have been replaced. Professional diagnostic and repair services for deep-seated leaks generally range from $200 to $600 depending on component accessibility.
Conclusion
Fixing a vacuum leak ranges from an inexpensive $10 DIY hose replacement to an $800 intake manifold gasket repair. Identifying the source early prevents poor fuel economy, catalytic converter damage, and rough engine performance. According to verified research and expert sources from the Automotive Service Association, addressing vacuum issues promptly saves drivers hundreds in secondary repairs. Your actionable next step is to inspect your engine bay for cracked lines today or schedule a professional diagnostic test to pinpoint hidden leaks accurately in 2026.
❓ Frequently Asked Questions
What factors influence the total cost to fix a vacuum leak?
The total cost depends on the exact location of the leak, whether you DIY or hire a mechanic, local labor rates, and whether specialized diagnostic equipment like a smoke machine is required.
How does a smoke test affect the repair bill?
A smoke test is standard for finding hidden leaks and typically adds a separate diagnostic fee of $100 to $150, though some shops roll this into the overall repair estimate if you approve the work.
What are the most common parts that fail and cause vacuum leaks?
Rubber vacuum hoses, PCV valves, intake manifold gaskets, and brake booster check valves are the most frequent culprits behind engine vacuum loss.
Why is mechanic labor the most expensive part of a vacuum leak repair?
Finding the exact source of a leak requires specialized tools and time, and components like intake gaskets are buried deep within the engine bay, requiring extensive disassembly.
Will fixing a vacuum leak immediately improve my fuel economy?
Yes, once the air-fuel ratio is corrected by sealing the leak, your engine will run efficiently again, resulting in restored gas mileage and smoother acceleration.
Can checking for vacuum leaks be done for free at home?
You can perform a basic visual inspection for cracked hoses at no cost, though verifying hidden leaks usually requires basic tools or a makeshift propane/water spray method.