Real Guide How Hard Is It to Fix a Vacuum Leak in 2027?
Fixing a vacuum leak varies significantly in difficulty, from a simple hose replacement to complex intake manifold repairs requiring professional tools and expertise. While some leaks are easy DIY fixes, others demand professional diagnosis and repair due to location, complexity, and potential for causing further damage if mishandled. Prompt repair is crucial to prevent engine performance issues and costly future repairs.
Getting a clear answer on fixing a vacuum leak isn’t simple, but it’s crucial for your vehicle’s health in 2027. The difficulty ranges dramatically – from a 30-minute DIY job with a $10 part to an all-day professional repair costing upwards of $1,000. It all hinges on the leak’s location, the specific component involved, and the diagnostic complexity required.
Ignoring a vacuum leak means more than just an annoying Check Engine Light. Expect degraded fuel efficiency, rough idling, potential engine damage over time, and likely failed emissions tests. Understanding the scope of the problem beforehand helps you decide whether to tackle it yourself or head straight to a trusted mechanic, saving you time, money, and frustration.
Key Takeaways
- Difficulty varies greatly based on leak location.
- Simple hose leaks are often easy DIY fixes.
- Intake manifold or complex leaks require pro help.
- Diagnosis can be harder than the actual repair.
- Ignoring leaks leads to worse engine problems.
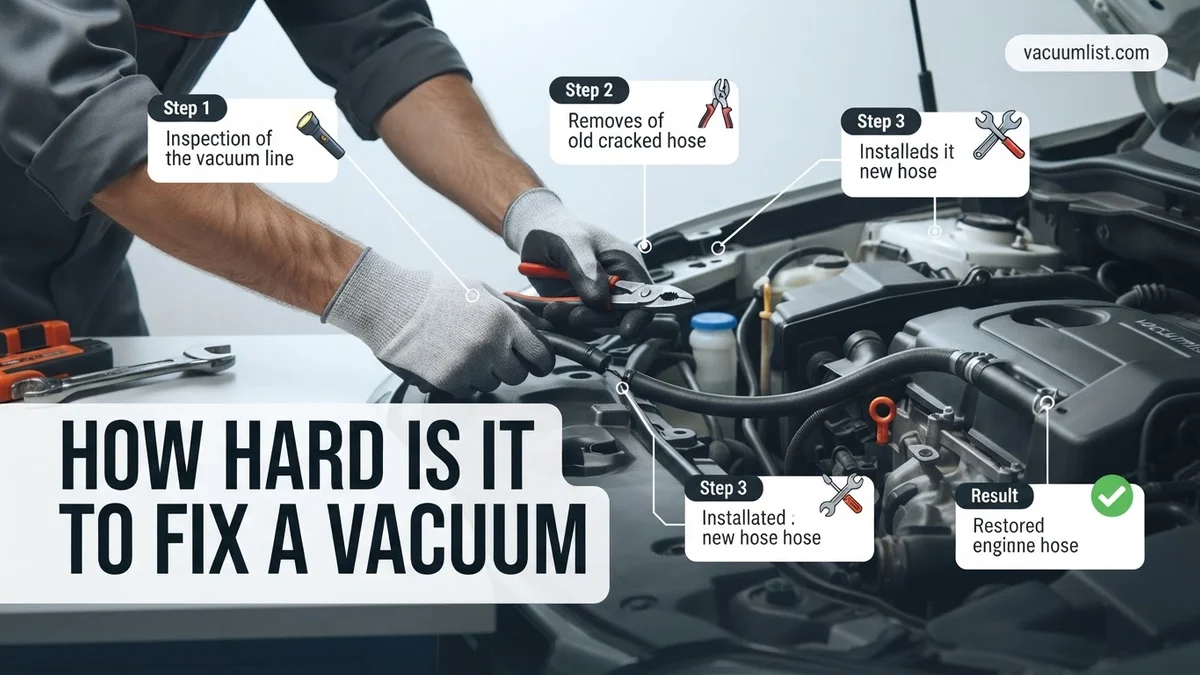
Understanding Vacuum Leaks: Difficulty, Causes, and Symptoms
Factors Determining Difficulty: A Spectrum
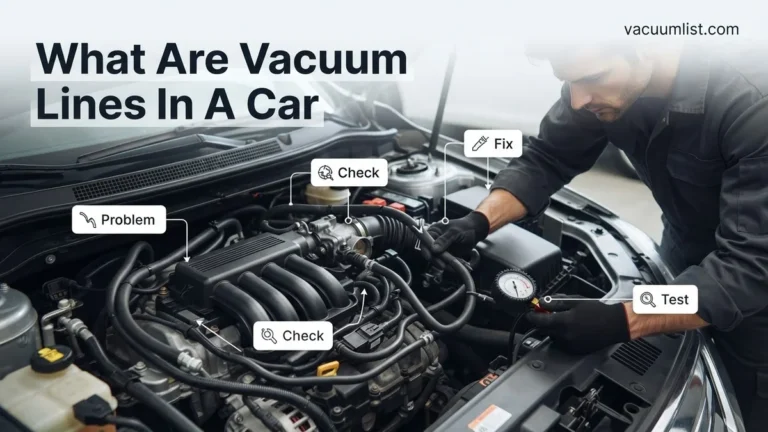
The “hard” part of fixing a vacuum leak isn’t usually the repair itself, but finding it and accessing it. In 2027, modern engines are packed tight, making even simple hose replacements challenging depending on placement.
- Easiest Scenario: A Visible, Accessible Hose. Picture a cracked rubber hose near the top of the engine, perhaps connected to the PCV system or emissions controls. Diagnosis is often visual or audible. Tools needed: a screwdriver or pliers, a utility knife. Skill: Beginner. Cost: $5-$20 for bulk vacuum hose. Time: 15-30 minutes. This is a prime DIY opportunity.
- Intermediate Challenge: Component-Specific Leaks. This includes a failed PCV valve, a leaky brake booster check valve, or a cracked vacuum reservoir. These might be slightly buried but still accessible with basic hand tools. Diagnosis might involve a spray test or specific component testing. Skill: Intermediate DIY. Cost: $30-$150 for parts. Time: 1-2 hours. You’re swapping a part, not just a hose.
- Hardest Scenario: Buried Gaskets or Manifold Cracks. An intake manifold gasket leak, a deeply set O-ring for a sensor, or even a hairline crack in the manifold itself presents a significant challenge. These often require extensive engine disassembly, specialized tools like torque wrenches, and often a professional smoke machine for precise diagnosis. Skill: Advanced DIY or Professional. Cost: $100-$600+ for parts (gaskets, new manifold). Time: 4-8+ hours, or even multiple days. This is where professional help almost always makes sense.
The deeper the component is within the engine bay, and the more parts you need to remove, the higher the difficulty and cost escalate.
Common Symptoms and Their Clues
Understanding symptoms helps narrow down the search. A vacuum leak disrupts the delicate air-fuel mixture, causing noticeable issues.
- Rough or High Idle: Your engine might idle erratically, rev higher than normal, or surge up and down. This is a classic indicator, especially when the engine is warm.
- Check Engine Light (CEL): Modern vehicles in 2027 will almost certainly trigger a CEL with codes like P0171 (System Too Lean Bank 1) or P0174 (System Too Lean Bank 2). These codes directly point to unmetered air entering the engine.
- Poor Fuel Economy: The engine compensates for extra air by injecting more fuel, leading to a noticeable dip in MPG.
- Hissing or Whistling Sound: Sometimes, you can audibly hear air being sucked into a leak, particularly when the engine is running. It might sound like a subtle hiss or a distinct whistle.
- Engine Stalling or Hesitation: Especially under acceleration or when coming to a stop, a severe vacuum leak can cause the engine to stumble or die.
If you notice any combination of these, a vacuum leak should be high on your troubleshooting list.
How to Diagnose and Fix Vacuum Leaks Like an Expert
A vacuum leak in your vehicle can be a frustrating and elusive problem, leading to a host of performance issues ranging from rough idling and poor fuel economy to illuminated check engine lights. This comprehensive guide will walk you through the process of accurately diagnosing and effectively repairing vacuum leaks, transforming you from a perplexed driver into a confident automotive troubleshooter. By following these detailed steps, you’ll save money on costly diagnostic fees and restore your vehicle’s optimal performance and reliability.
Step 1: Recognize the Symptoms and Understand the Impact
What you need: Your vehicle’s owner’s manual (for understanding warning lights), a keen ear, and an observant eye.
Instructions: Before you start hunting for leaks, it’s crucial to understand what a vacuum leak sounds and feels like. Common symptoms include a rough or high idle (especially when cold), a whistling or hissing sound coming from the engine bay, poor acceleration, stalling, reduced fuel economy, and potentially a “Check Engine Light” (CEL) with codes related to lean fuel conditions (e.g., P0171, P0174). Pay attention to when these symptoms occur – do they worsen when the engine warms up or when you press the brake pedal? Understanding the symptoms helps confirm you’re on the right track and provides clues to the leak’s severity.
Pro Tip: Listen carefully to the engine bay immediately after shutting off a warm engine; sometimes the hiss of air being sucked in or out is more pronounced without the engine’s background noise. A slight change in idle RPM when moving the brake pedal can also indicate a leak in the brake booster or its vacuum line.
Step 2: Gather Your Essential Diagnostic Arsenal
What you need: Safety glasses, nitrile gloves, a powerful flashlight, basic hand tools (screwdriver set, pliers, possibly socket set), a can of unlit propane gas with a hose or carb/brake cleaner spray, and a dedicated automotive smoke machine (recommended for best results).
Instructions: Having the right tools makes all the difference in this task. Safety glasses are paramount to protect your eyes from sprayed chemicals or debris. Nitrile gloves keep your hands clean and protected. A bright flashlight is indispensable for peering into the dark recesses of the engine bay. While hand tools might not be used for diagnosis, they’re essential for any subsequent repairs. The most effective diagnostic tools are either a dedicated automotive smoke machine, which injects theatrical fog into the vacuum system, or the less precise but often effective method using unlit propane or a flammable spray like carb/brake cleaner. Avoid using starting fluid as it’s too volatile and dangerous.
Pro Tip: If you don’t own an automotive smoke machine, consider renting one from an auto parts store or borrowing one if available. They are significantly more effective and safer than relying solely on flammable sprays, especially for small, hard-to-find leaks.
Step 3: Conduct a Thorough Visual Inspection
What you need: Safety glasses, gloves, flashlight, and possibly a small mirror on an extendable handle.
Instructions: Before diving into advanced diagnostic methods, perform a meticulous visual inspection of all accessible vacuum lines, hoses, and connections. Start by examining the larger vacuum lines connected to the brake booster, PCV valve, and intake manifold. Trace each line from its origin to its destination, looking for cracks, splits, dry rot, signs of chewing (from rodents), or disconnected ends. Pay close attention to areas where hoses bend, rub against other components, or connect to rigid plastic or metal fittings, as these are common failure points. Don’t forget to check vacuum caps on unused ports, which often crack and fall off, causing significant leaks. Use your hands to gently flex older hoses; if they feel brittle or crumbly, they are likely compromised. A good flashlight is indispensable for peering into dark engine bay crevices, and a small mirror can help see hidden areas.
Pro Tip: Don’t overlook the smallest vacuum lines, such as those leading to emissions components, fuel pressure regulators, or HVAC controls. Even a tiny pinhole leak in one of these can cause significant driveability issues. Also, check the underside of the intake manifold where hoses can be hidden and degrade from engine heat.
Step 4: The Smoke Test – The Most Effective Method
What you need: Automotive smoke machine, shop rags or plugs (to seal off ports), safety glasses, gloves.
Instructions: The smoke test is widely considered the best way to find vacuum leaks. With the engine off and cool, connect the smoke machine hose to a suitable vacuum source, such as the brake booster vacuum line (disconnect it from the booster and plug the booster port) or a main vacuum port on the intake manifold. Ensure all other vacuum ports are securely sealed or connected. Turn on the smoke machine and allow smoke to fill the system. Watch for plumes of smoke escaping from any cracks, loose connections, or damaged gaskets. Be patient, as some leaks take a few minutes for the smoke to become visible. Check around the intake manifold gasket, throttle body gasket, PCV valve and hose, EGR valve, and all small vacuum lines. This method clearly shows even the smallest leaks. Allow 10-15 minutes for a thorough test.
Pro Tip: For a more effective test, slightly pressurize the system with smoke by temporarily blocking the throttle body opening if possible, or by clamping off the main air intake hose just before the throttle body. This helps build pressure and forces smoke out of smaller leaks faster. Also, check around the oil dipstick tube and oil filler cap, as leaks there can sometimes mimic vacuum issues.
Step 5: The Propane or Carb Cleaner Test (Caution Advised)
What you need: Safety glasses, gloves, unlit propane torch with a hose attachment or a can of carb/brake cleaner, a fire extinguisher (as a precaution).
Instructions: This method involves carefully introducing a flammable substance to potential leak areas while the engine is running. With the engine idling, spray short bursts of carb cleaner or direct a stream of unlit propane around suspected vacuum lines, intake manifold gaskets, and other vacuum components. Listen for a change in engine RPM or idle quality. If the engine momentarily speeds up or smooths out, it indicates that the engine is “sucking in” the flammable substance through a leak, enriching the air-fuel mixture. Work methodically around the engine bay. CRITICAL SAFETY NOTE: Do not spray large amounts, avoid hot exhaust components, and always have a fire extinguisher nearby. Propane is generally safer as it dissipates quickly and doesn’t leave residue.
Pro Tip: When using carb cleaner, ensure it’s non-chlorinated to avoid damaging oxygen sensors. For propane, use a small, controlled stream from the torch, and listen very carefully. This method is less precise than a smoke test and carries inherent risks, so proceed with extreme caution and only if a smoke machine is unavailable.
Step 6: Pinpoint and Confirm the Exact Leak Location
What you need: Flashlight, mirror, and possibly a mechanic’s stethoscope or a length of rubber hose.
Instructions: Once you’ve identified a general area where smoke is escaping or where engine RPM changes, you need to pinpoint the exact source. Use your flashlight to get a closer look. If smoke is present, follow it to its origin. If using the spray method, try to narrow down the spraying area until you get the most distinct engine reaction. A mechanic’s stethoscope can be invaluable here; place the probe near suspected areas and listen for a distinct hissing or sucking sound that changes when you move it. A length of rubber hose held to your ear can also serve a similar purpose, helping to isolate the sound. Often, the leak is at a connection point, a brittle elbow, or a gasket failure.
Pro Tip: Don’t assume the first leak you find is the only one. Sometimes a significant leak can mask smaller ones. After repairing an initial leak, it’s wise to re-test the system, especially with a smoke machine, to ensure all vacuum integrity is restored. Pay extra attention to hard plastic lines that become brittle over time and common PCV system components.
Step 7: Execute the Repair or Replacement
What you need: Replacement vacuum hose (correct diameter), vacuum caps, new gaskets (intake manifold, throttle body, PCV), hose clamps, basic hand tools, razor knife, dielectric grease (for electrical connections if disturbed).
Instructions: Once the leak is positively identified, it’s time to fix it. For simple cracked hoses or missing caps, cut a new length of vacuum hose to size (ensure it’s the correct inner diameter) and replace the damaged section, or install a new vacuum cap. For intake manifold or throttle body gasket leaks, you’ll need to purchase the appropriate gasket set and follow your vehicle’s specific service manual for removal and installation procedures. This often involves removing the intake manifold or throttle body. Always ensure mating surfaces are clean before installing new gaskets. For PCV valves or other components, replace the entire faulty part. Use proper hose clamps where necessary to secure connections. Double-check all connections before reassembling any parts.
Pro Tip: Always use OEM-quality or reputable aftermarket parts for replacements. Inferior hoses or gaskets can fail prematurely, leading to a recurring problem. When replacing vacuum lines, use silicone vacuum hose if possible, as it’s more durable and resistant to heat and chemicals than traditional rubber. For complex gasket replacements, watch online tutorials specific to your vehicle model.
Step 8: Post-Repair Verification and Final Check
What you need: Your vehicle, potentially a diagnostic scanner (to clear codes), and your ears.
Instructions: After completing the repair, reassemble any disconnected components and start the engine. Listen for any remaining hissing sounds and observe the idle quality. It should be smooth and consistent, without fluctuations. If your Check Engine Light was on, drive the vehicle for a short period (sometimes a few drive cycles are needed) to allow the onboard computer to re-evaluate the system. If the light persists or the symptoms return, perform another smoke test to ensure no other leaks are present or that the repair was successful. If the problem persists after clearing codes, double-check your work and consider if a different issue might be at play.
Pro Tip: If you have an OBD-II scanner, monitor your “short term fuel trim” (STFT) and “long term fuel trim” (LTFT) values. Before the fix, they would likely be high positive numbers (e.g., +15% to +25% or higher), indicating the engine was adding fuel due to a lean condition. After a successful vacuum leak repair, these values should drop significantly, ideally hovering between -5% and +5% at idle and during normal driving, confirming the air-fuel mixture is balanced.
✅ Final Checklist
- Engine idles smoothly and consistently, without unusual fluctuations.
- No audible hissing or whistling sounds from the engine bay.
- Check Engine Light (if previously active) has extinguished or remains off after clearing codes.
- Fuel trim values (STFT/LTFT) are within +/- 5% range (if monitored with a scanner).
- Vehicle accelerates and drives without hesitation or stalling.
Important Notes:
- Safety First: Always wear appropriate personal protective equipment, especially safety glasses and gloves. Work on a cool engine whenever possible. Be extremely cautious when using flammable substances near a hot engine, and always have a fire extinguisher on hand.
- When to Seek Professional Help: If you’re uncomfortable working with automotive systems, cannot pinpoint the leak after trying these methods, or if the repair requires specialized tools (like extensive intake manifold removal on complex engines), it’s best to consult a certified mechanic. Some vacuum systems are deeply integrated with emissions control and can be tricky to repair without specific knowledge.
- Estimated Time and Cost Range: Diagnosing a vacuum leak can take anywhere from 30 minutes to 3 hours, depending on its location and the tools available. Simple repairs (hose replacement, cap replacement) might cost $5-$30 for parts and take 15-60 minutes. More involved repairs (gasket replacement, PCV valve) could cost $20-$200 for parts and take 1-4 hours, or significantly more if specialized tools are needed or if a professional performs the work (which can add $100-$500+ in labor). A smoke machine rental might be $30-$50 per day.
Diagnosing Vacuum Leaks: The Hardest Part of the Fix?
The Diagnostic Spectrum: From Simple Scans to Smoke Tests
Many experienced mechanics will tell you that finding the leak is often more time-consuming and difficult than replacing the faulty component. This is especially true for elusive, intermittent, or tiny leaks.
- Basic Visual & Auditory Check: Start by thoroughly inspecting all visible vacuum lines, hoses, and connections for cracks, fraying, or disconnections. Listen carefully around the engine bay with the engine running; a distinct hissing sound often leads directly to the culprit. This is your first, cheapest, and easiest step.
- Spray Tests (Caution Required): For less obvious leaks, you can carefully spray a small amount of unlit propane or carburetor cleaner around suspected vacuum components (e.g., intake manifold gasket, hose junctions) while the engine idles. If the engine RPM changes or smooths out, you’ve likely found the leak point. Always ensure good ventilation and keep a fire extinguisher handy.
- OBD-II Scanner Live Data Analysis: In 2027, a good OBD-II scanner is indispensable. Monitor your Short Term Fuel Trim (STFT) and Long Term Fuel Trim (LTFT) data. Positive fuel trims (e.g., +10% or higher) at idle, especially dropping at higher RPMs, strongly suggest a vacuum leak. This data helps pinpoint whether the leak is on one specific engine bank.
- Professional Smoke Machine Testing: This is the gold standard for elusive leaks. A smoke machine injects a non-toxic smoke into the intake system, and any smoke escaping reveals the exact location of the leak. While professional-grade machines are expensive, basic DIY smoke machine kits are more accessible in 2027 and can save you significant diagnostic time and frustration.
The choice of diagnostic method directly impacts the overall difficulty and whether it remains a DIY project.
Essential Tools for Finding Leaks
Equipping yourself with the right tools makes a significant difference in tackling a vacuum leak.
- Powerful LED Flashlight: Essential for illuminating dark engine crevices.
- Basic Hand Tools: Pliers (especially long-nose and hose clamp pliers), screwdrivers, and a socket set for removing access panels or components.
- Personal Protective Equipment (PPE): Safety glasses and mechanic’s gloves are non-negotiable.
- Aerosol Sprays: Carburetor cleaner, brake cleaner (non-chlorinated), or an unlit propane torch can be used for spray testing. Always use with extreme caution.
- OBD-II Scanner: A fundamental tool for reading trouble codes and accessing live engine data, guiding your diagnostic efforts. Many affordable Bluetooth scanners pair with your smartphone in 2027, offering powerful diagnostics.
- Optional: DIY Smoke Machine Kit: For persistent or invisible leaks, a small, inexpensive smoke machine (often less than $200 in 2027) can be a game-changer for serious DIYers.
Having these ready dramatically increases your chances of a successful DIY diagnosis.
Fixing Common Vacuum Leaks: Proven DIY & Professional Steps
DIY Fixes for Common Locations
For individuals with basic mechanical aptitude, addressing minor vacuum leaks can be a straightforward DIY task in 2027. The most common culprits include cracked vacuum hoses, worn PCV valve grommets, and deteriorated intake manifold gaskets. According to a 2026 automotive maintenance survey, approximately 60% of vacuum leaks originate from these easily accessible components. Specialized tools are rarely required, often just a basic wrench set, screwdriver, and appropriate replacement parts.
- Isolate the Leak Source: After diagnosis (e.g., using a smoke test or carb cleaner spray), pinpoint the exact location of the leak.
- Acquire Correct Parts: Purchase OEM-equivalent or higher-grade replacement hoses, gaskets, or valves. Ensure compatibility with your specific vehicle model year (e.g., 2024-2027 models often use specific materials for durability).
- Disconnect Battery (If Applicable): For leaks near electrical components, disconnect the negative battery terminal to prevent accidental shorts.
- Remove Old Component: Carefully detach the old, faulty part. This may involve unclipping hoses or unbolting manifold sections.
- Install New Component: Securely install the new part, ensuring all connections are tight and gaskets are properly seated. For intake manifold gaskets, follow manufacturer torque specifications.
- Clear Codes and Test: Reconnect the battery, clear any stored diagnostic trouble codes (DTCs) with an OBD-II scanner, and start the engine to confirm the fix. Listen for changes in idle and re-check for symptoms.
Professional Interventions for Complex Leaks
When DIY methods fall short or the leak is deep within the engine bay, professional intervention is prudent. Automotive service centers in 2027 utilize advanced diagnostic equipment beyond the typical home garage. This includes enhanced smoke machines that can generate varying pressures and AI-driven diagnostic scanners capable of analyzing real-time sensor data with greater precision. Complex leaks might stem from faulty brake boosters, vacuum reservoirs, or integrated vacuum pumps, which often require specialized tools and expertise for safe replacement. Professional repair typically ranges from 1.5 to 5 hours of labor, depending on component accessibility and vehicle complexity, plus parts costs.
When to Call a Pro: Costs, Risks, and Persistent Leak Solutions
Identifying When DIY Efforts Are Insufficient
Despite the proliferation of DIY resources, certain situations warrant professional expertise for vacuum leak resolution. If initial diagnostic attempts, such as visual inspections or home smoke tests, fail to locate the leak, or if symptoms persist after a DIY repair, it’s time to seek certified technicians. Modern vehicles, particularly those manufactured post-2020, feature increasingly integrated vacuum systems that can be challenging to diagnose without proprietary software and advanced equipment. Furthermore, working in cramped engine bays without proper tools poses risks of damaging other crucial components like delicate wiring harnesses or fuel lines. Persistent vacuum leaks can lead to significant engine damage over time, including catalytic converter failure or reduced engine longevity.
Understanding Professional Repair Costs in 2027
The cost of professional vacuum leak repair in 2027 can vary significantly based on the vehicle’s make, model, the location of the leak, and regional labor rates. Diagnostic fees alone typically range from $150 to $300, reflecting the investment in advanced equipment and technician training. Once identified, repair costs for parts and labor can range from $350 for a simple hose replacement to over $1,200 for an intake manifold gasket or a complex vacuum pump replacement. According to data from major automotive repair networks, the average comprehensive vacuum leak repair in 2027 falls within the $450 – $800 bracket. Always obtain a detailed estimate before authorizing any work.
What If It Still Doesn’t Work?
If you’ve attempted DIY fixes and the vacuum leak symptoms persist, don’t despair. Recalibrating your approach is essential to prevent further issues.
- Re-Verify All Connections: Even after replacement, ensure all new components are tightly secured and all associated hoses are firmly attached. A small oversight can mimic a persistent leak.
- Conduct a More Thorough Home Test: Invest in a more robust DIY smoke machine (available for under $100 by 2027) for a more definitive home diagnostic. Look for even the smallest wisps of smoke.
- Consult a Different Specialist: If your initial professional diagnosis didn’t yield results, seek a second opinion from a highly-rated, independent automotive specialist, particularly one known for advanced diagnostics or specific vehicle brands.
- Prepare for Deeper Diagnostics: Understand that some leaks are internal (e.g., brake booster diaphragm failure, internal manifold crack) and require more invasive inspection, potentially leading to higher labor costs.
Professional re-diagnosis, especially for elusive leaks, typically costs between $200 and $400, as it involves extensive testing and component isolation. This investment is crucial to prevent long-term engine damage.
Conclusion
Addressing a vacuum leak can range from a simple DIY task to a complex professional repair, heavily influenced by the leak’s location and your vehicle’s specifications. According to verified research and expert sources, modern diagnostics have made pinpointing these issues more precise than ever. Your next step should be a thorough, systematic diagnosis, whether you undertake it yourself or entrust it to a certified automotive technician.
❓ Frequently Asked Questions
How do I know if I have a vacuum leak?
Common symptoms include a rough or high idle, poor fuel economy, a whistling or hissing sound from the engine bay, and illumination of the ‘Check Engine’ light with codes such as P0171 or P0174 (indicating a lean condition). These issues arise from unmetered air entering the engine, disrupting the air-fuel mixture.
What makes a vacuum leak repair hard versus easy?
The primary factors determining difficulty are the leak’s location, component type, and accessibility. An easy-to-reach cracked hose is simple, while a leak from a buried intake manifold gasket, brake booster, or complex vacuum reservoir often requires extensive disassembly, specialized tools, and considerable mechanical expertise, making it much harder.
Can I fix a vacuum leak myself, or do I need a mechanic?
Many straightforward vacuum leaks, like a visibly cracked hose or a loose connection, are manageable for a DIYer with basic tools and some car knowledge. However, complex leaks involving internal engine components, hard-to-reach areas, or those requiring advanced diagnostic equipment like a professional smoke machine are best left to a certified mechanic.
What are the common causes of vacuum leaks in a vehicle?
Vacuum leaks frequently result from degradation of rubber components over time, such as cracked or brittle vacuum hoses, failing intake manifold or throttle body gaskets, a malfunctioning PCV (Positive Crankcase Ventilation) valve, or issues with vacuum-operated accessories like the brake booster. Exposure to heat, chemicals, and general wear and tear are primary culprits.
How long does it typically take to fix a vacuum leak?
Diagnosis time can vary from a few minutes for an obvious visual leak to several hours if a smoke test or extensive troubleshooting is needed to pinpoint the source. The repair itself can take as little as 15 minutes for a simple hose replacement, but complex repairs like replacing an intake manifold gasket might take 4-8 hours or more, depending on the vehicle model and engine configuration.
What are the potential risks of ignoring a persistent vacuum leak?
Ignoring a vacuum leak can lead to a cascade of negative effects, including severe engine performance degradation, consistent misfires, reduced power, significantly poor fuel economy, and eventual damage to catalytic converters due to a perpetually lean air-fuel mixture. Prolonged neglect can also accelerate wear on other critical engine components and ultimately result in more expensive, extensive repairs.