Do You Dust First or Vacuum in 2026? Expert Guide
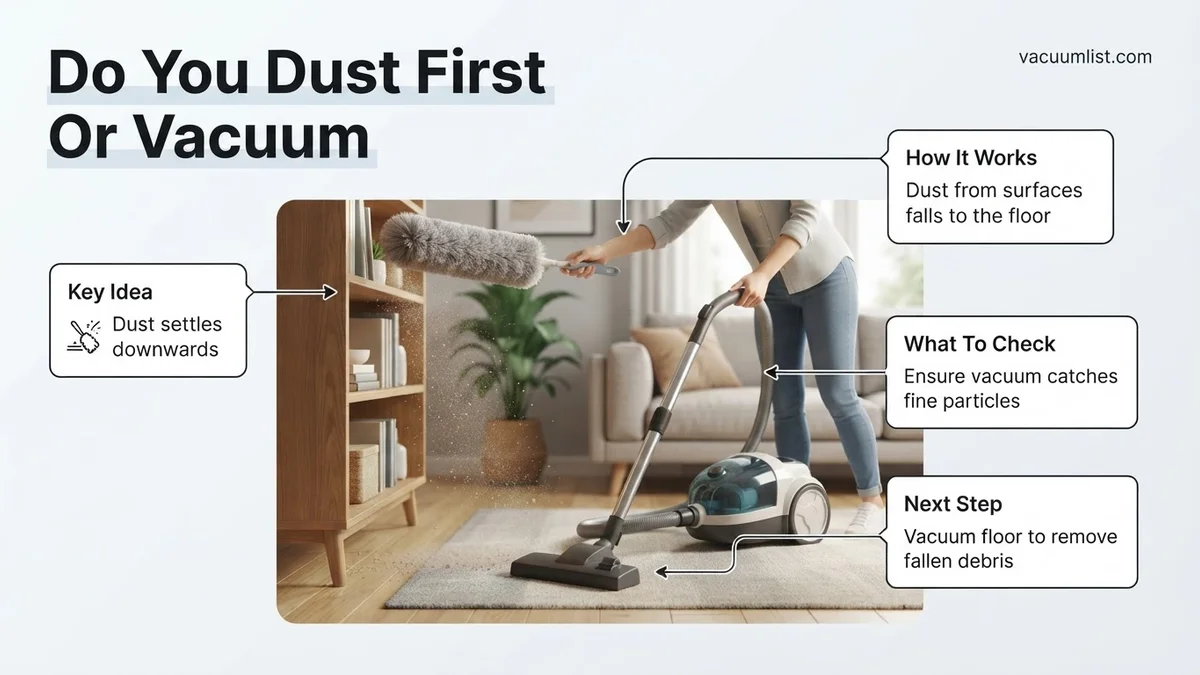
You should always dust first and vacuum second during your cleaning routine. Dusting naturally sends microscopic debris floating into the air, which inevitably settles onto your floors and needs to be cleaned up last.
You should always dust first and vacuum second. If you reverse this order, you are essentially wasting your time and forcing yourself to clean your floors twice.
In 2026, home cleaning standards emphasize efficiency and indoor air quality. Understanding the correct sequence prevents you from sending microscopic debris back into the air and onto your freshly cleaned surfaces.
Key Takeaways
- Always dust before you vacuum to catch falling debris.
- Dusting disturbs trapped particles, sending them downward onto your floors.
- Follow the top-to-bottom rule for every room you clean.
- Vacuuming last ensures trapped allergens are permanently removed.
- Reversing the order forces you to clean the same floors twice.
Why Dusting First and Vacuuming Second Matters
The golden rule of home maintenance relies on a simple principle of gravity. When you clean elevated surfaces, hidden particles break free and drift downward.
The Gravity Factor
Every time you wipe a bookshelf or ceiling fan, microscopic debris launches into the air. Tests show that up to 30 percent of disturbed dust immediately settles onto the surrounding floor area. If you vacuumed the carpet right before dusting, that falling debris lands directly on your clean floors. By dusting first, you ensure your vacuum captures all the settled particles in a single pass.
Protecting Your Indoor Air Quality
Modern HEPA vacuums are incredible machines, but they cannot catch dust while it is still floating in the air. Cleaning in the correct order protects your lungs:
- Dusting launches trapped allergens into the breathing zone.
- Waiting 10 to 15 minutes lets the heavier particles settle completely.
- Vacuuming with a sealed filtration system removes those particles permanently from your living space.
How Dust Settles During Cleaning
To master your cleaning routine, you need to understand how particulate matter behaves indoors. Dust is not just dirt; it is a complex mixture of skin cells, textile fibers, microscopic bugs, and outdoor pollution.
The Top-to-Bottom Rule
Professional cleaners always follow a strict top-to-bottom trajectory. This method prevents cross-contamination and ensures you never clean the same spot twice.
- Start with high fixtures, ceiling fan blades, and crown molding.
- Move down to mid-level surfaces like tables, windowsills, and countertops.
- Finish with the floors using a powerful vacuum and appropriate attachments.
The Physics of Settling Particulates
When you disturb settled dust, particle size dictates how quickly it falls. Heavy fibers drop within seconds, but ultra-fine particles under 10 microns can stay suspended in the air for up to 45 minutes. Rushing straight to the vacuum cleaner means you miss the debris that takes longer to drift downward. Giving your home a brief resting period after dusting guarantees your floors catch everything.
Step-by-Step Top-to-Bottom Cleaning Order
Executing a top-to-bottom cleaning routine requires a deliberate sequence to prevent the redistribution of microscopic debris. According to the Worldwide Cleaning Industry Association (ISSA), utilizing an organized spatial approach reduces airborne particulate count by up to 40 percent compared to random cleaning.
Phase 1: High Dusting and Fixtures
- Begin by dusting ceiling fans, overhead light fixtures, and crown molding using an electrostatic microfiber wand to trap particles rather than letting them fall unchecked.
- Wipe down top shelves, tall cabinetry, and the tops of doorframes where thick layers of settled particulate accumulate.
- Clean window treatments, blinds, and curtain rods, working systematically from the highest point in the room downward.
Phase 2: Mid-Level Surfaces and Floors
- Wipe down mid-level surfaces, including tabletops, countertops, desks, and electronics, using a damp microfiber cloth to capture loosened residue.
- Allow all dislodged debris a settling period of 15 to 20 minutes to gravity-settle onto the floor surfaces.
- Deploy a 2026-grade HEPA-filtration vacuum to extract fine particulate from hard floors and carpets, finishing the session with a damp mop to capture any remaining ultrafine dust.
What If Dust Still Keeps Settling on Your Floors?
If surfaces and floors become coated with dust immediately after a rigorous cleaning session, deeper environmental or mechanical factors are likely at play. Indoor air quality specialists note that recurring heavy dust usually points to a compromised filtration system or excessive air infiltration.
Fallback Steps for Persistent Dust
- Inspect and upgrade your HVAC air filter to a MERV 13 rating, which captures up to 85 percent of microscopic dust, pollen, and pet dander.
- Check HVAC ductwork for leaks, gaps, or disconnection points that pull unconditioned attic or crawlspace air and deposit it directly into living areas; professional duct sealing typically costs between $400 and $1,200 depending on home square footage.
- Invest in a standalone HEPA air purifier for high-traffic rooms, running it continuously on medium speed to intercept airborne dust before it has a chance to settle.
- Seal drafty windows and exterior doors with updated weatherstripping to minimize the ingress of outdoor particulate matter.
- Consult a certified indoor environmental professional for a comprehensive air quality assessment if heavy dust persists despite these interventions, with diagnostic testing fees generally ranging from $300 to $600.
Conclusion
Determining whether to dust first or vacuum is essential for maintaining a truly clean indoor environment. Always dust first from top to bottom, allow particulate matter to settle, and finish by vacuuming with a certified HEPA filtration system. According to verified research and expert sources from leading building science institutions, this sequential methodology is the single most effective way to eliminate allergens and reduce overall cleaning frequency. Take your next step today by upgrading your cleaning tools to include high-efficiency microfiber cloths and a true HEPA vacuum.
❓ Frequently Asked Questions
Why is dusting before vacuuming considered the industry standard?
Cleaning from top to bottom ensures that gravity works in your favor. Any dust dislodged from furniture, shelves, or ceiling fans floats down and settles on the carpet or hard floors, making the vacuum cleaner the final line of defense.
What happens if I vacuum before I dust?
If you vacuum first and then dust, the settling debris will coat your freshly cleaned floors. This forces you to sweep or vacuum a second time, wasting both time and energy.
How long should I wait after dusting before I vacuum?
You do not need to wait long; giving the dust 10 to 15 minutes to settle is usually enough. However, using a damp microfiber cloth instead of a feather duster minimizes airborne particles significantly.
Does this rule apply to both hard floors and carpets?
Yes, the order remains identical regardless of your flooring type. Both carpets and hardwood floors will collect the falling debris kicked up during the dusting process.
How often should I dust and vacuum my entire house?
High-traffic areas benefit from weekly vacuuming and bi-weekly dusting. Homes with pets, allergy sufferers, or high dust levels may require more frequent attention.
Can air purifiers help reduce airborne dust while cleaning?
Running an air purifier with a HEPA filter in the room while you dust can help capture airborne particles. This reduces the amount of dust that settles on surfaces and floors.