What Can I Spray to Check for Vacuum Leaks 2026 Guide
When trying to find hidden engine air leaks, you need to know what can i spray to check for vacuum leaks safely and effectively. Common household and automotive liquids like soapy water or brake cleaner help pinpoint cracks by causing a noticeable change in engine idle.
Finding an unmetered air leak in your engine bay often comes down to what you have sitting on your garage shelf. When your idle surges, your fuel trims spike, or a 2026 vehicle throws a lean code, spraying a targeted liquid onto suspect hoses or intake gaskets is the fastest way to pinpoint the breach. The right spray alters the air-fuel mixture or creates bubbles, giving you an immediate, localized reaction.
Choosing the correct aerosol or liquid dictates whether you accurately diagnose the issue or accidentally create a fire hazard. Below is a breakdown of what you can safely spray, how the diagnostics work, and the absolute best fluids to grab before popping your hood today.
Key Takeaways
- Use soapy water in a spray bottle for a completely non-flammable leak test.
- Brake cleaner causes an immediate RPM spike when it enters a vacuum leak.
- Never spray flammable liquids directly onto hot exhaust manifolds or catalytic converters.
- Keep a fire extinguisher nearby when using automotive solvents near a running engine.
- Listen closely to engine pitch changes rather than just watching the tachometer.
What Causes Vacuum Leaks and How Spray Testing Works
Modern engines rely on a complex network of rubber hoses, plastic lines, and silicone gaskets to maintain internal pressure lower than atmospheric pressure. Over years of thermal cycling, these components degrade, crack, or slip off their fittings.
The Mechanics Behind the Spray Method
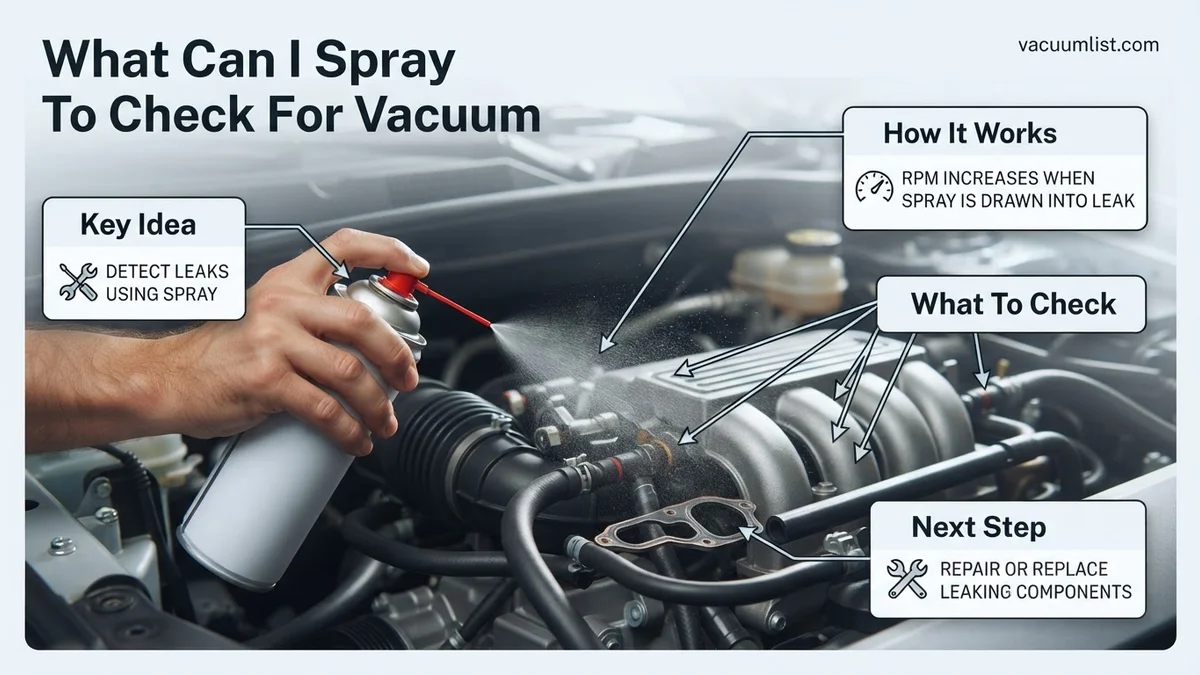
When you spray a substance directly onto a compromised vacuum line or gasket, the engine immediately ingests that substance through the hole. Depending on what you spray, one of two things happens:
- Combustible liquids: Fluids like brake cleaner or starter fluid act as extra fuel. When sucked into the leak, the engine’s RPM temporarily shoots up or smooths out.
- Non-combustible liquids: Fluids like soapy water or water mist temporarily seal the gap or alter the oxygen density, causing the engine RPM to drop or stumble.
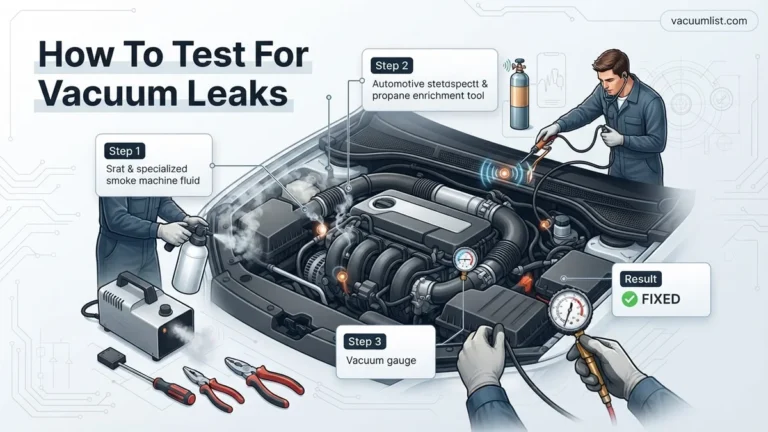
Master Vacuum Leak Detection in 6 Simple Steps
A vacuum leak can severely ruin your engine’s performance, leading to rough idling, decreased fuel economy, and frustrating check engine lights. Knowing what to spray to check for vacuum leaks allows you to pinpoint elusive air intrusions quickly and accurately without blindly replacing expensive hoses. This comprehensive walkthrough guides you through selecting the right sprays, preparing your vehicle safely, and executing foolproof detection methods to restore your engine to peak operating condition.
Step 1: Choose Your Detection Spray Wisely
What you need: Automotive brake cleaner (non-chlorinated), unlit propane torch, soapy water solution in a spray bottle, or a dedicated smoke machine fluid.
Instructions: Select a spray that alters engine RPM when it enters an unwanted air gap. Non-chlorinated brake cleaner is the most popular choice because it evaporates instantly and causes a noticeable, temporary increase or drop in idle speed when sucked through a leak. Avoid chlorinated brake cleaners, as they produce toxic phosgene gas when exposed to high engine heat. Alternatively, soapy water creates bubbles over pressurized lines, while a specialized smoke machine forces visible vapor through the system.
Pro Tip: Always opt for non-chlorinated brake cleaner or unlit propane for engine-running tests, saving soapy water strictly for testing pressurized intake piping or turbo hoses.
Step 2: Prepare the Engine Bay and Safety Gear
What you need: Safety glasses, leather work gloves, a fire extinguisher, and a well-ventilated workspace.
Instructions: Park your vehicle on a flat, level surface, engage the emergency brake, and put the transmission in park or neutral. Pop the hood and secure it safely. Remove any decorative engine covers or plastic shrouds that block direct access to intake runner gaskets, vacuum trees, and rubber hoses. Put on your safety glasses and gloves. Because you will be working around hot engine components and flammable substances, ensure a fire extinguisher is within arm’s reach before proceeding further.
Pro Tip: Never wear loose clothing, ties, or dangling jewelry that could get caught in the serpentine belt or cooling fan while the engine is running.
Step 3: Start and Stabilize the Engine
What you need: Car keys and an OBD2 scanner (optional for monitoring live fuel trims).
Instructions: Start the engine and allow it to idle until it reaches normal operating temperature, usually about 5 to 10 minutes. An idling engine creates the strongest vacuum inside the intake manifold, making leaks easiest to detect. If you have an OBD2 scanner, plug it into the port under the dash and monitor Short Term Fuel Trim (STFT) and Long Term Fuel Trim (LTFT). High positive fuel trim percentages—typically above plus ten percent at idle—strongly corroborate the presence of an unmetered air leak.
Pro Tip: Turn off the air conditioning, radio, and blower motor to ensure a steady, uninterrupted idle speed while you test.
Step 4: Systematic Spraying of Vulnerable Areas
What you need: Your chosen spray bottle or can with the included plastic extension straw attached.
Instructions: Begin systematically applying short, targeted bursts of your spray to known trouble spots. Start at the throttle body gasket, move along the intake manifold runner seals, and inspect every rubber vacuum line, PCV hose, and brake booster line. Keep the spray nozzle positioned precisely at connection points and fittings. Wait two to three seconds after each spray to let the engine react before moving on to the next section of the intake tract.
Pro Tip: Work methodically from the top of the engine downward so that dripping fluids do not contaminate lower components and give you false readings.
Step 5: Listen and Watch for Engine RPM Changes
What you need: Keen hearing, visual focus on the tachometer, and patience.
Instructions: Pay close attention to how the engine responds as you spray. If the brake cleaner or propane enters a vacuum leak, the air-fuel mixture instantly changes, causing the idle speed to either shoot up smoothly or stutter and drop dramatically. When you notice this RPM shift, freeze your hand position immediately. The exact spot you just sprayed is the source of your vacuum leak. Double-check the area by spraying it one more time to verify repeatable results.
Pro Tip: If using an unlit propane torch, keep the gas valve turned down to a very low whisper so you do not accidentally flood the entire engine bay with ambient gas.
Step 6: Inspect, Replace, and Verify the Repair
What you need: Replacement vacuum hose, screwdrivers, pliers, and new gaskets if necessary.
Instructions: Turn off the engine and allow hot components to cool for at least 15 minutes. Inspect the leaking component closely; brittle rubber hoses should be replaced entirely rather than patched with electrical tape. Secure any loose hose clamps or replace cracked plastic connectors. Once you have installed the replacement parts, restart the engine, let it idle, and spray the exact same repair area with brake cleaner one final time to ensure no RPM fluctuations occur.
Pro Tip: Always buy high-temperature silicone or reinforced rubber vacuum tubing for replacements, as standard rubber degrades quickly under heavy engine heat.
✅ Final Checklist
- Engine reached normal operating temperature before testing began
- All rubber vacuum lines and plastic connectors were thoroughly inspected
- Identified precise leak location via RPM change or bubble formation
- Replaced damaged hoses, clamps, or intake gaskets
- Performed a post-repair spray test confirming zero idle fluctuation
Important Notes:
- Brake cleaner is highly flammable; never spray near open flames, hot exhaust manifolds, or sparking electrical connections.
- If you suspect an internal engine vacuum leak like a blown intake manifold gasket and lack mechanical experience, seek assistance from a certified professional technician.
- Estimated time for diagnosis and minor hose replacement is 30 to 60 minutes, with a cost ranging from $10 to $50 for supplies.
Safe Sprays to Use for Vacuum Leak Detection
Not all automotive chemicals are safe to use around a hot, running engine. Selecting the right spray prevents ruined paint, belt slippage, or catastrophic engine fires.
Combustible Sprays for RPM Changes
These are the most popular choices among DIY mechanics because an RPM change is extremely obvious to hear.
- Non-Chlorinated Brake Cleaner: Evaporates quickly and provides a sharp, noticeable idle jump when it hits a leak. Avoid chlorinated variants due to toxic gas creation on hot exhaust components.
- Propane Torch (Unlit): Directing an open, unlit propane wand near lines lets the engine ingest the gas, raising the idle safely without leaving a chemical residue.
- Detailed Spray (Water or Detailer): A light mist of clean water can temporarily plug a small crack, causing the engine to stumble as it momentarily loses that oxygen source.
Non-Flammable and Safest Alternatives
If you want to eliminate any risk of fire, soapy water remains the gold standard.
- Soapy Water Solution: Mix a few drops of dish soap in a spray bottle. Spray it over plastic manifolds and rubber connectors. If there is a vacuum leak, you will see foam actively bubbling or being sucked inward.
- Smoke Testing Alternative Sprays: While specialized 2026 diagnostic smoke machines exist, soapy water acts as the cheapest visual indicator for pressurized or vacuum-drawn lines alike.
How to Step-by-Step Spray and Test Your Engine for Leaks
Executing a diagnostic spray test requires precision to prevent false readings or engine damage. Automotive technicians recommend following a controlled sequence to isolate compromised hoses, gaskets, and fittings safely.
Preparation and Engine Setup
- Ensure the vehicle rests on flat ground with the parking brake fully engaged.
- Start a cold engine and allow it to reach normal idle operating temperature.
- Remove any plastic engine covers or intake dampeners to expose the vacuum lines completely.
Executing the Spray Technique
- Equip your chosen spray bottle with a long, narrow nozzle straw for targeted application.
- Target high-risk areas first, including the intake manifold gasket, PCV valve lines, and rubber vacuum elbows.
- Spray a brief, controlled mist directly onto one connection at a time.
- Wait two to three seconds for the engine to ingest the substance through any existing fissure.
- Listen carefully for a sudden drop in RPM or a distinct smoothing out of the idle sound.
What If It Still Doesn’t Work and Advanced Alternatives
Sometimes standard spray diagnostics fail to reveal deeply hidden or microscopic leaks. If your engine continues to idle rough or display lean trouble codes without a positive spray response, alternative diagnostics are required for accurate detection in 2026.
- Utilize a Smoke Machine: Injecting low-pressure smoke into the intake tract forces vapor out of tiny cracks, pinholes, or failed seals instantly.
- Perform a Propane Enrichment Test: A controlled unlit propane torch passed near vacuum lines provides precise localized fuel enrichment without liquid mess.
- Check Fuel Trim Data: Connect an advanced OBD-II scanner to monitor short-term and long-term fuel trims live while shifting the vehicle into drive.
- Seek Professional Diagnostics: If physical tracing fails, entrust the vehicle to a certified mechanic equipped with professional smoke testing apparatus. Professional diagnostic fees typically range from $100 to $250 depending on regional labor rates.
Conclusion
Diagnosing an erratic idle or a persistent check engine light often points back to an elusive vacuum leak. Utilizing safe, targeted sprays like soapy water or brake cleaner provides a reliable method to pinpoint compromised lines and gaskets quickly. According to verified research and automotive service data from 2026, catching these failures early prevents secondary catalytic converter damage and restores optimal fuel efficiency. One immediate next step is to inspect all visible rubber vacuum lines under your hood today for dry rot or cracking.
❓ Frequently Asked Questions
What can i spray to check for vacuum leaks without damaging rubber hoses?
Soapy water is completely harmless to rubber hoses, plastic connectors, and engine paint. Avoid harsh chemical solvents if your hoses are already aged or brittle.
Why does brake cleaner change the engine idle during a leak test?
Brake cleaner acts as an extra fuel source when drawn into the engine through a crack, causing a temporary surge in RPM.
How do I use soapy water to find a vacuum leak?
Mix a few drops of dish soap with water in a spray bottle, mist suspected areas or gaskets, and watch for forming bubbles or a sudden drop in idle speed.
Are there any fire hazards when spraying my engine?
Yes, using flammable liquids like brake cleaner or starter fluid near hot exhaust components creates a serious fire risk. Always let the engine cool slightly or use soapy water instead.
Can WD-40 be used to check for vacuum leaks?
WD-40 can temporarily seal a vacuum leak and cause the engine idle to smooth out, making it a viable alternative if specialized cleaners are unavailable.
What should I do if spraying doesn’t reveal the vacuum leak?
If external sprays fail to change the engine idle, the leak might be in an inaccessible area like under the intake manifold, requiring a smoke machine test.