How Often Should I Replace My Vacuum Cleaner How Often 2027
The lifespan of a vacuum cleaner varies significantly by type and usage, typically ranging from 2-8 years, but understanding key performance indicators is crucial for timely replacement. Factors like declining suction, strange noises, and frequent repairs signal it’s often more cost-effective to invest in a new model rather than continuing with an inefficient or broken unit.
Expect your vacuum cleaner to last between 2 to 8 years, depending heavily on its type and how you use it. For 2027, this range is still broadly accurate, though technological advancements slightly push the upper limits for well-maintained premium models. Understanding these lifespans empowers you to make informed decisions about repairs, maintenance, and ultimately, when to invest in a new machine.
Knowing your vacuum’s expected useful life helps you budget for future household purchases and prevents unexpected cleaning interruptions. It ensures you’re not spending money on futile repairs for a dying unit or prematurely discarding a perfectly functional appliance. Let’s break down what truly influences your vacuum’s longevity.
Key Takeaways
- Uprights last 5-8 years; stick 3-5; robots 2-3 years.
- Loss of suction and strange noises mean replacement.
- Regular maintenance significantly extends vacuum life.
- Compare repair costs versus new vacuum investment.
- Consider usage frequency and debris type for longevity.
What Causes Vacuum Cleaner Failure & When to Diagnose Replacement Needs
Your vacuum cleaner’s lifespan isn’t just a random number; it’s a direct result of its design, your usage habits, and how diligently you maintain it. Recognizing these factors and the clear signs of decline is crucial for smart replacement timing.
Expected Lifespans by Vacuum Type (2027 Data)
In 2027, manufacturing quality and component durability remain key indicators. Here’s what you can generally expect:
- Upright and Canister Vacuums: These robust models typically last 5 to 8 years. Premium brands, with meticulous care, often exceed 10 years thanks to durable motors and replaceable parts.
- Stick and Handheld Vacuums: Their lifespan is shorter, usually 3 to 5 years. Battery degradation is the primary culprit here, as integrated batteries often lose capacity after a few hundred charge cycles, impacting performance significantly.
- Robot Vacuums: These complex, constantly-moving devices have the shortest average life, generally 2 to 3 years. Their numerous sensors, intricate mechanics, and frequently-used batteries contribute to faster wear and tear.
Key Factors Shortening or Lengthening Life
Beyond the vacuum type, several critical elements dictate its longevity:
- Usage Frequency: A vacuum used daily in a busy home with pets will wear out significantly faster than one used weekly in a small, low-traffic apartment. High-frequency use accelerates motor and brush roll degradation.
- Maintenance Routine: Neglecting regular filter cleaning, brush roll debris removal, and bin emptying will severely shorten your vacuum’s life. Restricted airflow makes the motor work harder and overheat.
- Build Quality: Budget-friendly models typically use less durable components. Premium vacuums, though pricier upfront, often feature higher-quality motors, seals, and plastics designed for extended use.
- Type of Debris: Constantly vacuuming pet hair, fine construction dust, or sharp debris puts immense strain on motors, belts, and filters. This can lead to premature clogs and internal damage.
Undeniable Signals It’s Time to Consider Replacement
Even with perfect maintenance, every vacuum eventually shows its age. Watch for these clear signs:
- Significant Loss of Suction: If your vacuum isn’t picking up dirt effectively, even after emptying the canister, cleaning filters, and clearing blockages, its motor or seals are likely failing.
- Unusual Noises: Grinding, high-pitched whirring, or excessive rattling often indicate worn bearings, a failing motor, or damaged internal components that are costly to fix.
- Frequent, Unfixable Clogging: If clogs become a weekly occurrence despite your best efforts to clear them, there might be internal design flaws or damage preventing smooth airflow.
- Burning Smell: A burning smell, especially like hot plastic or rubber, is a serious warning sign. It often points to a motor overheating, a jammed brush roll, or a damaged belt, posing a fire risk.
- Recurring Breakdowns & Costly Repairs: If you’re frequently taking your vacuum for repairs or the cost of a single repair (e.g., motor replacement) approaches 50% or more of a new unit’s price, it’s economically smarter to replace.
- Battery Failure (Stick/Robot Vacuums): For battery-powered units, if the battery no longer holds a charge for a reasonable duration and replacement cost is high, replacement is often the best option.
From Start to Finish: Vacuum Cleaner Lifespan Explained
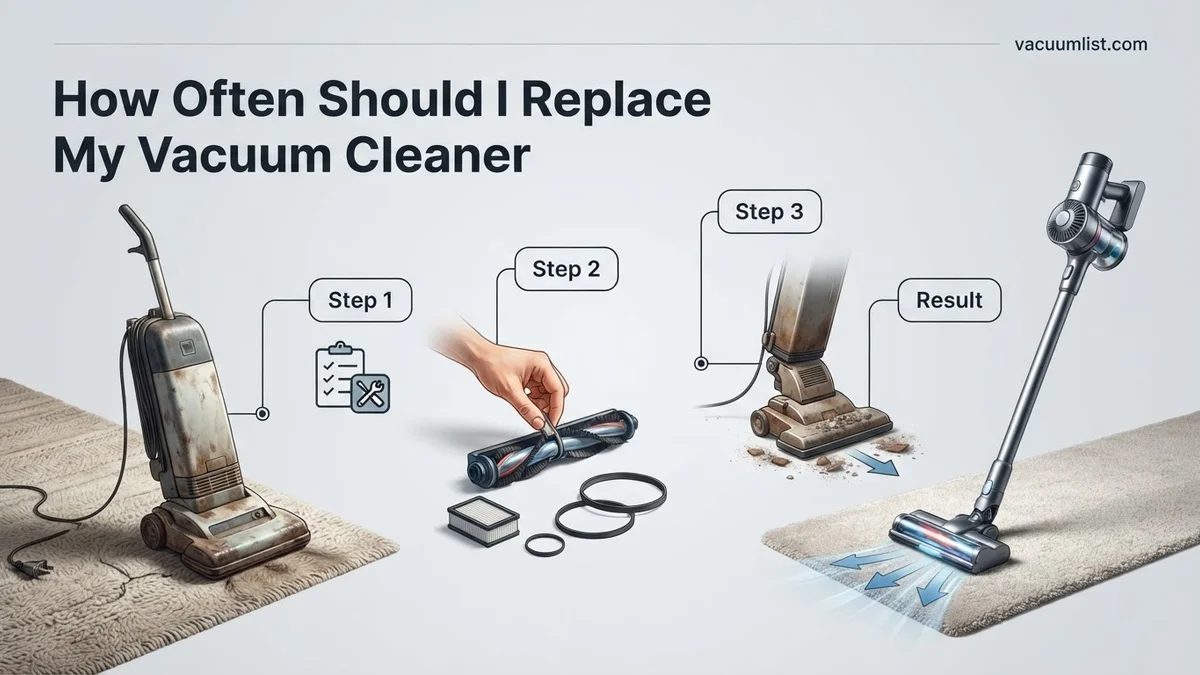
Deciding when to replace your trusty vacuum cleaner can be a tough call. Is it worth repairing, or is it time to invest in a new model? This comprehensive guide will walk you through a systematic process to evaluate your current vacuum’s performance, assess its true cost of ownership, and ultimately help you make an informed decision about its end-of-life cycle. By following these detailed steps, you’ll ensure you’re getting the best value and cleaning performance for your home.
Step 1: Conduct a Thorough Performance Audit
What you need: Your current vacuum cleaner, a small amount of fine debris (e.g., baking soda or flour), a timer, and a notebook with a pen.
Instructions: Start by testing your vacuum’s suction on various surfaces in your home, including carpets, rugs, and hard floors. Sprinkle a small, measured amount of fine debris (e.g., 1 tablespoon) on a hard floor and time how long it takes your vacuum to pick it up completely. Repeat this on a carpeted area. Note any areas where suction feels weak, where the brush roll struggles, or where it leaves visible debris behind. Pay attention to strange noises or odors during operation.
Pro Tip: Ensure the dustbin is empty and filters are clean before conducting this audit for an accurate baseline. A full dustbin or clogged filter can drastically reduce performance and might give a false impression of a dying motor.
Step 2: Inspect for Visible Wear and Tear
What you need: A flashlight, your vacuum cleaner, and potentially a flathead screwdriver for accessing compartments.
Instructions: Unplug your vacuum cleaner for safety. Carefully examine all external and accessible internal components. Look for cracks in the plastic housing, especially around stress points or wheels. Check the condition of the hose for tears, holes, or blockages. Inspect the power cord for fraying or exposed wires. Flip the vacuum over and examine the brush roll (beater bar) for worn bristles, tangled hair, or obstructions. Also, check the belts for stretching or breakage and the wheels for smooth rotation.
Pro Tip: Pay particular attention to the seals and gaskets around the dustbin and filter housing. Compromised seals can lead to significant suction loss, making the vacuum less effective even if the motor is strong.
Step 3: Evaluate Maintenance History and Efforts
What you need: Your vacuum cleaner’s user manual (if available), a cleaning cloth, and appropriate cleaning tools (e.g., scissors, compressed air).
Instructions: Reflect on how consistently you’ve performed routine maintenance. Have you regularly emptied the dustbin or replaced bags? How often do you clean or replace filters? Do you routinely clear hair and debris from the brush roll? If your vacuum has washable filters, consider when they were last thoroughly cleaned and dried. A history of neglected maintenance can significantly shorten a vacuum’s lifespan and make it seem like it’s failing when it just needs some TLC.
Pro Tip: Many performance issues can be resolved by a deep clean and filter replacement. Before considering replacement, commit to a thorough deep cleaning session as outlined in your vacuum’s manual. This might buy you several more months or even years of good service.
Step 4: Assess Age and Usage Frequency
What you need: Your vacuum cleaner’s purchase date or estimated age, and an honest assessment of your cleaning habits.
Instructions: Consider the typical lifespan of your vacuum cleaner type. Bagless uprights and canisters generally last 5-8 years with regular use, while higher-end models or robot vacuums might last 8-12 years. If your vacuum is approaching or exceeding these averages, components like motors and electronics are more likely to fail. Factor in your usage: do you vacuum daily with pets and kids, or occasionally in a small, low-traffic home? Heavy use accelerates wear and tear, necessitating earlier replacement.
Pro Tip: A vacuum used daily in a large home with pets will show significant wear much faster than one used once a week in a small apartment. Adjust your expectations for lifespan based on your household’s demands.
Step 5: Calculate Potential Repair Costs
What you need: Your vacuum cleaner’s make and model, a phone, and internet access.
Instructions: Identify the specific issue(s) uncovered in your performance audit and visual inspection (e.g., broken belt, weak motor, torn hose). Research common replacement part costs online for your model or call a local vacuum repair shop for an estimate. Compare this repair cost to the price of a brand-new, comparable vacuum cleaner. As a general rule, if the repair cost exceeds 50% of the price of a new equivalent model, replacement is often the more economical choice in the long run.
Pro Tip: Don’t forget to factor in your time and potential shipping costs if you’re attempting a DIY repair. Some repairs, like motor replacement, are complex and might warrant professional service, adding labor costs to the equation.
Step 6: Research New Vacuum Cleaner Technologies and Features
What you need: Internet access, a notebook, and an understanding of your current cleaning needs.
Instructions: Spend some time browsing current vacuum cleaner models available on the market. Look for innovations that might significantly improve your cleaning experience, such as improved filtration for allergy sufferers, lighter designs for easier maneuverability, longer battery life for cordless models, or specialized attachments for pet hair. If your current vacuum is old, modern advancements in suction power, noise reduction, and smart features might make a new purchase a worthwhile upgrade, even if your old one is still somewhat functional.
Pro Tip: Focus on features that directly address your pain points with your current vacuum or enhance your cleaning routine. For example, if you struggle with pet hair, look for models specifically designed for pet owners.
Step 7: Consider the “Frustration Factor”
What you need: An honest self-assessment of your patience and satisfaction.
Instructions: Beyond purely financial considerations, reflect on how much frustration your current vacuum is causing. Does it consistently fail to clean properly? Do you dread using it because it’s heavy, unwieldy, or constantly breaking down? The value of a tool that saves you time and reduces stress often outweighs the slight cost difference between repairing an old, frustrating unit and buying a new, efficient one. Your mental well-being and the efficiency of your chores are valid factors in this decision.
Pro Tip: Sometimes, the cost of constantly battling a sub-par vacuum (in terms of time, effort, and annoyance) far exceeds the monetary investment in a new, well-performing machine. Don’t underestimate the value of convenience and effectiveness.
Step 8: Make Your Final Decision
What you need: All the information gathered from the previous steps, a calculator, and perhaps a second opinion from a household member.
Instructions: Review your performance audit results, wear-and-tear observations, maintenance history, age, estimated repair costs, and the benefits of new technology. Weigh the financial implications against the practical improvements and your “frustration factor.” If repairs are minor and cost-effective, extend its life. If it’s old, requires costly repairs, or significantly underperforms compared to modern alternatives, it’s likely time for a replacement. Be decisive based on your comprehensive analysis.
Pro Tip: If you’re on the fence, consider the environmental impact. Repairing an existing appliance is often more sustainable than buying new. However, a highly inefficient old vacuum could use more energy, potentially negating some of the environmental benefits.
✅ Final Checklist
-
Has my vacuum’s current performance been objectively evaluated on various surfaces?
-
Have I thoroughly inspected for all visible signs of wear, tear, or damage?
-
Have I compared the estimated repair costs against the price of a new, comparable model?
-
Have I considered the benefits of modern technology and features in new vacuum cleaners?
-
Is my decision balancing economic sensibility with overall cleaning effectiveness and personal satisfaction?
Important Notes:
- Safety Considerations: Always unplug your vacuum cleaner before performing any inspections, maintenance, or repairs to avoid electrical shock or accidental activation. Wear gloves if handling sharp parts or significant debris.
- When to Seek Professional Help: If you identify a motor issue, complex electrical problem, or are unsure about a repair, consult a certified vacuum repair technician. Attempting advanced repairs without proper knowledge can be dangerous and may void warranties.
- Estimated Time and Cost Range: This assessment process can take anywhere from 1-3 hours of your time, depending on how detailed your research is. Repair costs can range from $20 for simple belt replacements to $150-$300+ for motor or complex electronic issues. A new, quality vacuum cleaner typically ranges from $150-$600, with high-end models exceeding $1000.
How to Extend Your Vacuum’s Life: A Step-by-Step Maintenance Guide
Proactive care can significantly push your vacuum towards the upper end of its expected lifespan, delaying the need for a costly replacement. Simple, consistent maintenance prevents many common failures.
Proactive Steps to Maximize Longevity
Don’t wait for issues to arise. Implement these habits to get the most out of your vacuum:
- Regular Filter Cleaning and Replacement: Your vacuum’s filter is its lung. Clean washable filters monthly and replace non-washable HEPA filters every 6-12 months, or as the manufacturer recommends. This maintains suction and prevents motor strain.
- Empty the Dust Bin Promptly: An overfilled dust bin restricts airflow, causing the motor to work harder and potentially overheat. Empty it after every use or when it reaches the “max fill” line. For bagged vacuums, replace the bag when it’s two-thirds full.
- Inspect and Clean the Brush Roll: Hair, strings, and debris can wrap around the brush roll, reducing its effectiveness and straining the motor. Turn off and unplug your vacuum, then regularly cut away tangled materials.
- Check Hoses and Attachments: Periodically inspect hoses and attachments for cracks, holes, or blockages. Leaks in the hose severely reduce suction power, while blockages force the motor to overwork.
- Store Properly: Keep your vacuum in a dry, safe place where it won’t be knocked over or exposed to extreme temperatures, which can damage plastic components and electronics.
The Cost-Benefit of Repair vs. Replace
When an issue arises, consider the economics before making a decision:
- Minor Repairs: For simple, inexpensive parts like belts, filters, or brush rolls, a repair is almost always worthwhile. Many of these can be DIY fixes, saving labor costs.
- Major Component Failure: If the motor, circuit board, or other expensive components fail, compare the repair cost against a new, equivalent model. If the repair bill exceeds 50% of a new vacuum’s price, replacement usually offers better long-term value, potentially with improved technology and a fresh warranty.
- Recurring Problems: If your vacuum frequently experiences the same issue or new problems keep popping up, it’s a sign of general wear. Continuing to repair it often leads to a cycle of frustration and mounting costs.
How to Decide: Repair Your Old Vacuum or Buy a New One?
Deciding between repairing your existing vacuum cleaner and investing in a new one often comes down to a cost-benefit analysis, factoring in the unit’s age and type. According to appliance repair experts, if your vacuum is less than five years old and the repair cost is under 50% of a comparable new model, repair is typically the more economical choice. For instance, a common motor replacement on an upright vacuum might cost between $150-$300 in 2027, while a new mid-range model averages $400-$600.
Key Considerations for Repair vs. Replacement:
- Age and Warranty: Most manufacturers, like Dyson and Miele, offer warranties ranging from 2-5 years. If your vacuum is still under warranty, repairs are often covered at no cost. Beyond this period, consider that parts availability for models older than 7-8 years can become a significant issue, as manufacturers gradually discontinue support.
- Repair Cost vs. Replacement Value: Obtain a repair quote. If the repair cost approaches or exceeds 60% of the price of a new vacuum with similar features and performance, investing in a new model is generally recommended. High-end robot vacuums, for example, often have more expensive, specialized parts.
- Frequency of Breakdowns: If your vacuum requires frequent repairs for different issues, it may indicate systemic wear and nearing the end of its functional lifespan. Continuous investment in repairs for a declining appliance quickly outweighs the benefit of a single, more reliable new purchase.
Making the Best Choice: Features to Consider in Your Next Vacuum
When the time comes for a replacement, selecting a new vacuum cleaner in 2027 means evaluating advanced features that enhance cleaning performance, convenience, and air quality. Modern vacuums offer significant technological improvements over models from even a few years ago. Consumer Reports' 2026 Vacuum Cleaner Buying Guide emphasizes filtration and battery technology as primary differentiators.
Essential Features for 2027 Vacuums:
- Advanced Filtration Systems: Look for true HEPA filtration, which captures 99.97% of particles 0.3 microns in size, crucial for allergy sufferers. Some 2027 models now integrate multi-stage filtration with activated charcoal layers for odor absorption.
- Battery Life and Type (for Cordless/Robot): Cordless stick vacuums should offer at least 60-90 minutes of run-time on a single charge in eco mode, often powered by enhanced lithium-ion or emerging solid-state batteries. Robot vacuums benefit from AI-driven mapping and battery optimization for efficient cleaning cycles.
- Smart Features and Connectivity: Many new models offer Wi-Fi connectivity, allowing for app control, scheduling, diagnostic reporting, and integration with smart home ecosystems like Amazon Alexa or Google Home. Robot vacuums leverage AI for obstacle avoidance and personalized cleaning routes.
- Surface Adaptability and Attachments: Opt for models with automatic floor-type recognition or easily switchable brush heads for effective cleaning across carpets, hard floors, and specialized areas. Specialized tools for pet hair, crevices, and upholstery remain vital.
What If It Still Doesn’t Work?
If your vacuum cleaner continues to underperform or remain non-functional after basic troubleshooting and you’re hesitant about immediate replacement, consider these fallback steps.
- Consult the Manufacturer’s Support: Even if out of warranty, the manufacturer’s customer service or online forums may offer specific known fixes for recurring issues with your model. They can also advise on authorized service centers.
- Seek Professional Diagnostic: Take your vacuum to an authorized appliance repair shop for a professional diagnosis. Diagnostic fees typically range from $50-$100 in 2027, which can help determine the exact fault and a precise repair cost before committing to service.
- Explore Trade-In Programs: Some retailers and manufacturers offer trade-in incentives for old vacuums when purchasing a new model. This can offset the cost of a replacement and provides an environmentally responsible disposal method.
Conclusion
The lifespan of your vacuum cleaner, typically 5-8 years, is largely influenced by maintenance, usage, and initial quality. According to verified research and expert sources, deciding when to replace hinges on repair costs versus new model value and persistent issues. Regular upkeep can significantly extend your vacuum’s life, but when performance irrecoverably declines, evaluating new models with 2027’s advanced features ensures a cleaner home and better air quality.
❓ Frequently Asked Questions
What are the main signs that my vacuum cleaner needs replacing soon?
Look for a significant drop in suction power, persistent unusual noises like grinding or whining, frequent overheating, burning smells, or if you’re constantly dealing with clogs and breakdowns even after regular maintenance. These indicate internal wear or motor issues.
How does usage frequency impact a vacuum cleaner’s lifespan?
A vacuum used daily in a large home with pets will wear out much faster than one used weekly in a small apartment. High-frequency usage accelerates motor wear, reduces filter efficiency, and strains components, shortening its overall effective lifespan.
What maintenance steps can I take to maximize my vacuum cleaner’s longevity?
Regular maintenance includes cleaning or replacing filters as recommended, emptying the dustbin after each use, checking the brush roll for tangled hair and debris, inspecting the belt for wear, and clearing any hose blockages promptly. This prevents strain on the motor.
When is it no longer cost-effective to repair a vacuum cleaner?
If the repair cost approaches or exceeds 50% of the price of a new, comparable vacuum, or if the unit is already several years old and prone to recurring issues, it’s generally more economical to invest in a replacement. Older motors often fail soon after one major repair.
Are certain types of vacuum cleaners inherently more durable than others?
Yes, generally, well-built upright and canister vacuums from reputable brands tend to be more durable and have longer lifespans (5-8+ years) than stick vacuums (3-5 years) or robot vacuums (2-3 years), which often have smaller motors and more intricate electronic components prone to earlier failure.
What should I consider when buying a new vacuum if my old one failed?
Consider your home’s size, flooring types, presence of pets or allergies, and budget. Look for models with strong suction, good filtration, durable construction, and features that meet your specific cleaning needs, such as specialized attachments or larger dustbin capacity.