How Much Is A Vacuum Leak Repair Vacuum Leak Repair 2026
A vacuum leak repair typically costs between $150 and $1,000+ depending heavily on the underlying cause and the location of the leak. While basic rubber hoses cost very little to replace, labor charges and complex components like intake manifold gaskets drive up the final price.
A car vacuum leak repair typically costs between $150 and $1,000+, depending entirely on what is causing the air intrusion. If you are dealing with a simple rubber hose that slipped off, you might pay under $100 for basic labor. However, if your intake manifold gasket has failed on a modern 2026 vehicle, the labor-intensive teardown can push your bill past the thousand-dollar mark.
Ignoring a vacuum leak is a fast track to poor fuel economy, rough idling, and a persistent check engine light. Because your engine relies on precise air-to-fuel ratios, unmetered air entering the system forces your car’s computer to compensate awkwardly, causing long-term damage if left unaddressed.
Key Takeaways
- Expect a diagnostic fee of $100 to $150 for professional smoke testing.
- Simple rubber vacuum hoses cost under $50 to fix.
- Intake manifold gasket replacements often range from $400 to $1,000.
- Rough idling and check engine lights are primary warning signs.
- DIY hose replacements save labor costs if you locate the leak.
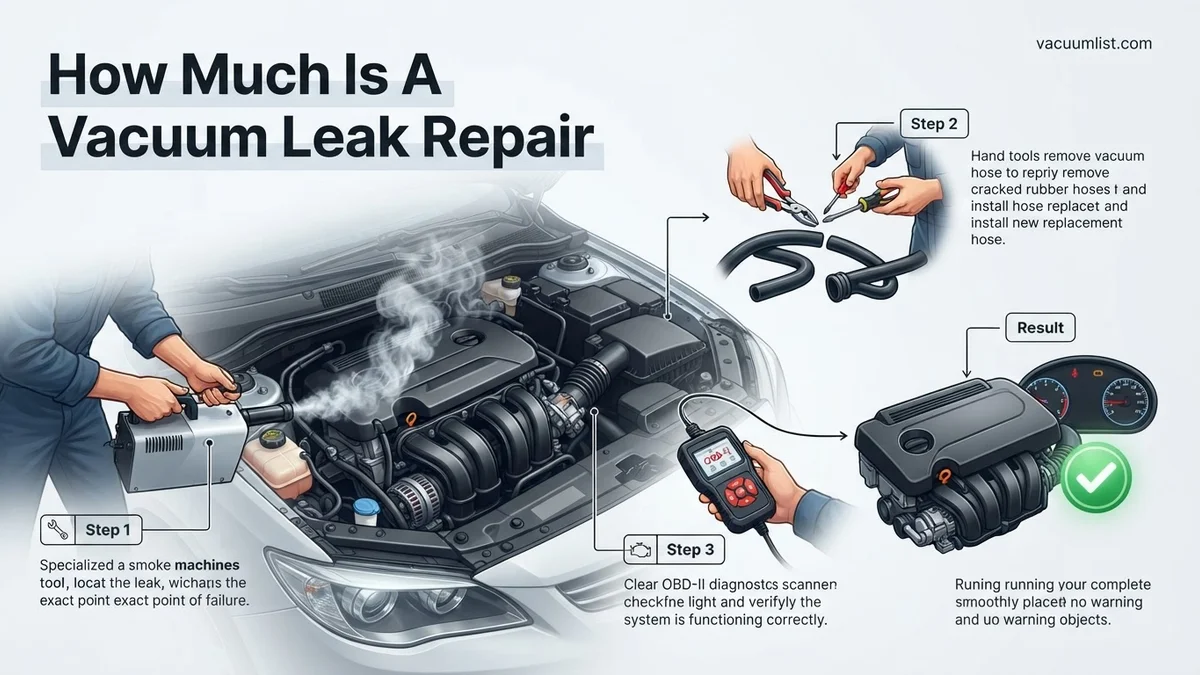
How Much Is a Vacuum Leak Repair: Average Costs and Diagnostic Fees
The Baseline Diagnostic Fee
Before any wrench turns, a mechanic has to find the leak. Because vacuum lines can hide beneath engine covers, wiring harnesses, and intake components, finding the exact breach requires specialized testing. You can generally expect:
- Standard Visual Inspection: Often $50 to $100, though some shops roll this into the repair cost.
- Smoke Machine Test: The industry gold standard for 2026, typically costing between $100 and $200. Mechanics inject harmless smoke into the intake system to watch it escape from cracks.
Parts Versus Labor Breakdown
The total price tag on your invoice usually skews heavily toward labor rather than parts. Here is how the financial split typically looks:
- Rubber Hoses: Parts cost $5 to $20, but expect $100 to $150 in labor minimum to access buried lines.
- Gaskets and Seals: Intake or throttle body gaskets cost $20 to $80 in materials, but labor ranges from $300 to $800 due to deep engine disassembly.
- Plastic Connectors: PCV valves and brittle plastic elbows usually run $15 to $50, with minimal labor if easily accessible.
Vacuum Leak Repair Cost: What Causes It and How to Fix It
Dealing with a rough idle, check engine light, or unexpected stalling often points to an under-hood vacuum leak. Understanding how much a vacuum leak repair costs requires a step-by-step approach to evaluating parts, labor, and diagnostic fees. This guide walks you through the financial breakdown of diagnosing and fixing these pesky engine issues so you can budget accurately and avoid overpaying at the repair shop.
Step 1: Recognize the Symptoms and Initial Diagnostics
What you need: OBD-II scanner, notepad, flashlight, and a basic understanding of your vehicle’s idling behavior.
Instructions: Before calculating repair costs, you must identify if you actually have a vacuum leak. Common indicators include a high or erratic idle, engine hesitation, hissing sounds under the hood, and diagnostic trouble codes like P0171 or P0174 (indicating a lean air-fuel mixture). Connect an OBD-II scanner to your vehicle’s port to read any stored error codes. Professional shops typically charge a diagnostic fee ranging from $100 to $150 just to pinpoint the exact location of the leak using advanced methods like a smoke machine test.
Pro Tip: Many auto parts stores will read your OBD-II codes for free, saving you the initial diagnostic fee before you visit a mechanic.
Step 2: Inspect Hoses and PVC Lines Yourself
What you need: Visual inspection skills, replacement rubber hose (if needed), and basic hand tools.
Instructions: Open your hood and visually inspect all rubber vacuum hoses, PCV lines, and silicone connectors. Look for dry rot, deep cracks, swelling, or complete disconnections. Rubber hoses degrade over time due to intense engine heat and oil exposure. If you find a cracked line that is easily accessible, replacing it yourself can drop your repair cost to less than $10 for a generic spool of vacuum hose from an auto parts store, completely eliminating labor charges for minor fixes.
Pro Tip: Never pull on hoses while the engine is piping hot to avoid severe burns; wait at least 30 minutes after driving.
Step 3: Perform a DIY Smoke Test or Propane Test
What you need: A can of unlit propane, a spray bottle with soapy water, or a DIY smoke machine setup.
Instructions: To find elusive leaks that aren’t visible to the naked eye, use a targeted detection method. Spray soapy water along gasket lines and vacuum junctions while the engine idles; bubbles will form if air is being sucked inward. Alternatively, professionals use a smoke machine ($100 to $300 to buy, or a $150 shop labor fee) pumped into the intake system. Smoke will billow out of any crack, split hose, or failing gasket, instantly revealing what needs replacement and narrowing down your upcoming parts bill.
Pro Tip: Exercise extreme caution when using flammable propellants or sprays around a running, hot engine exhaust manifold.
Step 4: Calculate Gasket and Intake Manifold Costs
What you need: Vehicle year, make, model, and an online auto parts catalog.
Instructions: If your vacuum leak stems from a failing intake manifold gasket, throttle body gasket, or plenum spacer, the repair cost increases significantly. Gasket sets themselves are relatively inexpensive, usually costing between $20 and $80 depending on whether your car has a 4-cylinder or a complex V6/V8 engine. However, the placement of these gaskets dictates the labor time required to reach them. Jot down the specific gasket part numbers needed for your engine layout to prepare for labor estimates.
Pro Tip: Always replace all related seals and gaskets while you have the intake manifold removed to prevent duplicate labor costs later.
Step 5: Estimate Professional Labor Rates and Total Shop Fees
What you need: Local mechanic quotes, vehicle repair manual, and standard labor time guides.
Instructions: Call at least two certified repair shops to get competitive quotes once you know the source of the leak. Replacing a simple rubber vacuum line might take a mechanic 15 minutes, resulting in a minimum labor charge of $50 to $100. Conversely, replacing a buried intake manifold gasket can take 3 to 6 hours of labor. With shop rates ranging from $100 to $200 per hour, total professional labor for complex manifold leaks frequently lands between $300 and $900, bringing your grand total parts-and-labor bill to $350-$1,000.
Pro Tip: Independent specialty mechanics often charge 20% to 35% less for labor than official dealership service departments for the exact same repair quality.
Step 6: Clear Codes and Verify the Repair
What you need: OBD-II scanner and a test drive route.
Instructions: Whether you fixed the leak yourself or paid a professional shop, you must ensure the repair was successful. Use your OBD-II scanner to clear all stored fault codes from the engine computer. Start the car and monitor the idle speed; it should stabilize smoothly between 600 and 800 RPM. Take the vehicle on a 15-minute test drive encompassing stop-and-go city traffic and highway cruising to ensure the check engine light does not return and engine performance is fully restored.
Pro Tip: If the check engine light returns immediately, the computer may not have reset, or a second, smaller vacuum leak is still present elsewhere in the system.
✅ Final Checklist
- Diagnostic trouble codes have been successfully read and cleared.
- All cracked, brittle, or disconnected vacuum hoses are replaced.
- Gaskets and intake components are properly torqued to manufacturer specifications.
- Engine idles smoothly without surging, hesitation, or hissing sounds.
- Test drive completed without the check engine light reappearing.
Important Notes:
- Never work on a running engine with loose clothing, long hair, or dangling jewelry that could get caught in drive belts.
- Seek professional help immediately if the leak involves complex electronic components, turbocharger lines, or requires removing major engine sub-assemblies.
- Estimated total cost range: $15 for basic DIY hose replacements up to $1,000 for complex dealership intake manifold gasket replacements. Time required ranges from 30 minutes to a full business day.
What Causes Vacuum Leaks and How Mechanics Diagnose Them
Common Failure Points Under the Hood
Your engine bay is a harsh environment characterized by extreme heat cycles, engine vibrations, and chemical exposure. Over time, these factors degrade the materials holding your vacuum system together. The most frequent culprits include:
- Degraded Rubber Hoses: Dry rot, cracking, and softening cause vacuum lines to split or disconnect completely.
- Intake Manifold Gaskets: Rubber or paper seals flatten out and leak air where the manifold bolts to the engine block.
- PCV System Components: Cracked Positive Crankcase Ventilation hoses and failing valves regularly introduce unmetered air.
- Throttle Body Gaskets: A worn seal right at the throttle plate lets air bypass the sensors.
How Shops Pinpoint the Problem
Mechanics do not just guess where the leak is located. In 2026, professional diagnostic workflows utilize advanced tools to save you money on unnecessary part replacements. They rely on:
- Propane or Brake Cleaner Tests: Spraying targeted areas while the engine idles to watch for an immediate RPM change.
- Electronic Smoke Machines: Pressurizing the intake tract with dense smoke to reveal tiny pinhole leaks instantly.
- Scan Tool Data: Monitoring short and long-term fuel trims (STFT and LTFT) to confirm if the engine is running lean before tracking down the physical leak.
Step-by-Step Guide to Fix a Vacuum Leak and Replace Damaged Hoses
Fixing a vacuum leak often requires nothing more than basic hand tools and a replacement hose. According to automotive service standards, addressing cracked rubber early prevents severe engine strain.
Gather Your Tools
Before beginning the repair, prepare safety glasses, replacement vacuum tubing, wire cutters, and a pair of needle-nose pliers. Having a portable work light is also essential for inspecting tight engine bays in 2026.
Replacement Procedure
- Locate the damaged vacuum line identified during your diagnostic smoke test or visual inspection.
- Disconnect the old hose from both fittings by gently twisting and pulling with needle-nose pliers.
- Measure a new section of high-temperature silicone or rubber vacuum tubing to match the exact length of the old hose.
- Cut the new tubing cleanly using sharp wire cutters or utility shears to ensure a flush end.
- Push the new vacuum hose securely over both engine fittings, ensuring a tight and snug seal.
What If the Vacuum Leak Persists After Replacing Hoses?
Sometimes changing cracked rubber hoses does not resolve rough idling or check engine lights. Persistent symptoms indicate that unmetered air is entering the engine through a larger component failure rather than a simple line.
Advanced Troubleshooting Steps
- Inspect intake manifold gaskets and throttle body seals for hardening, warping, or visible cracks.
- Check the PCV valve and its associated grommets, as these frequently degrade and cause significant vacuum losses.
- Test electronic components like the purge valve and intake control runners for internal diaphragm ruptures.
- Bring the vehicle to a certified professional for an advanced smoke machine diagnostic test if the leak remains hidden. Professional diagnostic fees typically range from $100 to $200.
Conclusion
Ignoring a vacuum leak leads to poor fuel economy, rough idling, and potential engine damage over time. Replacing damaged hoses quickly restores proper air-fuel ratios and protects long-term engine performance. According to verified research and expert automotive sources, catching these minor issues early saves drivers hundreds of dollars in secondary repairs. Schedule a diagnostic inspection or perform a visual hose check today to keep your engine running efficiently.
❓ Frequently Asked Questions
Why is labor the most expensive part of a vacuum leak repair?
While the actual parts like rubber hoses or plastic connectors are very cheap, locating a hidden leak requires specialized equipment and time. Additionally, components like intake manifold gaskets are buried deep inside the engine bay, requiring hours of disassembly.
How does a mechanic perform a smoke test for a vacuum leak?
A mechanic uses a specialized machine to pump safe, pressurized smoke into the engine’s intake system. Wherever there is a crack, loose fitting, or failed gasket, the smoke will escape, instantly revealing the exact source of the leak.
Can I use a DIY propane test to find a vacuum leak at home?
Yes, some DIYers spray unlit propane or brake cleaner around vacuum lines while the engine idles. If the engine idle suddenly changes or smooths out, you have found the area where the spray is being sucked into the leak.
What happens to my car’s fuel economy if I ignore a vacuum leak?
A vacuum leak lets unmeasured air into the engine, causing the computer to miscalculate the air-fuel ratio and run lean. This forces the engine to burn more fuel, leading to a noticeable drop in gas mileage and potential catalytic converter damage.
Is it cheaper to fix a vacuum leak myself?
If the leak is caused by a severed, brittle, or disconnected vacuum hose near the surface, DIY repair is very cheap and takes only minutes. However, if the leak stems from a buried intake manifold gasket, professional tools and mechanical experience are strongly recommended.
Will a vacuum leak always trigger a check engine light?
Not immediately, but small leaks will eventually trigger diagnostic trouble codes such as P0171 or P0174 (System Too Lean). If the leak is very small, the car might run rough or stall before the dashboard light actually turns on.